JuanCarlos and I are super fortunate in many ways. And when it comes to the friend category, we absolutely score. We have the most amazing friends, all over the country. One such lovely group lives in Princeton, NJ and are always willing to make the long drive to visit us. Given the time they invest in traveling, JuanCarlos and I make sure that we prepare an all day affair filled with delectable bites. The food ranges from easy and simple mixed with some other items that require a tad more prep. But the fun part is that we keep it casual and flowing, bringing out items as they are ready. It allows us to mingle, chat, and relax without any formal schedule yet with plenty of food from which to choose. It’s like a grazing event.
Louisa & Rocco sampling the appetizers.
I actually love this type of entertaining because it affords me the opportunity to prepare a variety of different plates. Sometimes I get overly enthused, and just want to offer up the world… on a platter. It feeds my need to experiment plus have a group of food lovers to test out my ideas. I will admit that often times I have to reign myself in for parties. I get so excited, wanting to make more dishes than are humanely possible to consume, unless an army shows up. That said, I do a good job of keeping to amounts that makes sense.
I know I’m always giving advice about making a plan, having a budget, being organized, etc. All of which are necessary. Having a list, knowing what to buy, prep and what to make when, plus staying within your financial limits all are essential. I keep to the first rules diligently. List making, organizing, prepping; that’s my jam. Which is why I included a printable complete shop/prep/menu list at the end of the blog if you choose to replicate this menu. However, one thing I will admit openly; we rarely, if ever, follow a budget. JuanCarlos and I are both of the same mindset. If we are hosting, we will make whatever we deem is appropriate for the occasion and not be concerned about the cost. I don’t recommend this approach for everyone. Having a budget in mind helps to keep you on track and from over buying.
Ok, enough chit chat. This post is going to be chock full of food, so the least said the better. Although, I believe I’ve past that point already. Onward!
Table Setting
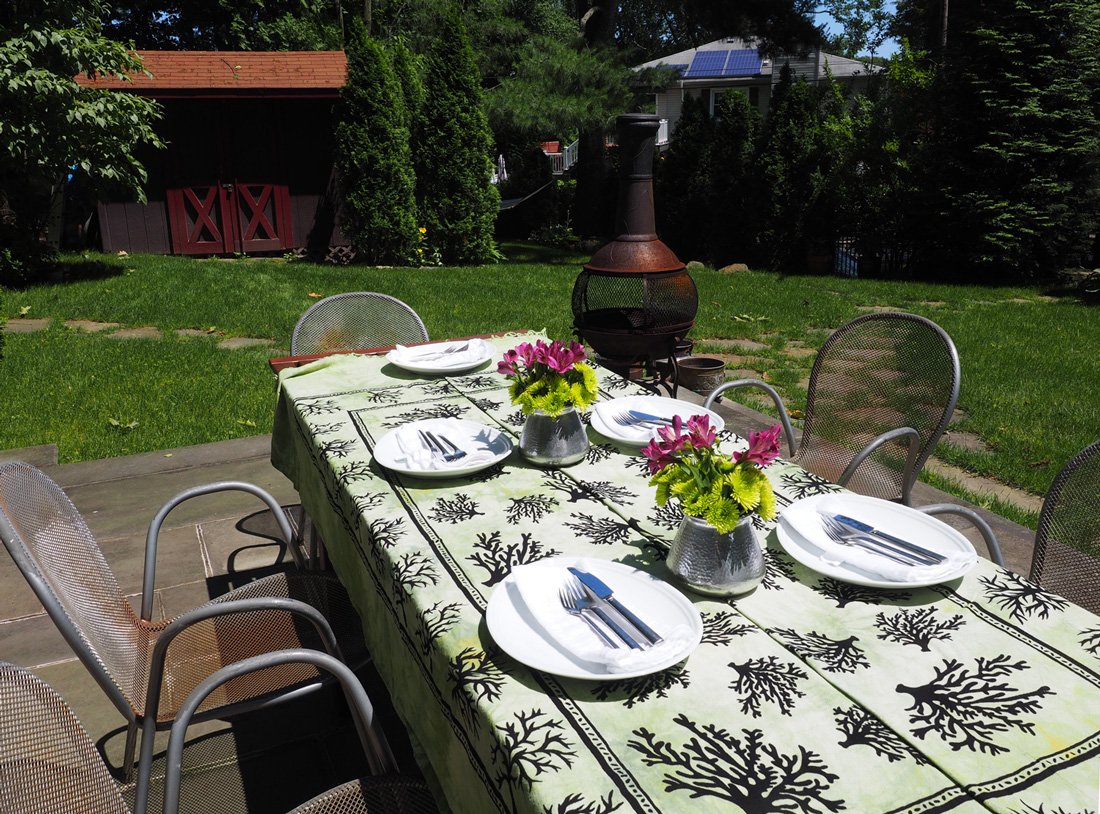
I’ve said it a thousand times, as my many posts dedicated to table settings will prove, and I will continue to say it. DO NOT skimp on your outdoor table. Plain and simple: Make it inviting.
Note: If you want me to stop saying it, send me some photo examples of your tables and I will dispense with the repetitive table setting suggestion.
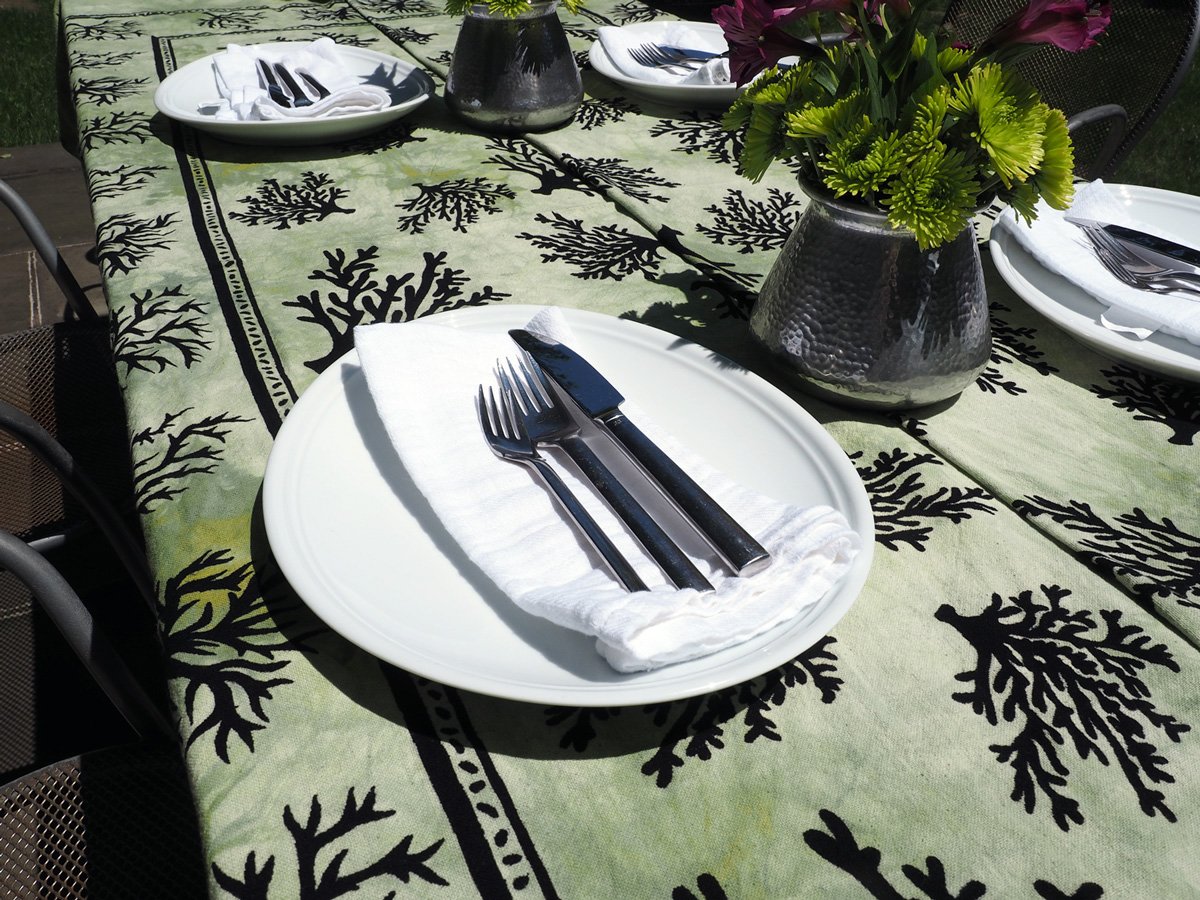
I chose a bold green and black tablecloth that is similar to the one I recently featured Green & Black: A Graphic Table Setting.
I laid a neutral table runner with a bold, black graphic design across the wooden table that was used as a buffet. . I felt that the dramatic outline paired well with that of the tablecloth. I then kept everything else extremely simple.
I bought this khaki colored table runner from IKEA. It was the stark, graphic print that attracted me.
Big white plates, white napkins with a simple rectangle fold placed on the plate lengthwise with the utensils atop. Flowers were from Trader Joe’s. Nothing expensive or extravagant put a fresh pop of color that complemented the tablecloth colors.
Simple but still feels special.
I love the contrast of magenta and lime green. In a pinch, you can’t beat Trader Joe’s for flowers.
Drinks
Have a variety of drinks, but don’t go overboard. I can tell you from experience, people aren’t expecting to have every drink option under the sun. We used to offer a full bar, but through the years have pared down considerably on our offerings.
First tip, know your crowd. If most of your guests enjoy beer over wine, buy accordingly. Our groups are typically wine drinkers. No surprise there. So we offer a variety of wines, sparkling and flat water plus I usually make home iced tea as a non alcoholic option.
Second tip, be gracious; pour and refill your guests glasses. Sure, you would hope they feel comfortable serving themselves, but not everyone will. And it certainly makes them feel special when you are an attentive host.
Keep ‘em refreshed!
Starter | Appetizers
Have a 2-3 different dishes.
You all know that I’m a huge fan of the ubiquitous cheese/charcuterie platter. Since this was a warm August day I wanted to keep the starters less fussy without tons of cheeses melting in the sun. Instead I skewed this a bit lighter with a more tamed grazing platter.
Grazing Platter
Mortadella, French Breakfast Radishes with herb salted butter, salchichon, marcona almonds and dates.
Instead of the big cheese/charcuterie platter, I opted for a more simplified version I dubbed The Grazing Platter.
Watermelon Salad
Watermelon Squares topped with feta, pickled red onions & mint drizzled with balsamic vinegar over a bed of arugula
Nothing more refreshing than watermelon. Up the ante and top it with tangy feta, sharp pickled onion and the fresh herbaceous hit of mint, a drizzle of balsamic adds sweetness. It’s a party in your mouth.
Stuffed Endive
Endive stuffed with whipped cream cheese & goat cheese two ways:
Strawberry | Grape tomato | Basil
Sautéed Peas | Shallots with Pea Shoots.
Click here for recipe
Endive are the perfect vehicle to deliver food into your mouth. I love stuffing them with tons of fillings. These offerings were perfect for a hot summer day.
Intermezzo
This is a small course that we like to serve in between the appetizers and the main meal. I know what you are saying… Food in between the food courses? Well, I did say it was an all day eating affair. For this occasion we served a surf and turf tasting of scallops and grilled meats.
Butter Seared Scallops with Peas/Shallots
These scallops were seared in a cast iron pan on the grill. I used some of the pea/shallot mixture leftover from the endive dish to accompany the scallop. It was a beautiful pairing, and a tasty bite.
Seared scallop with peas
If you can’t get fresh, use frozen peas.
Grilled Meat
No explanation necessary. Grill up some of your favorite meats and serve it family style on a wooden board.
My husband loves, loves, loves to grill. He also loves to have his friends around him while he grills. So offering up both the scallops and the meat right off the flames is right up his alley.
Pluma is the end of the pork loin from an Ibérico pig from Spain. It is moist and tender, and quite the special bite of grilled pork.
My happy grill master, JuanCarlos, chatting it up with Ivor.
Dinner
Salmon Burgers
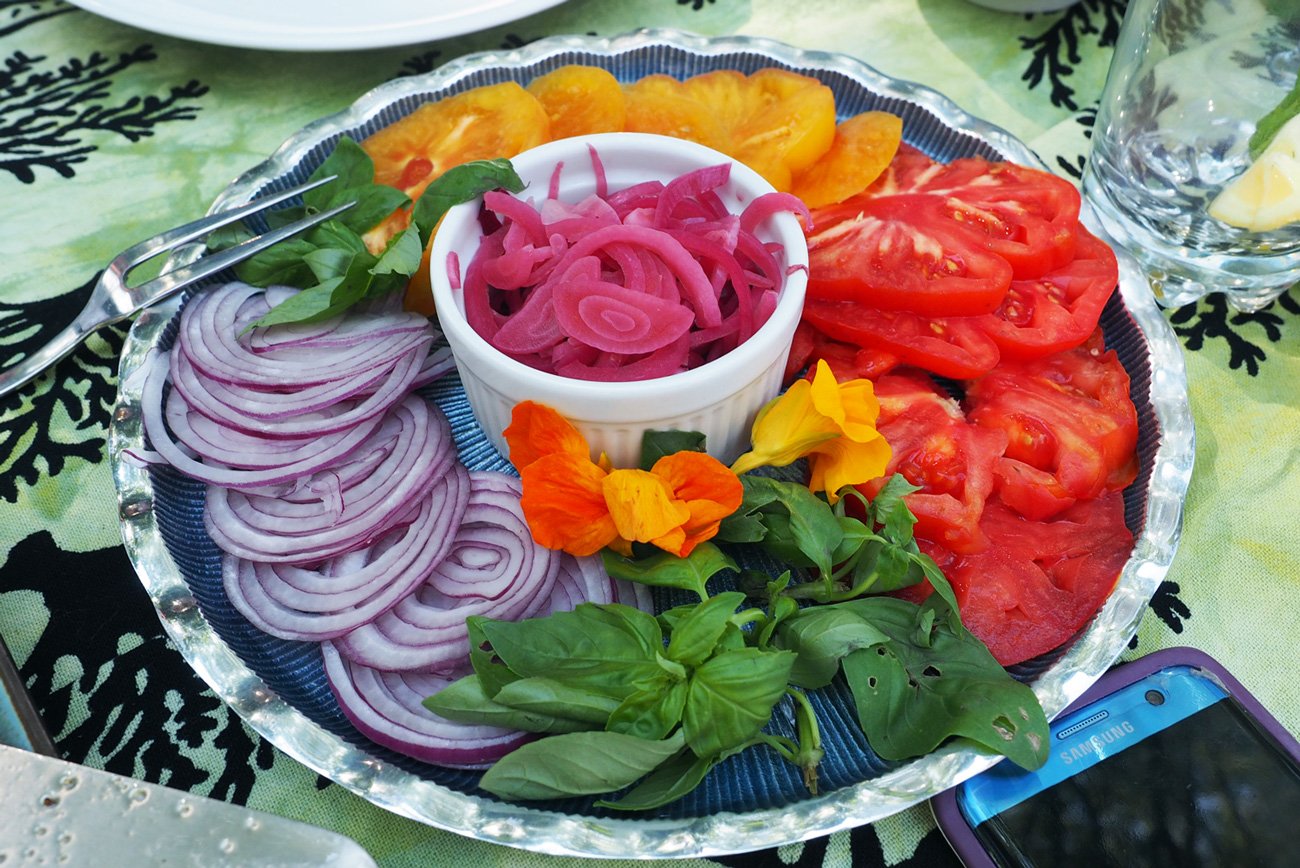
with Buns & all the fixings (raw red onion slices, pickled red onions, heirloom tomato slices, basil & pea shoots. People can choose whatever floats their boat.
Click here for recipe.
Build a burger station.
Heirloom tomatoes in big slices, raw and pickled onions, fresh basil. Just that is a great salad!
My gluten & egg free salmon burgers. On this occasion, I encrusted them in cornmeal to give them an extra crunch.
Pea shoots and micro greens are more delicate for the salmon burgers. Plus I had leftover from the endive appetizer, so use what you have.
Our friend, Louisa, has celiac intolerance, and I am wheat intolerant. The gluten & egg free salmon burgers were ideal for us and the rest of our guests. While they enjoyed the burgers with a bun, we each choose a different way to stack our burger using a tomato slab; making it our own.
All the other guests enjoyed the bun.
Tomato on top…
Tomato on the bottom…
Spicy Slaw
I love serving this salad because it complements so many dishes. It pairs great with grilled meats or fish. It’s a natural with burgers. So it made sense to sit alongside my salmon burgers.
Click here for recipe.
Spicy Slaw, a crisp, refreshing and hearty salad.
Smashed Baby Potatoes with herb garlic oil
Nothing hard about this one. And the best part is that the majority of this can be made ahead. I use new potatoes, but you really can use any potato you like. Boil them up fork tender but not overdone. Drain well and let them cool slightly on a baking tray. Then using the bottom of a glass or a measuring cup press down on each potato smashing them flat but still keeping them together. You don’t want to fully smash or they will completely fall apart. If making ahead, refrigerator until you are ready to fry them up. To finish them, you can either bake them at 400 degrees in the oven with a drizzle of oil, salt and pepper. You can fry them in a cast iron pan on the stove or on the grill, as we did.
I love serving these with either my marinated feta or a simple herb garlic oil, much like a chimichurri sauce. Simply mince cilantro, parsley, basil, chives, crushed garlic, lemon zest, squeeze of lemon juice, olive oil, salt and pepper. If you want to kick up the heat, add red pepper flakes. You can add whatever herbs you like or have. Make it your own.
Nothing better that the crispy skin of a potato with the soft interior. Slather with herb oil and you are in heaven!
Grilled Asparagus
If you have grill fired up, might as well throw on some asparagus. It’s a great summertime green BBQ vegetable.
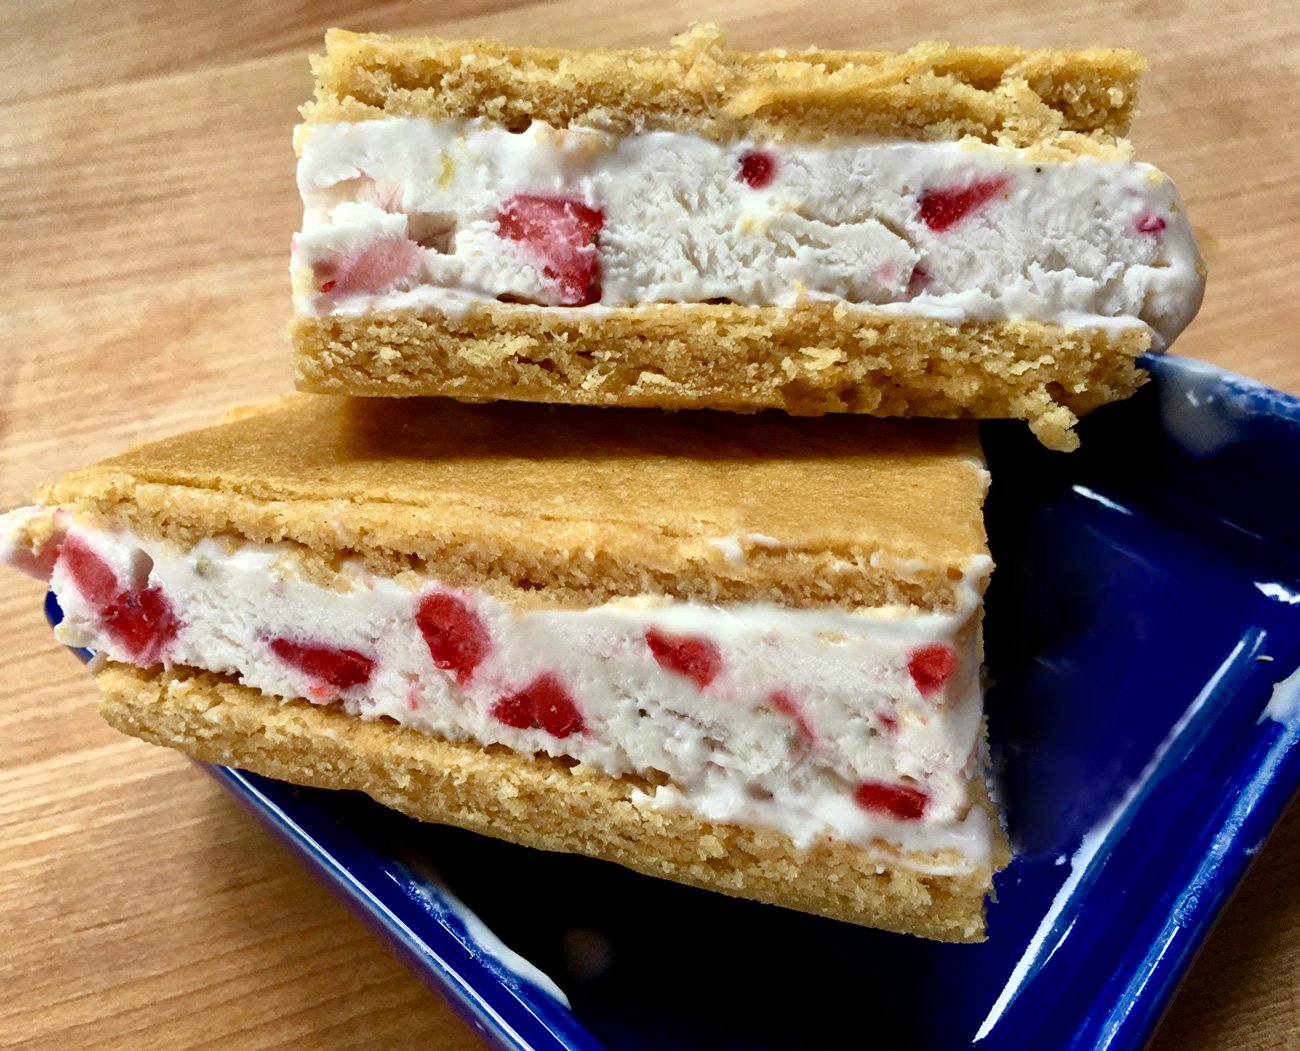
Dessert was a variety of my ice cream sandwiches. More wine and after dinner drinks. We ate. We drank. We talked. We laughed and ate and drank some more. We love spending time with our Princeton pals, and feel so incredibly fortunate that they make the drive to our little haven in Westchester.
My chocolate chip cookie with vanilla chocolate chip ice cream. All homemade, of course.
Chocolate crisp cookie with vanilla chocolate chip ice cream.
Lemon spice cookie with strawberry basil ice cream.
Now this may feel like a ton of food for 6 people. But remember we paced ourselves and were nibbling all day. You don’t have to make all of these. Try a few. But if you do want to tackle this entire menu check out the printable Prep list document for the entire shop, prep, to do rundown.
I hope you have friends that you would enjoy spending all day with. If you do, make it special. It’s worth every minute!


