Chick Pea Fritters - Gluten Free Treat

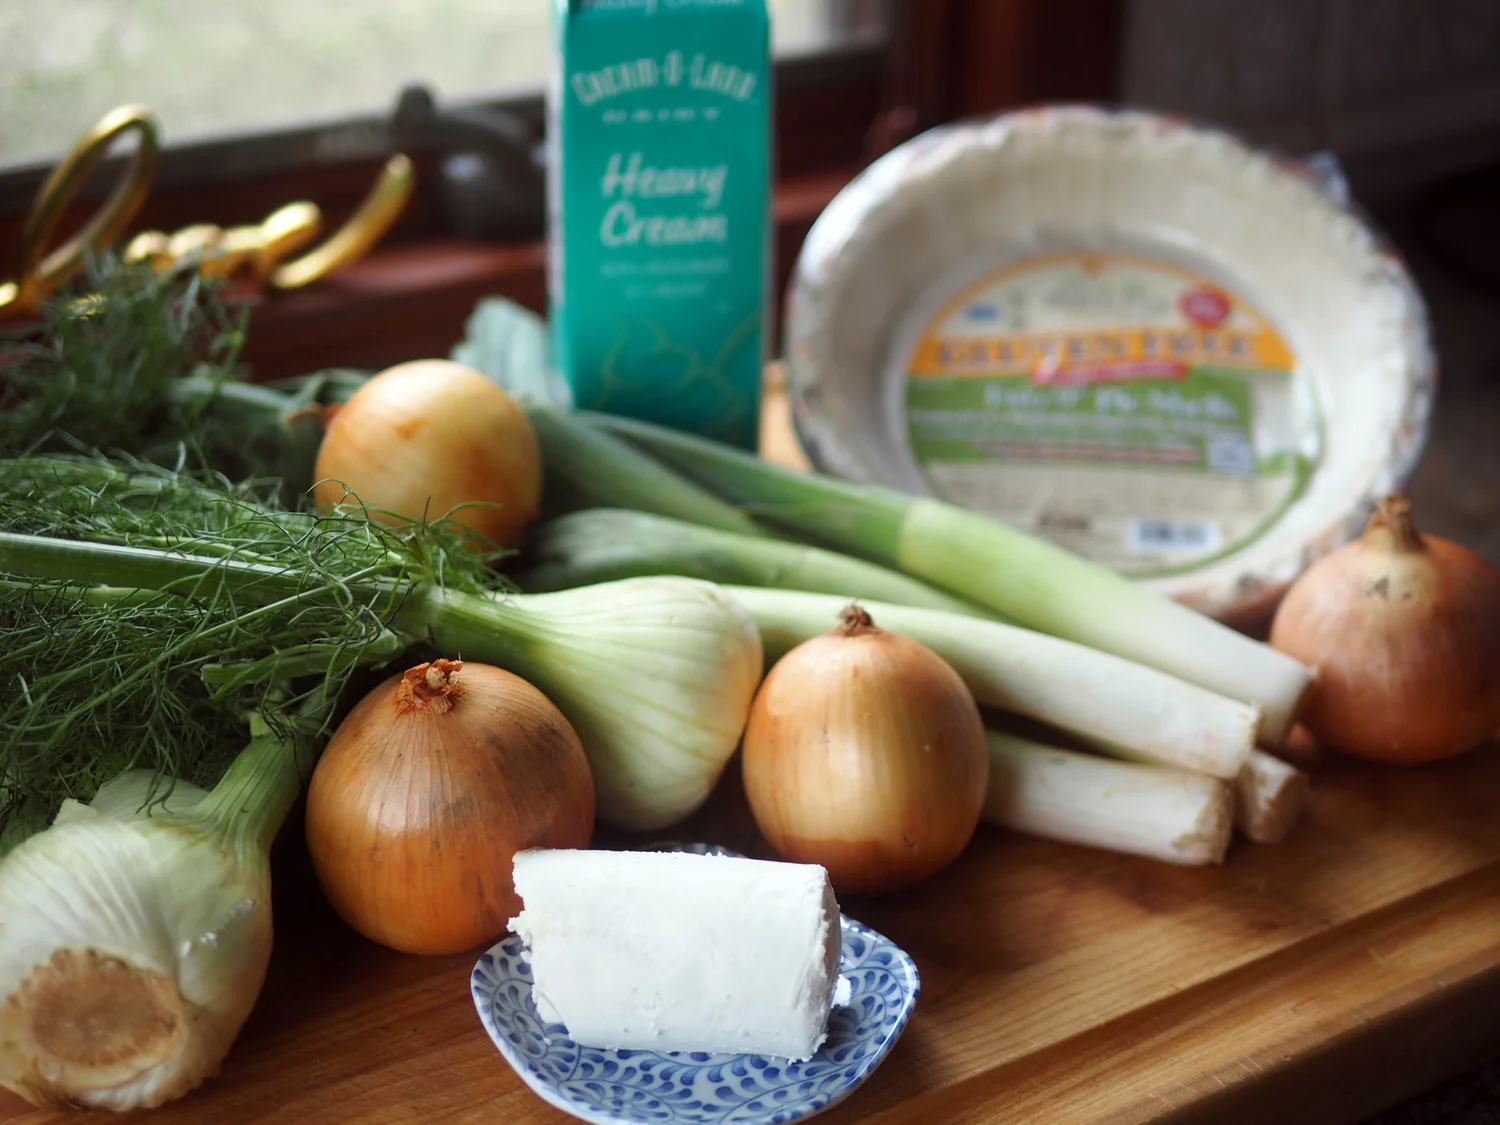
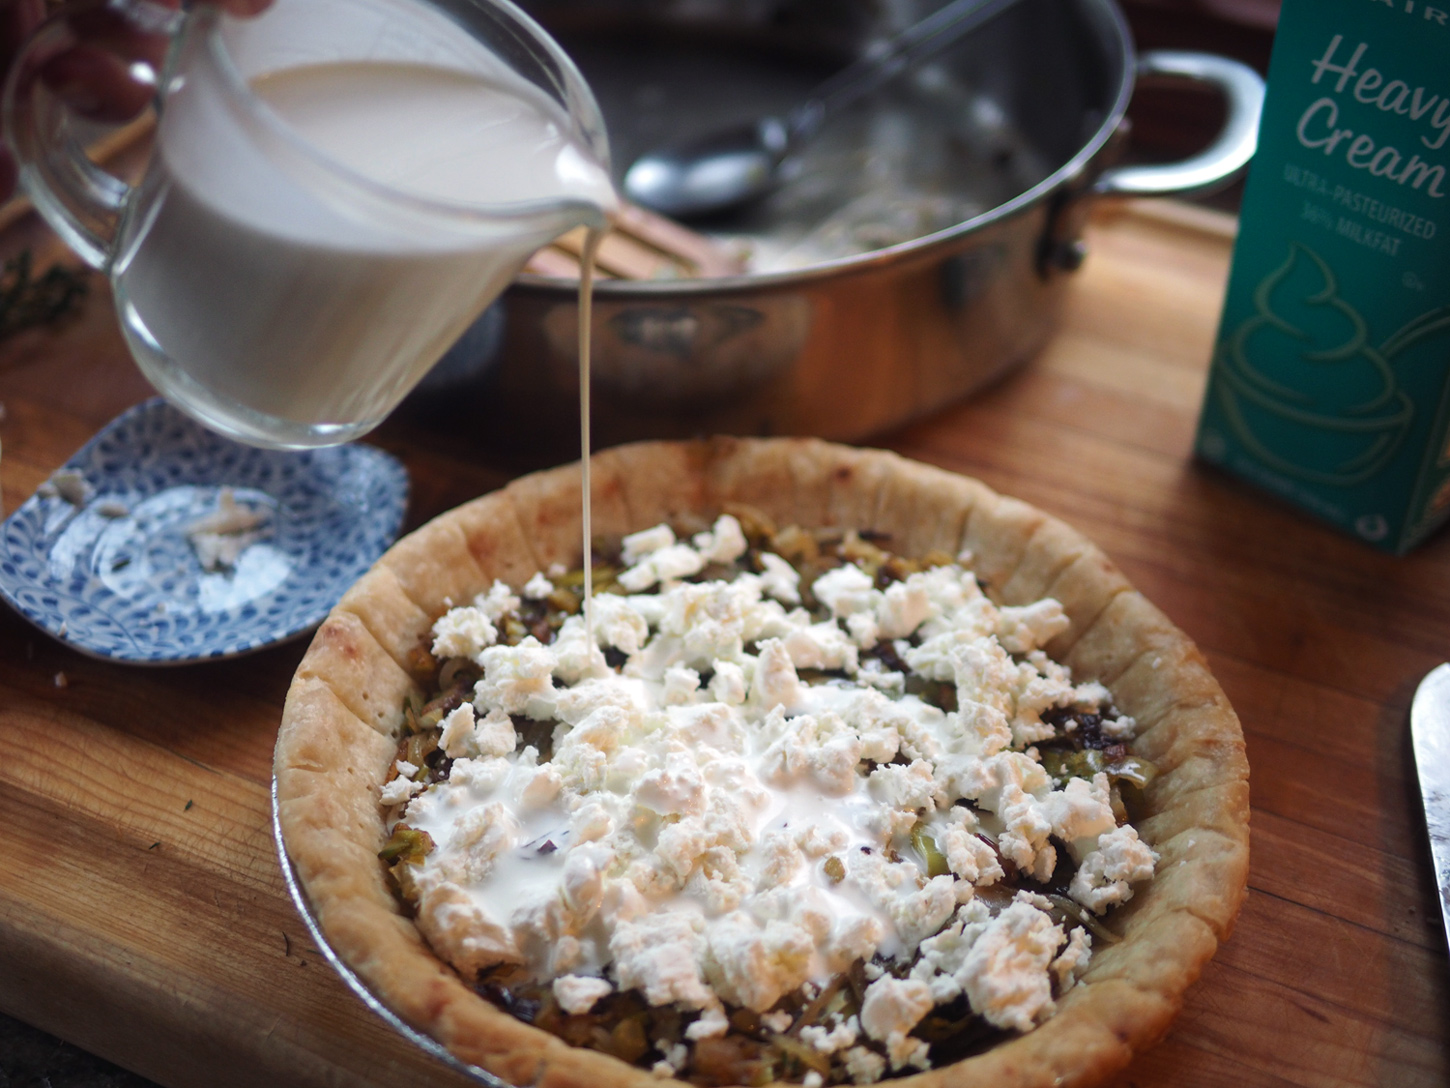
You know why it’s important to learn baseball when you are younger? So you can hit life’s curveballs when you are older. You never know when the universe is going to toss one at you. But rest assured, a few will be pitched your way. Some are serious and life altering, Some are less severe but still require adjusting. Some curveballs are disguised as opportunities. Actually, let me rephrase that. Most of life’s curveballs actually ARE opportunities.

This past summer, I had an awesome gig come across my plate. I was hired to cook for a family of 7 adults, providing lunches and dinners for a two week period. (The family ended up loving what I provided that they extended it for entire month.) This was a huge undertaking in every sense of the word. And there were plenty of fastballs and curveballs pitched my way.

Curveball #1: Refrigerator and freezer needs. I have 2 refrigerators with 2 regular freezers plus 1 full freezer. Yet that was not going to be enough. But as luck would have it our neighbors sold their house, moved out and the new owners weren’t moving in for a month. Coincidence or Fate? I say lifesaver as I packed their fridge and freezer to the brim.

Curveball #2: The clients many food restrictions which required a complicated menu planning.

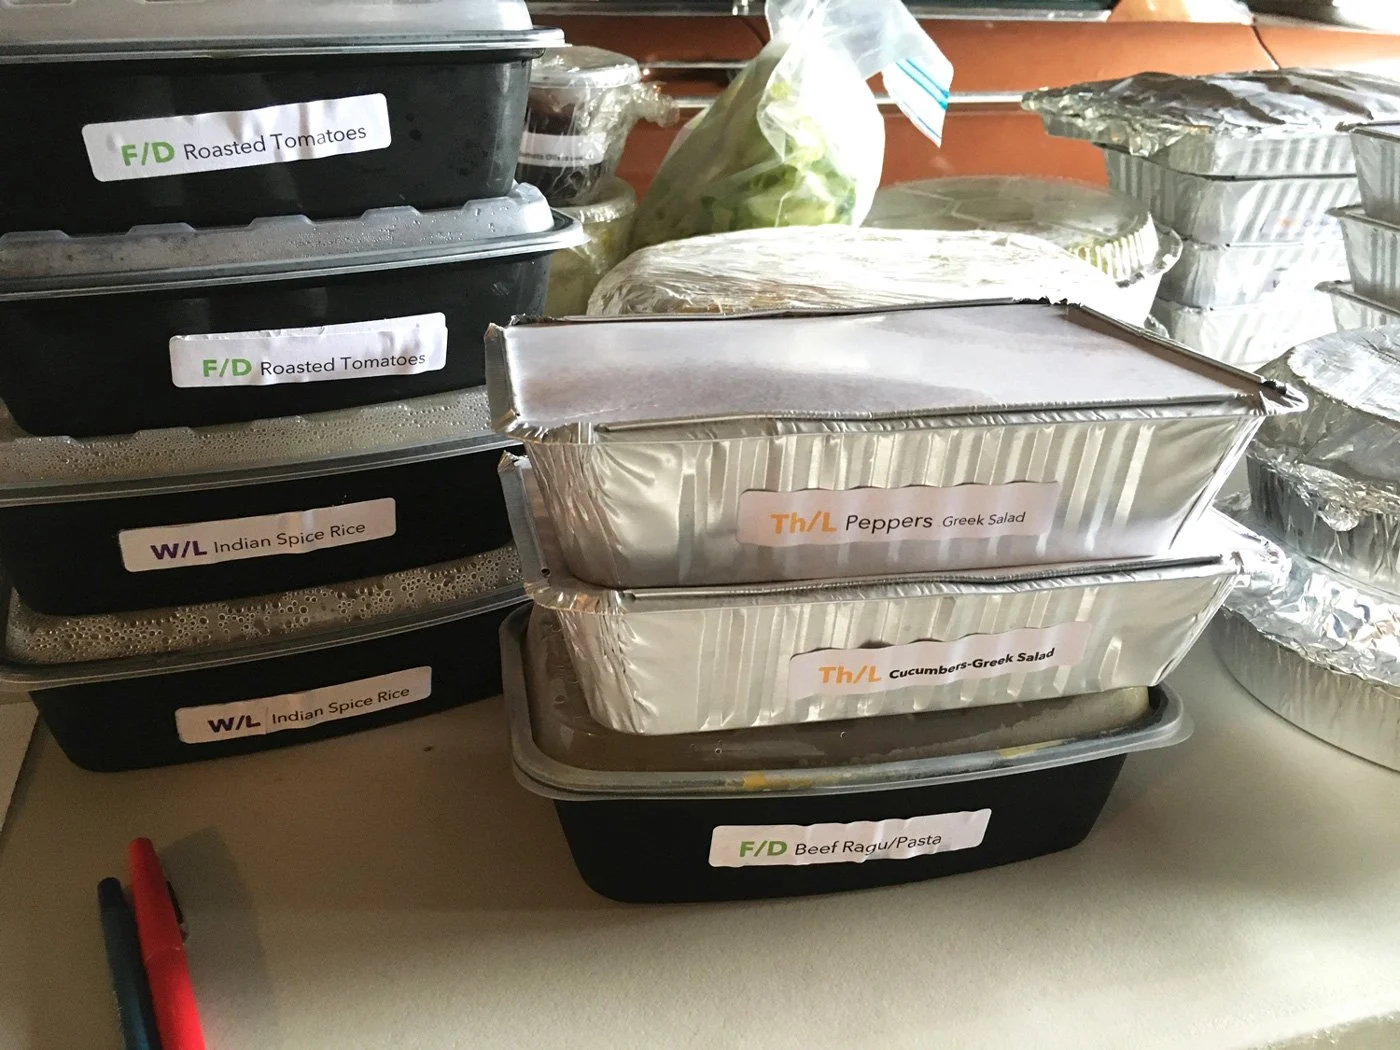
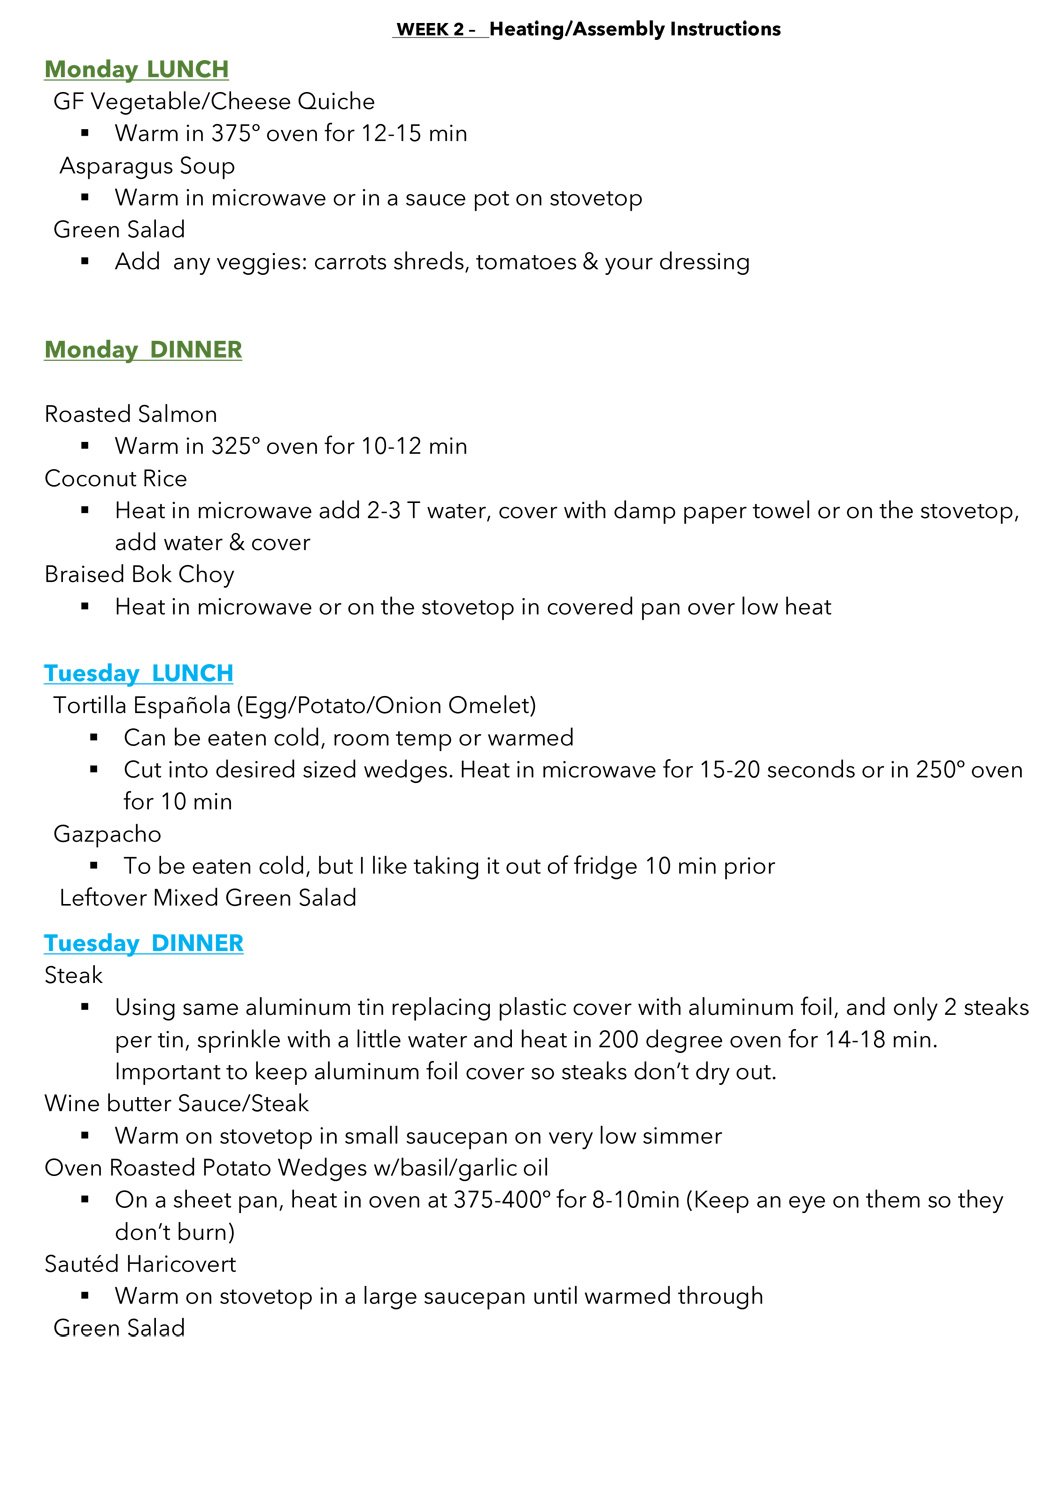
Curveball #3: The management of each meal, heating instructions, and color coded labeling system. With so many containers being delivered, the only way they would know what to heat up was having a color coded labeling system so they knew what dish went with what and for when. They would also need instructions for re-heating and for sauces/dressings. M/L = Monday Lunch, F/D = Friday Dinner and so on.

Other challenging parts of the gig was that I had to deliver the food over an hour away twice a week which required a well orchestrated shopping-cooking- delivery schedule, using various coolers and pack out lists to ensure nothing was left behind. Add to that the various food restrictions which included what proteins some of the guests ate and others did not. This meant that I had to come up with two mains for every meal. Ensuring that every person had sufficient protein was like solving a Rubik’s cube. Oh, did I mention, gluten free? That part is easy for me since I’ve been gluten free for over a decade. So, I won’t even count that.

There were other curveballs but I think you get it.
Big, Big, Big. And I’m always up for a challenge, especially one that requires logistical thinking. I have the detail oriented mind to tackle this type of task. All bragging aside, it’s actually one of my super skills.

I am a very visual person. In order to tackle this monster, I needed to see it. At first, I starting handwriting the menu and the to do lists. Then I typed it into the computer. But soon realized that it was a living, breathing beast which needed to be shifted and modified constantly. Moving items around on the computer wasn’t as effective since all the columns kept getting out whack. I knew the only way to confront this monster of a task was the old fashioned method of sticking it up on a wall. I needed a system that would allow flexibility, full visibility and the ability to easily move food offerings around without shifting others out of place (as what happens in a Word Doc). This could be the next new meaning of a Moveable Feast.
I printed out each offering, cut them into small strips and added painters tape to the back. It was the only way to switch out an item easily after staring at the entire menu and realizing that I might be serving rice 3 days in a row. Or that if I moved a dinner to another night then I wouldn’t have the spicy slaw as a leftover for lunch 2 days later. Rubik’s cube or mathematical conundrum? Anyway, this system worked beautifully and allowed me to see the whole scope of the project and ensure the client was happy with the diversity of offerings. I left it on the wall as art!

My moveable feast. A ‘place and stick’ menu system that kept me from going batty.

I literally used it everyday to keep me on track

Everything was going along swimmingly until one day the client made a late decision switch which left a protein hole for the vegetarian in the family.

Curveball # I lost count: Need an additional protein but no time to go shopping.

So, how do you sneak in extra protein at the last minute using only what you have available? Legumes to the rescue.

I decided the fastest, easiest solution was to make chick pea fritters. Don’t ask me why I thought this would be fast and easy since I had never made these before. But the idea seemed similar to other pancake like food, so that equaled a decent plan. Naturally, it had to be gluten free. This really wasn’t that earth shattering of an idea. It only felt dramatic because I had less them 8 hours to solve the problem and make the food using only available items, in order to make it for the next day’s morning delivery.

Here’s how it went down.

But just a few ingredients: Chick Peas, Gluten Free flour, jalapeño, egg, scallions and cilantro.

Ingredients

(Makes 14 - 3” round Fritters)

1 39 oz can Chick Peas
3 T Gluten Free Flour (or Chick Pea flour. If you aren’t concerned with GF, then regular flour can be used)
1 Egg, beaten
2+ Tbsp Jalapeño pepper, minced (add more if you like more heat)
1/3 c Cilantro packed leaves, 3 T chopped
1/2 c Scallions, sliced
1 t Salt
1/4 t black pepper
1/8 t red pepper flakes, optional
coarse sea salt to finish

Tahini Dipping Sauce
1/2 c tahini
6 T ice water
3 T Lemon juice/zest
2 T scallions, sliced
1 t jalapeño, minced
salt to taste

Instructions

  1. Slice, chop and mince the aromatics.

Mise en place: Chop, slice and have all ingredients ready.

2. Mash the chick peas, leaving some larger and smaller pieces for texture.

3. Add the jalapeño, cilantro, scallions and mix.

4. Then beat egg with salt, pepper and red pepper flakes and add to chick pea until combined.

5. Add the flour 1 tablespoon at a time and mix until the egg is absorbed but still it wet enough to hold it together.

Squeeze a bit into a ball to ensure it holds together.

6. Using an scoop, choosing the size you desire. If you want them as appetizers make smaller ones. If you want them as a side dish, make them larger. Depending on your style and also how you will be serving them, it’s up to you whether you scoop and free form them or scoop and press into a cutter for perfectly equal fritters. Once you decided, scoop, flatten and place them on the sheet tray for fast work. Again, you can choose super flat so they are crispier, or slightly fatter for the thicker more substantial bite. Your choice depending on your needs/desires. Remember, my recipes can be followed exactly or simply be a guide for you to create and make your own modifications. However it is important that when forming these pack them tight so they hold together.


Choose your tool

Scoop for free form, or scoop into a mold

Size matters…

7. Refrigerate for 1/2-1 hour or freeze for 15-20 minutes. This step helps to get the fritters together then frying.

Prep makes easy work. Plus I do recommend placing them on tray to refrigerate or freeze before frying.

8. I like using a cast iron pan when I frying. The heat from the pan allows for a good sear. If you don’t have cast iron, use your best fry pan or grill pan. Working in batches so as to not drop the pan temperature, add oil and about 6 of the fritters. Turn with a small spatula. When done, remove and place on a paper towel and sprinkle with coarse sea salt.

I prefer thinner fritters because I’m a sucker for crisper, crunchy food.

Golden brown and crispy. The paper towel absorbs any excess oil.

I made a tahini dipping sauce to go along with these. A little extra protein from the sesame. Below is the tahini sauce process.

Tahini

Whisk in ice water, and you can see how the water not only changes the consistency but it lightens up the color as well.

Add lemon juice, zest, scallions, jalapeño and whisk together.

Creamy topping. Try it on other foods.

The client immediately texted to let me know that her husband consumed almost the entire batch himself. Huge success. Happy customer, and now I have another little appetizer/side dish to add to my collection and to share with you.

A yummy combination.

You know me, my dishes are never just one use. They usually do double and triple duty. Serve up as an appetizer, or a side dish. You can even swap out toast and use them as a base for eggs. I made one poached egg and one fried egg to place on top of my fritters. I added a dollop of yogurt and some fresh parsley. A few apple slices rounded out this breakfast. I’d say I hit this curveball out of the park.

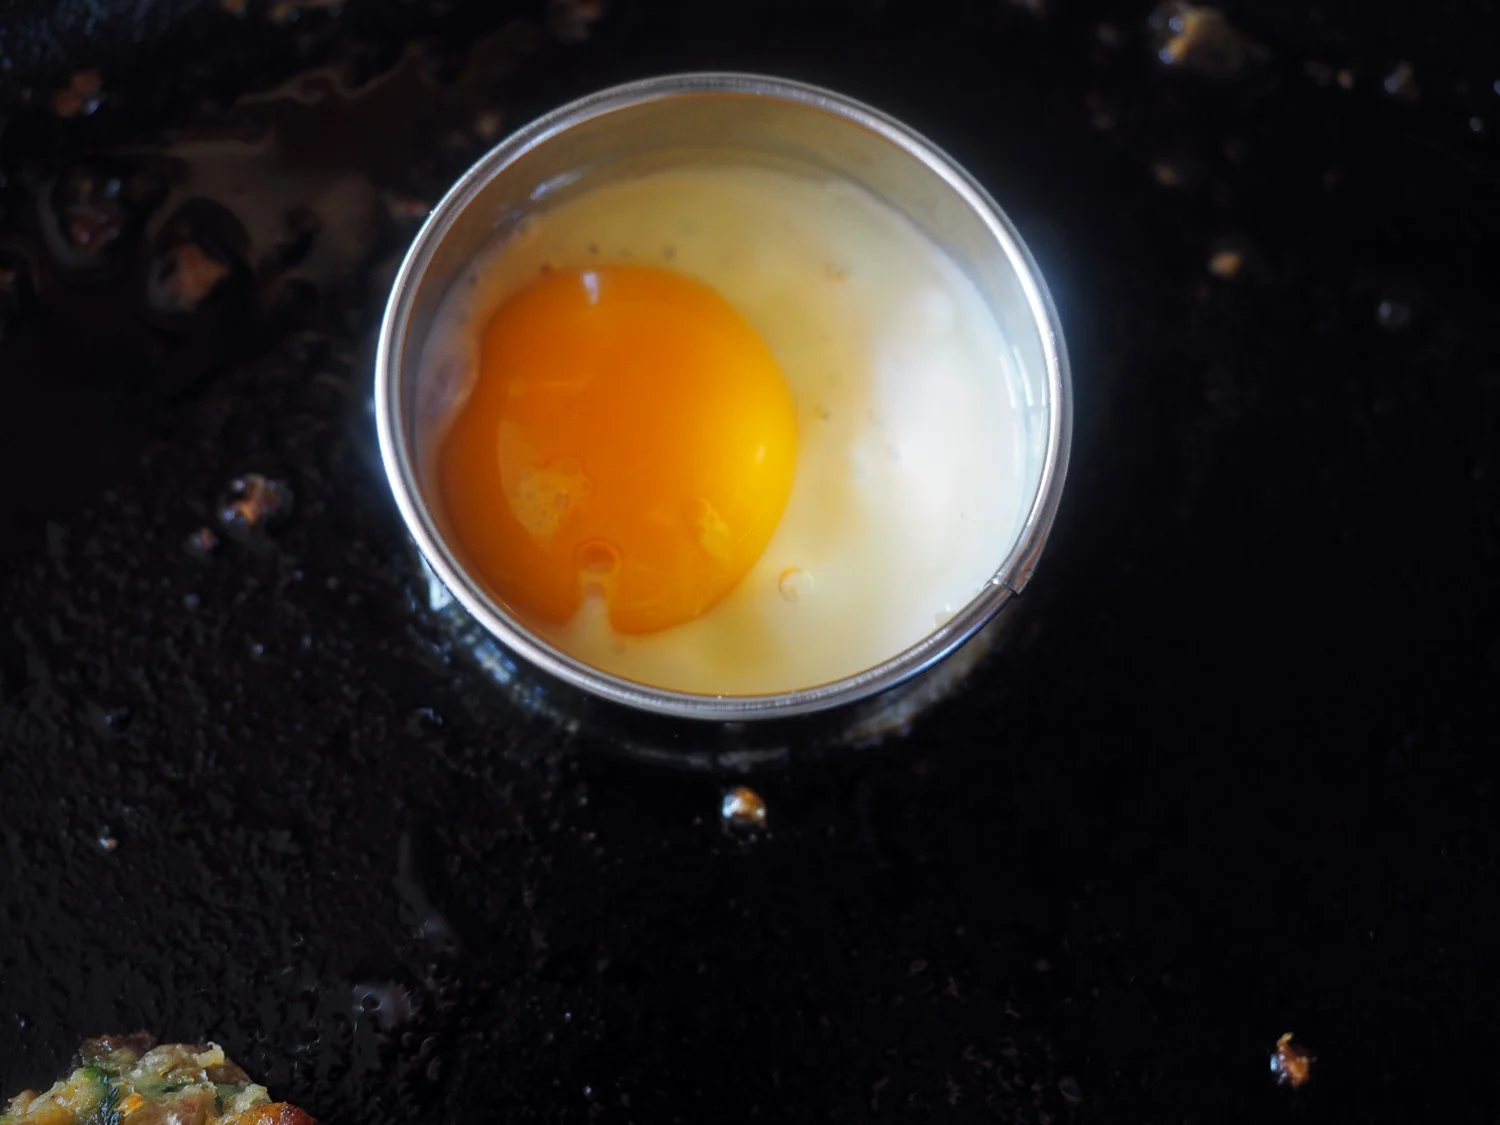
I fried my egg in a metal round the same size as the fritter to make it nice and tidy. If you use this method make sure to oil the inside of the mold so the egg removes more easily.

Left side fried egg, right side poached egg. Delicious, nutritious and packed with protein. Apple slices added a lovely crispy, freshness.

A happy husband


Mint Tea Be Cocktail

Just recently I had a full day adventure in NYC with old friends. These were unexpected, last minute plans and were perfect moments for both reminiscing and making new memories. Outings that make life full and rewarding.

First, I met up with college pals. Dianne, who I’ve known since Junior High, and Dominique, since right after college, all of us graduating from University of Binghamton. We walked around eating and drinking, and window shopping our way through Soho. After attempting to eat at a French American Bistro, we ended up in a Sicilian Enoteca. The bistro didn’t open until 12n and it was 11:30a, and apparently we were all so hungry we couldn’t wait the half hour. Not even sexy drinks would tempt us into waiting. I had spotted the Enoteca as we were walking, as did Dom, so suggested it. I figured the Italians would be ready to serve food at any hour. If the sun had risen and people were awake, the Italians were ready with food. I’m glad we didn’t wait for the bistro to open their kitchen. Our Italian lunch was a symphony of delicious simplicity. We shared 3 plates; an Arugula Salad, a Fennel and Orange Salad and then Gluten Free Ziti with Shrimp in a creamy burrata, tomato sauce. I literally lapped up the last morsels of the pasta using a spoon to scoop up all it’s luscious goodness. I enjoyed the dish so much that I asked where they buy their pasta. Fortunately, it comes from Di Paolo’s Italian Market right near by in Little Italy. But before heading over to snag some gluten free goodness, we shopped a bit and I bought these flouncy white pants. Apparently, the ‘one size fits all’ JUST fits, and didn’t deter me one bit from racing to buy that pasta. Once home, I made my own version of it a few days later.

Feeling brave sharing this Rubenesque modeling moment.  Photo credit: Dianne Guarino

Feeling brave sharing this Rubenesque modeling moment.
Photo credit: Dianne Guarino

Really love this brand of gluten free pasta

Really love this brand of gluten free pasta

Paolo’s Gluten Free Ziti with fresh tomatoes and herb goat cheese. Clearly not the same but just as good.

Paolo’s Gluten Free Ziti with fresh tomatoes and herb goat cheese. Clearly not the same but just as good.

After more walking, shopping, talking and catching up we said our goodbyes to our friend Dom, then Dianne and I met up with friends from our elementary/junior high/high school days for drinks and light dinner. My original idea of meeting up at The Ten Bells was quickly shut down when we realized they didn’t open until 5 and we were all meeting at 4pm with a hard out time. Yet another timing dilemma. But I always find that these situations are for the better, as witnessed with the lunch happening. We ended up at Dudley’s, a cute little place with outdoor seating, with good food and drink in the Lower East Side. And that is where this post is really going. To share with you a recreation of the drink I so enjoyed. Sure, I meandered around to get here, but that was what the day was all about. Spending time with old friends with no real agenda but to share old and new memories. This day was not just good for me, but a great way to encourage you to do so too. I know, I’ve spouted a lot of words about a lot of other things just to get to the cocktail. But that is the beauty of life and the road we journey to arrive somewhere. It’s the mishaps and redirects that get you to the exact place you are supposed to be. In this case, Lunch Italian Style plus 4pm consumption of a refreshing cocktail with dear friends.

Friends for life: Dominique, Me and Dianne. AKA 3D. Smiles of well fed women looking for bargains.                      Photo credit: Dianne Guarino

Friends for life: Dominique, Me and Dianne. AKA 3D. Smiles of well fed women looking for bargains. Photo credit: Dianne Guarino

Nancy, Kathy, me and Dianne.                                                                                                                                            Photo credit: Kathy Lashlee

Nancy, Kathy, me and Dianne. Photo credit: Kathy Lashlee

I’m not a big drinker these days. Can’t seem to hold my liquor. But the drink that caught my eye was the cleverly called Mint to Be. An auspicious name for a cocktail that clearly defined the day and all our happenstances. It was so dang refreshing. I suppose I could have used my handy dandy phone to take a photo of the ingredients, but didn’t. Thank goodness, I only had one drink so from memory, it had Vodka, St. Germaine, tea and mint. I had no idea in what proportions so when recreating, I just guessed. And on my first try, I guessed right.
Here’s what I did.

Ingredients

2 oz. Green Tea, brewed with mint leaves & cooled
1 oz. Vodka
1/2 oz. St. Germain
Fresh Mint leaves & Cucumber for garnish

Enjoyed this drink so much,I actually almost finished it!  Photo credit: Kathy Lashlee

Enjoyed this drink so much,I actually almost finished it!
Photo credit: Kathy Lashlee

Cocktail set up. Mint, Freshly brewed Green Tea, St Germain, Vodka and cucumber

Cocktail set up. Mint, Freshly brewed Green Tea, St Germain, Vodka and cucumber

I brewed green tea and let it steep with fresh mint leaves and let it cool. In a shaker, I put ice, vodka, St. Germaine and more mint leaves then added the tea once it was fully cooled.

tea.steeping.jpg

Shake shake shake, then poured it into a cocktail glass over ice. I added a cucumber slice and more mint leaves.

Refreshing? Almost too refreshing. These babies will go down fast. So be careful. Of course, if you like your drinks stronger, you can certainly add more vodka, although it will change the flavor profile a bit. I like these ratios because it’s very smooth. JuanCarlos, who usually is the one making cocktails around these parts was pretty impressed. So we invited our neighbor friends over to enjoy. I don’t need to tell you that they did, indeed.

It truly was Mint Tea Be.

Served with crisp cucumber slices and crunchy, salty marcona almonds… A perfect cooling cocktail that suits to a T.

Served with crisp cucumber slices and crunchy, salty marcona almonds… A perfect cooling cocktail that suits to a T.

This cocktail paired with pretty much anything. Including langostinos with sautéd tomatoes & peas.

This cocktail paired with pretty much anything. Including langostinos with sautéd tomatoes & peas.

Linguine with Oven Roasted Tomatoes, Olives & Spinach

final.pasta.jpg

Hello fellow pasta lovers.  I know I have been neglecting you. Believe me when I tell you that it is not from a lack of making pasta. Quite the contrary. I make and eat pasta. (Gluten free now) Maybe not as often as before when I used to eat it every day.  Yeah, you read that correctly.  EVERY DAY. Oh the glory years.  Every day requires a lot of invention. Which meant I needed to come up with a variety of combinations to swirl, toss and top my pasta.  This is the very essence of the 'something from nothing' style, and how I pretty much make every pasta dish. Which leaves you wondering why the hell I'm not posting them given that it is the literal building block of my blog. Oh the irony.  Quite frankly, these dishes, although delicious, didn't seem like such revolutionary ideas, nor ones you wouldn't have thought up yourselves.  But maybe not. So, if it's pasta you want, it's pasta you get.  Who I am to deny anyone from eating pasta? I'm not crazy.

This combo literally was a throw it together dish from last week.  I was spending time with my niece Gianna before she headed back to college, my alma mater Binghamton University. Our afternoon of shopping ended right at the dinner hour and we were hungry.  We first thought of grabbing a bite at some local restaurant, but Gianna being every thoughtful and dollar conscious, said why spend money.  After mentioning that I didn't have a ton to choose from at home, save pasta, her answer: "Well, I would never turn down pasta."  And this why she is my goddaughter.  Like minds.

Here we go with the old open the fridge and see what we have...

Container of oven roasted tomatoes

Moroccan oil cured black olives

Baby spinach

That's all we needed to make a pasta that had some real depth of flavor.

setup.jpg

Ingredients

1 lb. linguine (I used Tinkyada gluten free)
3.5 c oven roasted tomatoes
1/2c approx. roasting oil & juices from the tomatoes
1/3 c Moroccan oli cured olives, rough chop
4 c baby spinach, rough chop
1/2 med. yellow onion, diced (approx. 2/3 c)
3 large cloves garlic, sliced
pinch red pepper flakes, optional
Magic 3 (Olive Oil,  Salt, Pepper)

Moroccan Black Oil Cured Olives

Moroccan Black Oil Cured Olives

Instructions

Dice the onions, slice the garlic, chop the olives. While the pasta is cooking, sauté the onions and garlic until just softened. Add the olives and stir to combine. 

olives.cook.jpg

Add the tomatoes plus their roasting oil and spinach and let cook until spinach is wilted and everything is warmed through.  Season to taste. (Note that the olives add a salty flavor so go light handed when adding salt.  TASTE, taste, taste.)

Once pasta is al dente, transfer it to the sauce pan and combine all together letting it cook the last minute in the sauce.  Top with grated cheese.

pasta.in.sauce.jpg

The sweetness from the tomatoes, the salty, earthy flavor from the olives and the bite of spinach. There really is no need for me to tell you that this was yummy.  Trust me, it was.  So much so, I made it again when my sis, Jill came for her weekly visit.  Pasta NEVER disappoints. It really does provide a double dose of love.

double.love.pasta.jpg

Leek, Onion & Fennel Tart - Gluten & Egg Free

My memory must be fading... like a distant memory.  I can't recall what exactly prompted me to make up this tart. It might have been that I was craving a tart-like something, or maybe I saw a quiche and had slice envy.  All I remember is a deep desire to eat crust. The solution for when you have a hankering for something?  Go shopping.

It's been stated that you should never shop when you are hungry but I was on a mission, which helped keep this buying event to a minimum.  I was lucky enough to find a gluten free tart shell that didn't have a lot of crap in it. Happiness in the frozen section propelled me with glee back to the produce isle. 

There I found leeks and fennel which were looking fresh and seemed like a fine fit for my crust craving creation. I knew I had onions and goat cheese (which apparently are in endless supply in my house).  Last item needed to make myself a luscious tart that would halt my hankering for quiche was cream. I don't eat eggs.  Pity me.  Yes, pity me because I love eggs and they are in EVERYTHING. But alas, eggs don't love me.  An epic unrequited love story.

Since no eggs, no quiche.  No problem. This tart was going to kick the butt of any egg laced tart dish. 
And yes, although this is gluten and egg free, I did not say calorie free.  So this one may not be my healthiest share but it might become a special favorite for when indulging is on your mind.

There aren't too many steps to this making this, minus a little slicing.  But you have to do that in most recipes, so stop any belly-aching. Homemade food does require a tad of effort.

Ingredients

Pie Crust 9" (I used Wholly Gluten Free)
4 c leeks, sliced and thoroughly washed
1 heaping c onions, sliced
1 heaping c fennel, sliced
4 oz. goat cheese
1 c heavy cream
fresh thyme, optional
1 T butter
Magic 3 (Olive Oil, Salt, Pepper)

The onion family ready to be tarted.

The onion family ready to be tarted.

Instructions

Using a fork, pierce holes in the bottom and sides of the crust.  Bake at 350 degrees until lightly brown.  Set aside.

Prep the crust by making fork holes to prevent from bubbling up.

Prep the crust by making fork holes to prevent from bubbling up.

Perfectly pre-baked crust

Perfectly pre-baked crust

While the crust is baking, slice the leeks and soak them in water. Removing and rinsing several times.  (Leeks are laden with sand and you want to ensure there isn't a grain left.  When changing the water, remove the leeks from the water using a strainer or big slotted spatula as opposed to dumping the water and leeks into a strainer.  If you do the latter, all the sand will go right back through the leeks.  By removing the leeks, the sand stays at the bottom of the water. Then just dump and refill with fresh water. )

Wash, soak, dump water. Wash, soak and dump again. Do this until no more sand appears at the bottom of the bowl.

Wash, soak, dump water. Wash, soak and dump again. Do this until no more sand appears at the bottom of the bowl.

While the leeks are soaking, slice the onions and fennel.  Once all vegetables are ready, sauté in butter and oil, seasoning with salt and pepper.  If you decide to use the fresh thyme, add it now. Cook these until fully caramelized. 

Onion slices

Onion slices

Fennel slices

Fennel slices

The best combo. Butter and Oil

The best combo. Butter and Oil

All veggies in: fennel, onions, leeks

All veggies in: fennel, onions, leeks

Sauté slowly until they are completely broken down and beautifully caramelized.

Sauté slowly until they are completely broken down and beautifully caramelized.

Now with all the items ready, fill the pie crust with the vegetable mixture, top with tons of goat cheese and pour in the cream. You can also just mix all these ingredients together in a bowl and then fill the pie.  Your choice.  I didn't mix it because I envisioned the pie I saw layers in my head.  Silly me, it truly makes no difference.

Vegetable mixture, goat cheese, heavy cream and crust waiting to join forces.

Vegetable mixture, goat cheese, heavy cream and crust waiting to join forces.

Fill the bottom with the sautéd vegetable mixture. (Or you can mix the veggies with the cream and goat cheese and then pour in.)

Fill the bottom with the sautéd vegetable mixture. (Or you can mix the veggies with the cream and goat cheese and then pour in.)

Lots of cheese and creamy goodness tops this tart off.

Lots of cheese and creamy goodness tops this tart off.

Place the pie in the oven and bake for 40-45 minutes until center stops wiggling and when tested with a toothpick it comes out clean.

Let it cool slightly to allow it to set.  You can serve it warm, at room temp or even cold.  Slice and pair it up with a soup or salad.  This is ideal for brunch, lunch or dinner side dish.  I made it when my friend, Emilce came for an overnight stay.  We both had a slice, leaving the rest of the pie all to myself for days.  Bliss!

Print Friendly Recipe

DP-stirredwlove-ID1.jpg
final.pie3.jpg
 

Creamy, Cheesy Cauliflower Dip

Creamy, steamy, cheesy and delicious cauliflower dip

Creamy, steamy, cheesy and delicious cauliflower dip

Cauliflower:  the big, white, bulbous veg that is so versatile.  It can be crunchy when roasted, or creamy when pureed.  It's nutritious and delicious. (and even facilitates my propensity to rhyme.) Seriously, what more can you ask of it.  But I did. Please can you be a creamy, cheesy dip for my cocktail party? And the answer was, Sure Thing. 

Since this dip was such a hit for my post Thanksgiving cocktail party I thought it only fitting and quite appropriate to bookend the year by posting another cauliflower dish.  I started this blog with the simple but versatile Faux Creamy Cauliflower Soup and I end the year with another simple but this time decadent cauliflower dish that will help ring in the New Year's Eve.  There is no faux in the creamy nature of this dip. It's real, alright.  And it's cheesy, gooeyness is completely sanctioned when one is kicking out the old and cheering in the new.

Just as with the soup you can add a variety of extras as you desire.  You can even play with different spices, too. This is was my first attempt at asking my cauliflower to be dippable so I didn't venture too far into the experimental.  That said, we did just fine.  Here are the basics.

Ingredients

1 head of cauliflower
1/4 c shallots, minced
1/4 c onion, minced
2 small cloves garlic, minced
Magic 3 (oil, salt, pepper)
1/8 t red pepper flakes (optional, if you like a little heat)
1/2 c sautéd escarole (optional, I had some leftover from the Escarole Rolls so I tossed it in)
2/3 c fontina, grated (or cheese of your choice, Gruyere would be yummy)
Crusty bread, for serving
Endive, gluten free option for serving

Instructions

Break up the cauliflower in pieces and boil it in salted water. 

Remove, reserving 1 cup of the liquid for pureeing.  Set cauliflower aside while you sauté the onion, shallots and garlic, seasoning as they get nice and soft.  Then add the cooked cauliflower and let it get coated with that flavor.

Next step is to make it creamy.  Place the mixture into a food processor and puree, adding a little of the reserved liquid as needed to get the consistency you want.  Remember, you can always add but cannot take away, so go slowly to determine whether you want it chunky or super smooth.  At this point, please taste and adjust your seasonings as you see fit.  As I mentioned, since I had some leftover sautéd escarole, after I removed the mixture from the processor, I folded it in.

cauliflower puree

cauliflower puree

leftover sautéd escarole

leftover sautéd escarole

The mixture awaiting it's cheese partner.

The mixture awaiting it's cheese partner.

Place the mixture into an oven proof baking dish that can also be used to serve. I bought the one pictured from Despaña.  They have terra cotta cazuelas in a variety of sizes, and this one is perfect.  Then comes the best part, the CHEESE. Did I say I like cheese?  If you know me, you already knew that.  Add the cheese into the entire mixture, plus sprinkle some on top. Bake at 350 until nice and bubbly.  

Serve warm with crusty bread, endive or any other vegetable for dipping.  

Here's to ringing in the New Year with Health & Wealth of heart, body and mind.  May you reach for the stars, touch them and be electrified to do great things.  May love and peace show up at your door each day.  And may you know when to have faux creaminess and when it's absolutely necessary to have the real thing.  

Thank you all for your support and onto new food bites in 2017!