Pop Tarts or Pastilitos

final.tarts.jpg


When I was growing up we mostly ate homemade food, and even homemade desserts. Between my mom and grandmothers, cooking and baking were daily activities. Going out to dinner or buying already prepared items was a rarity, and if you could believe it, considered a treat. Funny, how the tides have turned. The trick was on us, since now, a home cooked meal is something to be cherished. (In my mind, it always was and still is.) We went out to dinner on special occasions, like New Year’s Day. But mostly we gathered at our kitchen table for meals. As far as desserts, my grandmother who lived with us would bake some of her specialties. We did however from time to time indulge in some packaged goodies. I must admit that when I was a kid I ate, and enjoyed a few of those artificial treats, including pop tarts.  Back then we didn’t pay much attention to labels. So reading a label to ensure it was good for us just wasn’t in our active consciousness. I cannot attest to how much crap might have been in them way back when, but given how shelf stable they were I would imagine quite a lot.  They probably were not great for us then. I do know that now I wouldn’t let those chemical enhanced things touch my lips.  But that doesn’t mean I don’t reminisce about the dough filled treat. So, when I realized that I had cream cheese and fig jam that needed to be used up, I immediately thought of pop tarts.  I guess pop tarts didn’t have cream cheese so these might be more in line with a Cuban pastelito.  For some reason pop tarts popped to mind first.  I always have puff pastry in my freezer.  And this is the exact reason why.  You never know when you might need or want a little ‘something something’.  And I’ve found that puff pastry has often come to my rescue.

These couldn’t be simpler.  Really, I mean it.

Just 3 ingredients: Puff pastry, cream cheese and jam

Ingredients 

3/4 c approx. Cream Cheese

1/2 c approx. Jam (I used fig jam)

Puff Pastry Sheet*

* You can also use pie crust. I would imagine that that dough will be an even closer taste and feel to the original pop tart.  Either puff pastry or pie crust will do the trick.

Instructions

  1. Thaw out the puff pastry.  Once at room temperature, dust the board with flour and gently roll it out to approximately 16” x 12”.  Cut the pastry into 2” wide strips, then cut those strips in half. 

Roll out the dough, and be sure to sprinkle the board with some flour so it doesn’t stick.

Roll out the dough, and be sure to sprinkle the board with some flour so it doesn’t stick.

2. Spread approx. 1.5 - 2 tsp of jam onto the middle of each strip. Then dollop approx. 1 tbsp of cream cheese on one end.

Spread the jam in the center making sure to not go to the edges.

Spread the jam in the center making sure to not go to the edges.

A nice dollop of cream cheese is always a good thing.

A nice dollop of cream cheese is always a good thing.

3. Brushing the edges with water before folding over the dough, then fold the dough over in half.

A simple fold is all you need to do.

A simple fold is all you need to do.

4. Then using a fork, crimp around all the edges to seal.  Place them on a tray with parchment paper and let them chill in the refrigerator for 15 minutes.

Crimping the edges seals the deal, and the pastry, of course.

Crimping the edges seals the deal, and the pastry, of course.

Lined up little treats.

Lined up little treats.

Love, lined up and ready for baking.

Love, lined up and ready for baking.

5. Bake in a 375-400 degree oven for 15-20 minutes until golden brown.

These look and taste better than a pop tart.  I promise.

These look and taste better than a pop tart. I promise.

Golden brown, flaky, sweet goodness.

Golden brown, flaky, sweet goodness.

And just like that you have a tasty, sweet and savory pop tart or pastelito. Whatever you call it, just make sure to include the word delicious. 

Sure you can stack them up on a plate.  Then watch the plate empty out.

Sure you can stack them up on a plate. Then watch the plate empty out.

Note:  If you like it a tad sweeter and more like a traditional pop tart, drizzle a glaze over top.  (To make a glaze, mix 3 Tbsp confectioner’s sugar with 1 tbsp milk and whisk until you get a nice glaze.)

That’s a whole lotta LOVE.

That’s a whole lotta LOVE.

The Not Sweet Fruit Tart

final.pie.jpg

I’d venture to say that most of us have had recent conversations about food allergies, food intolerances, and just plain avoiding foods we think we shouldn’t be eating. It has become another whole food industry - Gluten Free, Vegan, Non GMO, Dairy Free, No Refined Sugar, Plant Based. There are Instagram feeds dedicated solely to a niche food category. I actually think it is fantastic that people are becoming more aware of what they are ingesting. We truly are what we eat. Food can either heal or harm, so why not be uber selective in what we consume. But at the same time, it has become increasingly difficult to decipher all the information and determine what to eat each day. And trying to host a dinner and side step all the allergy mine fields, can be explosive. More than that, it just plain saddens me knowing that we have poisoned our food supply resulting in this food intolerant epidemic. Which is why I mostly stick to eating as organic as possible, loads of seasonal vegetables and grains. And fruits, which is how I decided to make this tart. I bet you were wondering where all my ranting was going.

I, too, am a sufferer of food intolerances, so I get it. I annoy myself sometimes. I can, and will write another post detailing how I navigate the world side stepping foods I love but can’t eat. For now, this post is about understanding people’s choices, honoring and trying to accommodate them. Hey, it’s all good for me. These challenges only present opportunities to push myself to find new food ideas. Ain’t nothin’ bad about that.

Recently, I met up with my two friends to celebrate all three of our birthdays, and to just plain ole catch up. (That’s another subject I can write at length about - how we are all so busy that it takes months to find a mutual date to meet up. Do not get me started on that one!) At first, I was supposed to host but then plans got switched around and Donna graciously took up the mantle to host. She made a most delicious dinner featuring a salmon dish with a salsa that has my lips licking just thinking about it. I will beg her for the recipe to share. Since she was handling the dinner, she asked if I could make a dessert. Our friend Lisa was avoiding sweets. So how do you make a non sweet dessert? Fruit to the rescue. I was banking that it’s own natural sweetness would do the trick.

I did cheat ever so slightly by adding homemade strawberry jam that I reduced down with orange juice and zest to intensify the flavor. But nothing else had added sugar.

I wasn’t actually looking for an easy dessert to make but this one somehow ended up being pretty easy. The only baking portion was the puff pastry shell. Everything else was pretty much assembly.

Photos first, recipe follows.

Whip a heavy cream. Traditionally, powdered sugar is added for sweetness. Not here. I only added orange zest to brighten the flavor.

Whip a heavy cream. Traditionally, powdered sugar is added for sweetness. Not here. I only added orange zest to brighten the flavor.

The puff pastry has a buttery flavor that adds richness to the overall dessert. Spreading just a small amount of strawberry jam gives another layer of flavor, and a tart and sweet component.

The puff pastry has a buttery flavor that adds richness to the overall dessert. Spreading just a small amount of strawberry jam gives another layer of flavor, and a tart and sweet component.

Fluffy and light, the non-sweetened mix of whipped cream and mascarpone makes it luxurious and not heavy at all.

Fluffy and light, the non-sweetened mix of whipped cream and mascarpone makes it luxurious and not heavy at all.

Spread it out and fill it to the top. See all the orange zest flecks. I do believe these added a fresh, brightness to the cream mixture.

Spread it out and fill it to the top. See all the orange zest flecks. I do believe these added a fresh, brightness to the cream mixture.

Make it pretty. One thing about simple desserts is that it should be visually appealing. Decide on a design, then make it gorgeous!

Make it pretty. One thing about simple desserts is that it should be visually appealing. Decide on a design, then make it gorgeous!

You can use any fruit you like. These were the ones that were readily available and work well together. Plus the colors play nicely, and that always helps making a dish look more appealing.

Ingredients

Puff Pastry sheet
1 1/2 c Mascarpone Cheese
1 pint Heavy Cream
1 Qt Strawberries
2 c Blackberries
1.5 c Raspberries
1/3 c Strawberry Jam
Juice of an Orange & Zest

Instructions

  1. Roll out a puff pastry sheet large enough to fit a 10” pastry pan with removable bottom. Once placed in the pan, use the rolling pin to cut a clean edge of pastry.

  2. Blind bake* the shell until completely cooked. Then set aside to cool

  3. While the shell is baking, simmer the strawberry jam with 2 T of juice of orange & 2 t zest, reducing until thick. Set aside and let cool.

  4. Whip the full pint of heavy cream until stiff peaks. Remove half and reserve for extra topping.

  5. Using a spatula, gently fold in the mascarpone cheese, orange zest and blend until combined. Do not over mix in order to not deflate the whipped cream.

  6. Spread a thin layer of the jam on the bottom of the pie crust.

  7. Fill with the cream mixture.

  8. Cut the strawberries and arrange all along the outer edge. Then fill in with the rest of the fruit.

  9. Add mint leaves for decoration as well as a refreshing addition. Serve with more whipped cream

*Blind baking: Baking a crust without the filing. Some bakers use tin foil filled with dried beans, rice or baking weights to weigh the pastry down. I simply use tin foil and smaller baking pan on top.

Note: When I rolled out the pastry dough there will be left over pieces. I decided to use a small leaf shaped cookie cutter to create little decorations. I baked them at the same time as the crust, then used them in the final decorations. I added cream on one side to adhere them to the pie then topped them with jam to make them look like strawberries. Sprigs of mint not only added a pop of color but acted as the leaves to the faux strawberries.

final.pie2.jpg

This was a huge hit meeting the task of providing a dessert while also being refreshing and Not Sweet. Granted this was not gluten free but it served the purpose while also putting big smiles on everyone’s faces.

Cream Cheese Cake... I Mean Pie

final.pie.jpg

Have you ever had a dessert that was so yummy it formed a mental flavor print in your mind? So much so that when someone even mentions it your taste buds start screaming?  I have witnessed this effect whenever my mom has suggested that she make her cream cheese cake.  Which really isn't a cake at all, but a pie. Yet calling it a cheese pie just sounds weird.  Whatever the name, this dessert is like Kryptonite for some people.  Just push it near them and they begin to quiver.  Place a slice in front of them and they turn to mush.  

Over the past several decades my mom has gained legions of fans as she baked this simple, delightful dessert for a variety of different occasions.  Always being a staple on her Thanksgiving dessert menu.  So with that calorie laden holiday steaming down the highway, I wanted to share this super... and I mean super easy recipe with you.  Mind you, I have no idea where from where this recipe emerged.  I only know that she and my family have been making it for quite some time.  It's now one of those desserts that my friends ask if my mom or I will be making.  A while back, a friend who has a catering company enjoyed a slice at one of my parties.  Upon tasting it, she hired me to make this dessert among some of my other baked goods for her one of her clients. 

This 'pie' isn't that light fluffy cheese interior of a cake, but instead offers up a rich dense filling topped with a sour cream glaze.  It's creamy and velvety, and you are gonna want a second pie.  So maybe double the recipe below.  One for your guests, and keep one for yourself! 


So simple. It has but a few ingredients

So simple. It has but a few ingredients

Ingredients

For the pie filling:
12 oz. cream cheese
2 eggs, large
3/4 c sugar
1/2 t vanilla
9" Graham cracker crust
(Make your own or buy a pre-made version)

For the topping:
1 cup sour cream **
1 T sugar
1/2 t vanilla

**The original recipe calls for 8 oz sour cream which will give you a thin layer atop the pie.  If you like the tangy flavor, then use the 1 pint version.  It will give you a layer as thick as the layer of cheese.


Instructions

  1. In a food processor, or with a hand mixer, beat together the cream cheese, eggs, sugar, vanilla until smooth and all combined. (Note: It helps if the cream cheese is room temperature.)

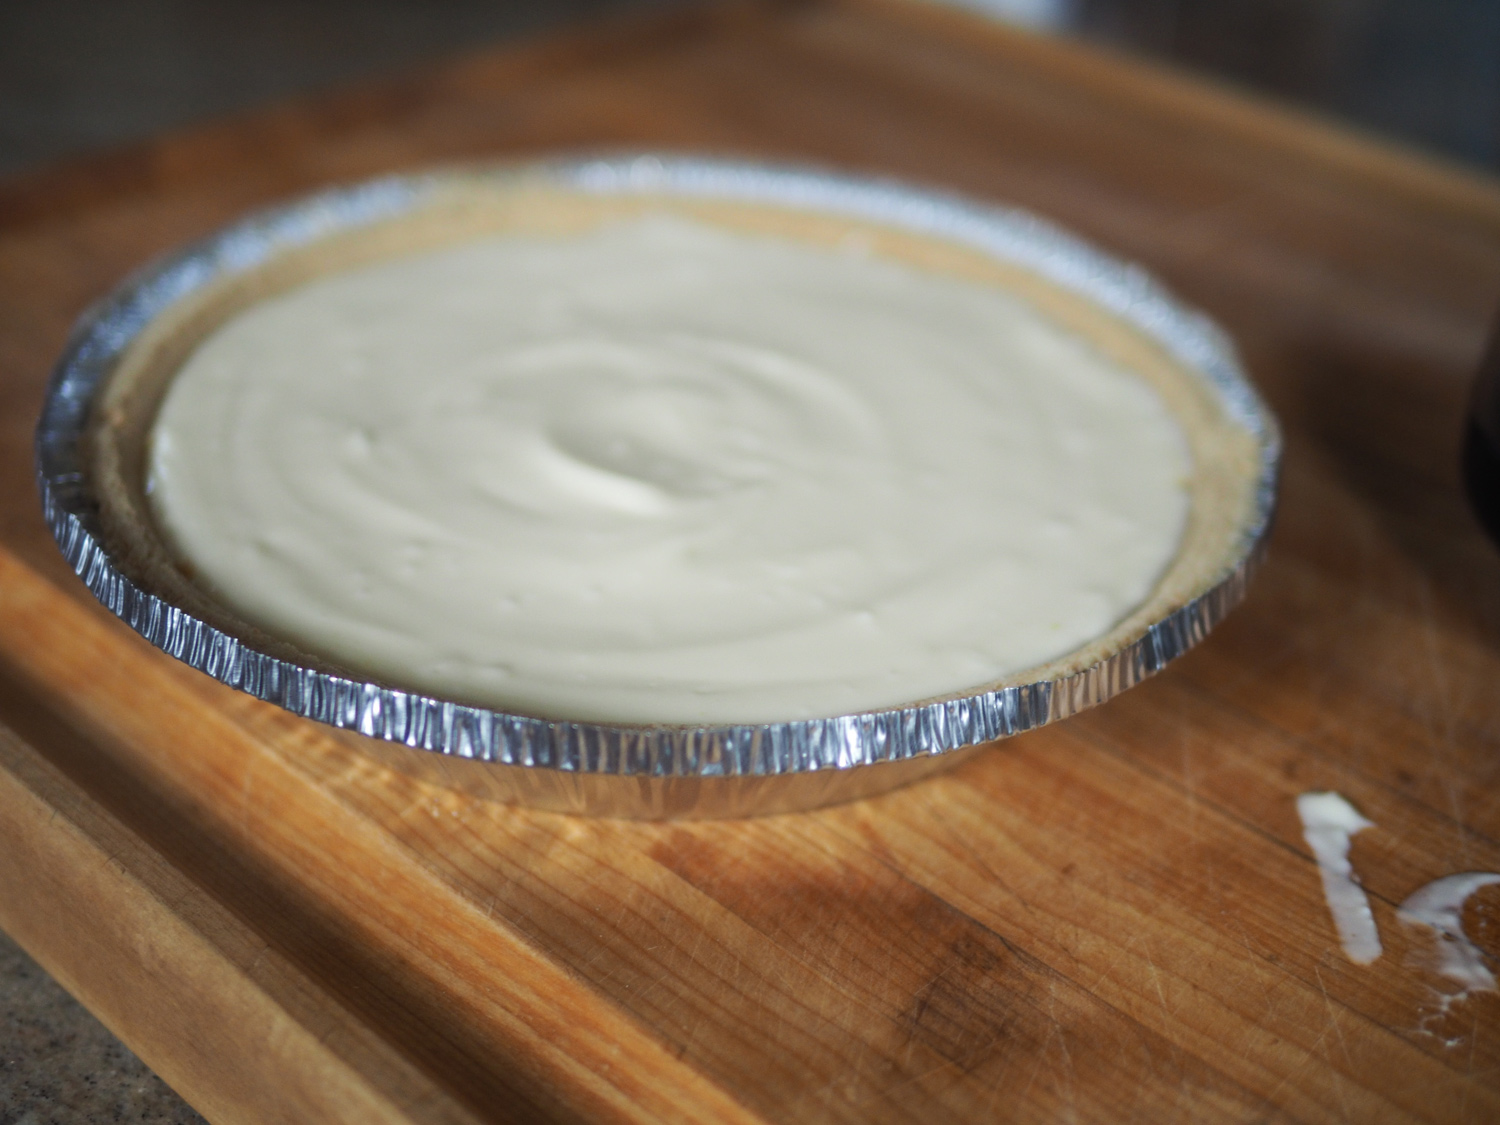
2. Fill the graham cracker crust with the cream cheese filling and smooth out to create an even surface. Bake at 350 degrees for 35-40 minutes or until the center is fully cooked. Check by piercing the center with a toothpick.  If it comes out clean, the pie is done.

filling.jpg
pie.filled2.jpg

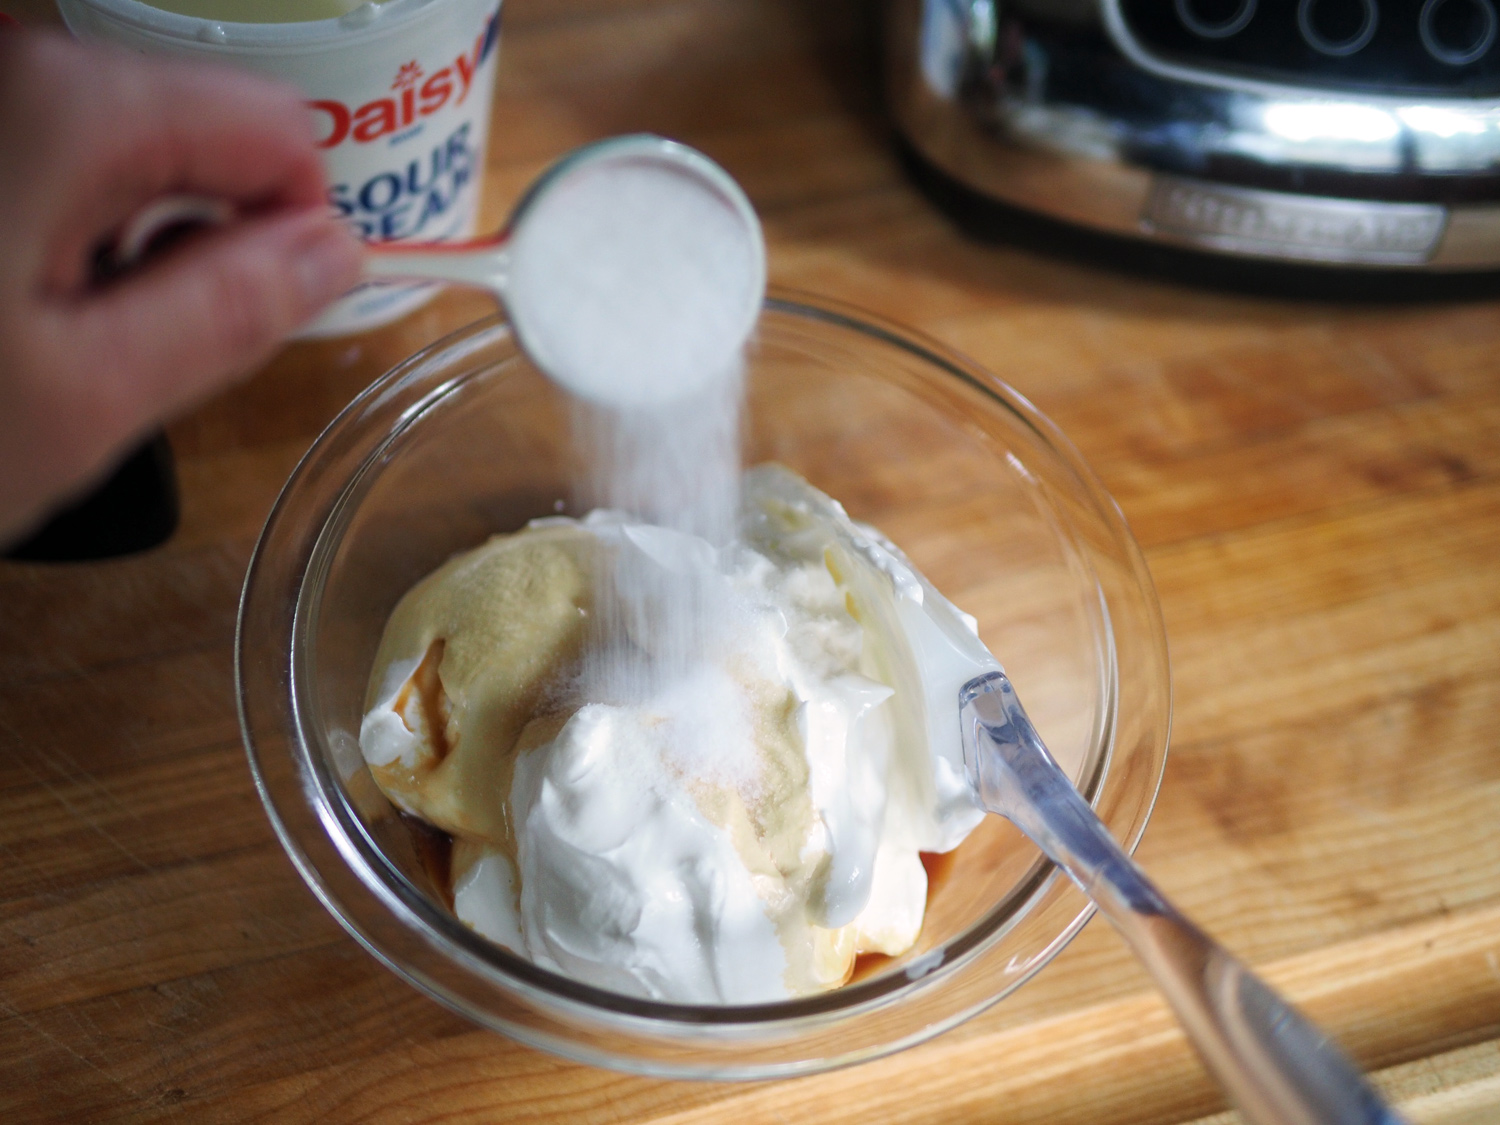
3. While the pie is baking, combine the topping ingredients together and stir until well incorporated.

make.icing.jpg
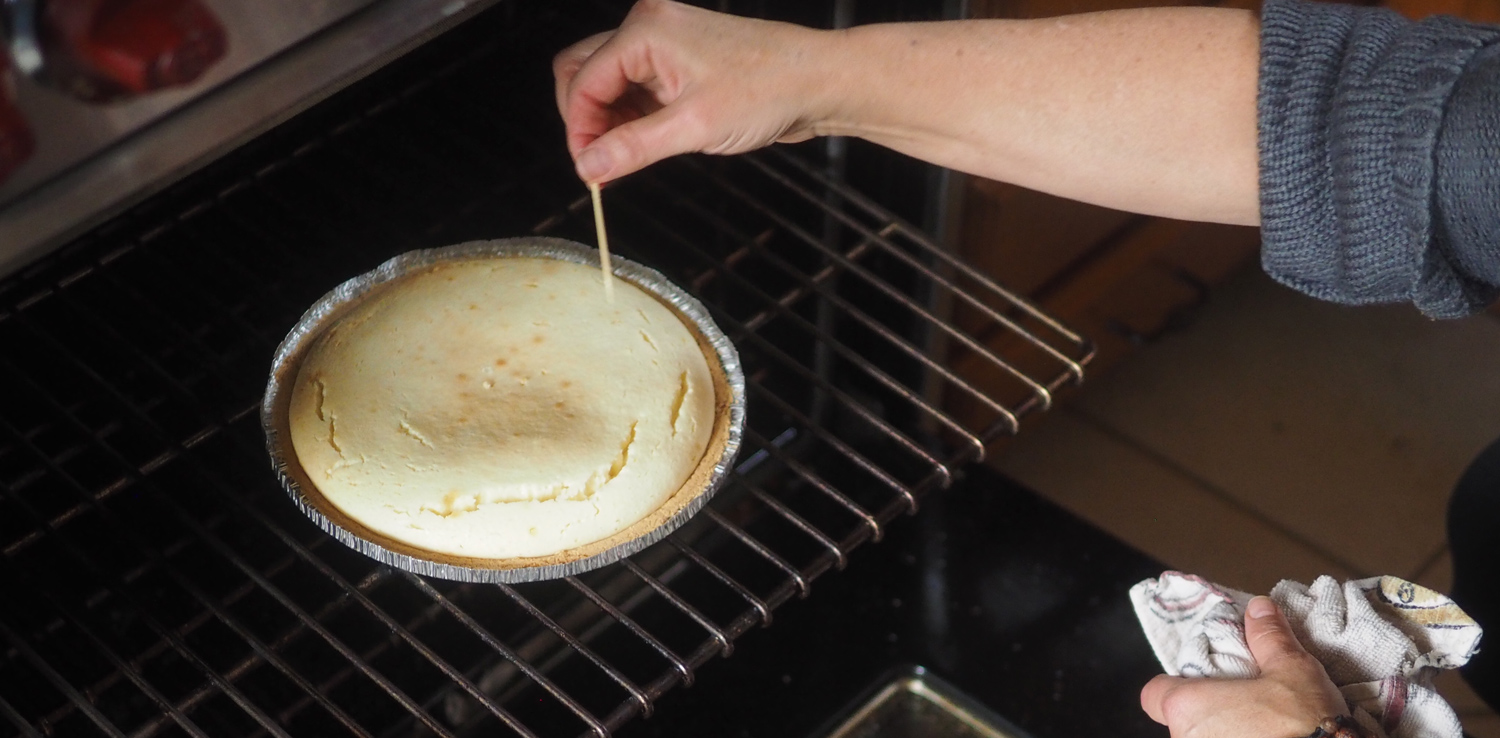
Check your pie doneness by piercing the middle with a toothpick. When it comes out clean, it's ready for the topping. Photo credit: Rob Perri

Check your pie doneness by piercing the middle with a toothpick. When it comes out clean, it's ready for the topping. Photo credit: Rob Perri

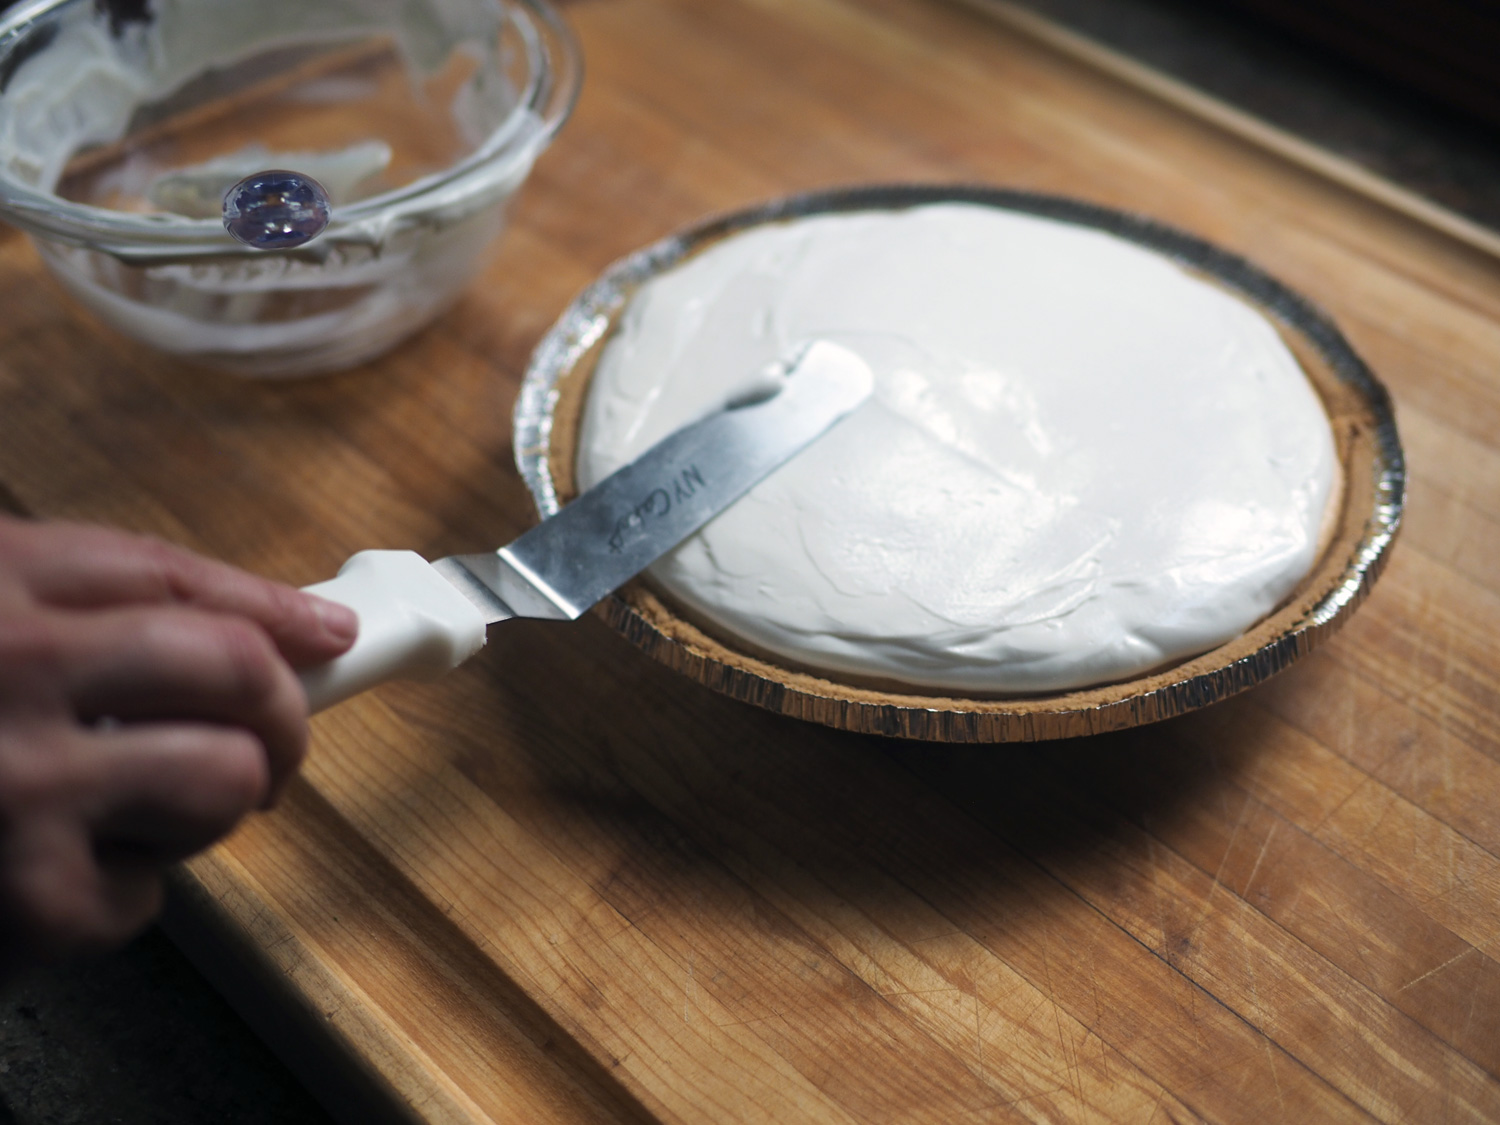
4. Once the pie is done, let cool slightly then pour the topping onto the pie. Using an offset spatula or even flat butter knife, spread and smooth the sour cream topping over the entire top, completely covering the cream cheese filling.

That's a whole lotta LOVE right there by way of falling fluffy goodness. Photo credit: Rob Perri

That's a whole lotta LOVE right there by way of falling fluffy goodness. Photo credit: Rob Perri

Photo credit: Rob Perri

Photo credit: Rob Perri

Photo credit: Rob Perri

Photo credit: Rob Perri

5. Then place the pie back in the oven for another 5-7 minutes, just until the topping sets.  Remove and let cool.

This pie has crunch, tart, sweet and tang.  How many dessert can deliver on all that? Even though I've shown a lot of photos, this pie is but a few easy steps. Mix, fill, bake. Top, bake, eat! 
So, if you are hosting, adding this dessert to your menu will not add stress in the least.  (And it can be made well in advance.)  And if you are a guest, volunteer to bring dessert.  You will definitely be invited back and requested to bring this decadent cheese cake again.  I mean pie!

Happy Sweet Tooth.

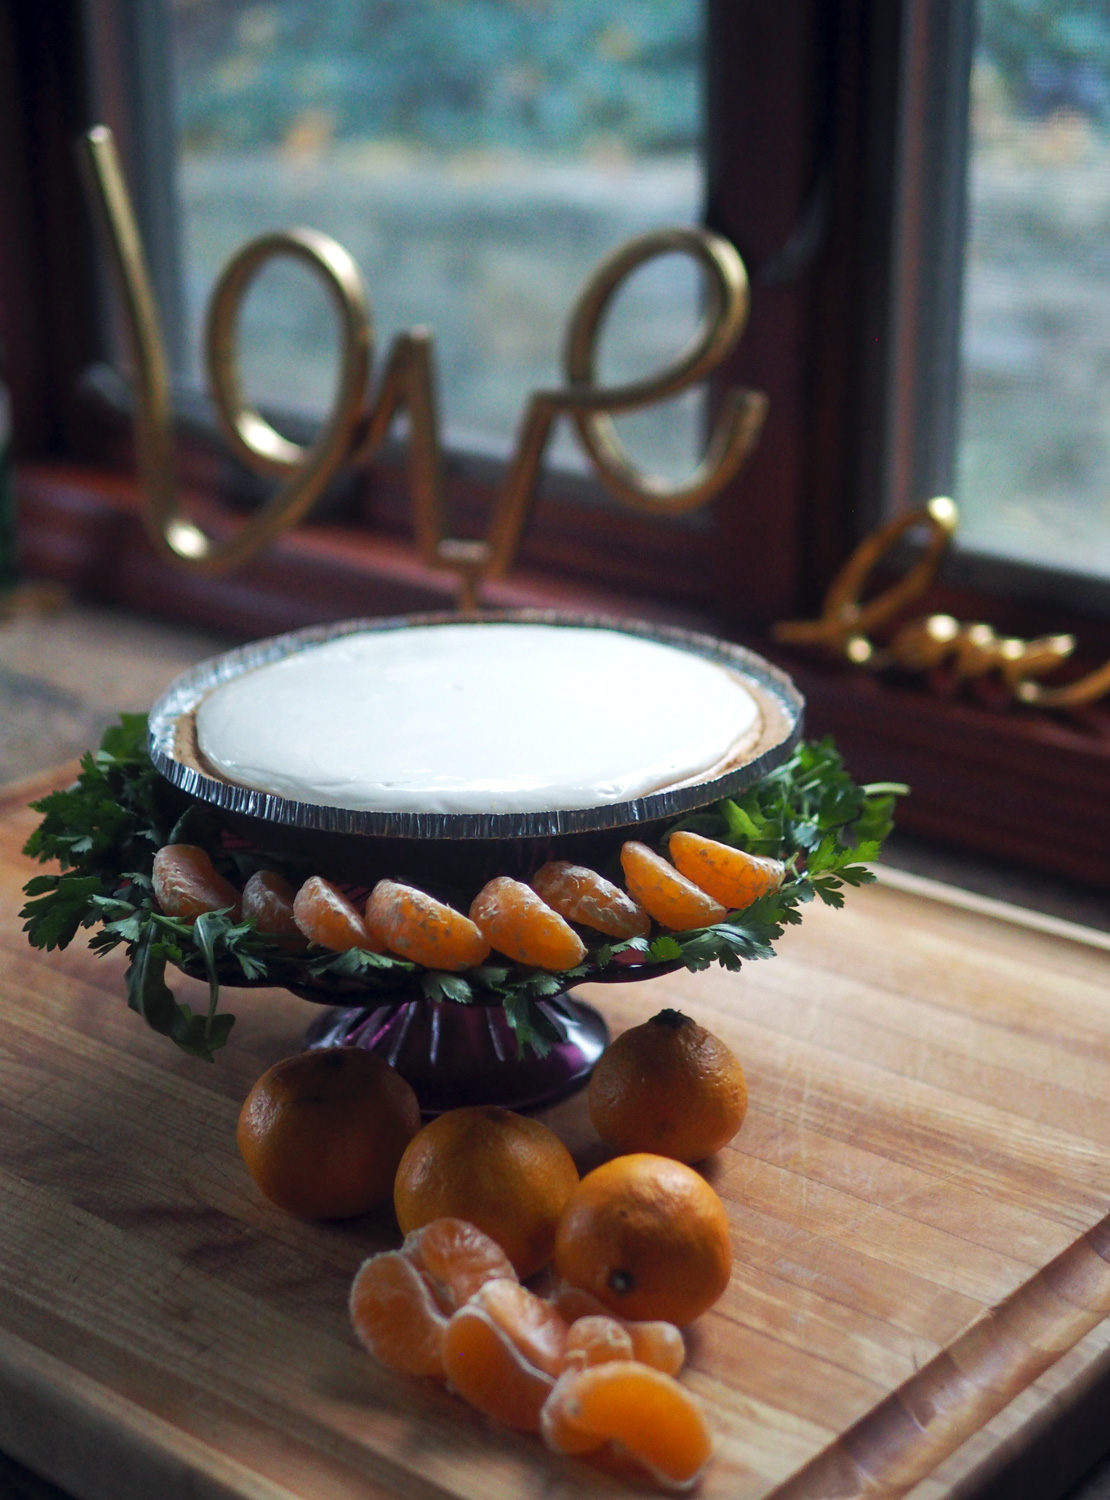
Since I used a store bought pie shell in a tin I felt the final presentation needed a little fancy schmancy. Using some parsley greens and tangerines tucked around a cake stand upped the 'pretty factor', giving it that holiday theme color pop. Pleas…

Since I used a store bought pie shell in a tin I felt the final presentation needed a little fancy schmancy. Using some parsley greens and tangerines tucked around a cake stand upped the 'pretty factor', giving it that holiday theme color pop. Please don't stress out thinking you need to fancy up this dessert. If it's not your thing, just slice it up. That said, go ahead and try copying my idea and build your confidence with styling. There's nothing wrong with imitation. Or find your own way to stylize your final presentation.

Sequillos - An Asturian Cookie of Love

cookie.final.jpg

We love to travel, and try to do it as often as possible.  We love exploring the sights, sounds and flavors of places that are full of life.  We recently returned from a 12 day trek through the northern part of Spain. What a glorious part of the country. Mountainous and green.  Fresh air and beauty abound. The views are more spectacular than any lens can capture, but I did my best.  And in those 12 days, we saw, did and tasted a lot but there is still so much more to see, do and taste. We thoroughly enjoyed every inch of our tour through the north. However, the absolute, truly most special part of this trip was when we stayed with our dear friends, Marcos and Angelica in Marcos' hometown of Amieva, Asturias.  What an enormous treat.  An adventure like no other.   

Beauty which ever way you turn.

Beauty which ever way you turn.

This tiny town of 200 people is tucked away high in the mountains and provides picturesque views from every angle. I promise I will be writing more about our entire trip and the special time at their home and all the unbelievably delicious food we were treated to. Today I want to focus on a simple little cookie that grabbed my husband's heart.  And when something grabs hold of him that he enjoys, I do what I can to ensure he gets grabbed again.  Knowing how much he loved eating these tiny bite sized treats with his espresso, I asked Marisa, a local to the town and chef of the house, to fork over the recipe. As with everything she did, she did so with "alegria”.

Sofia looking on as Maria sifts the flour and Marisa mixes the dough.

Sofia looking on as Maria sifts the flour and Marisa mixes the dough.

These cookies couldn't be easier to make. Much less work than any of the more labor intensive cookies I bake for Christmas. So, here it is.  From Marisa in Amieva, Asturias to me in Hartsdale, NY to you, wherever you may be.

I snapped a few shots of the lovely María and Marisa making yet another batch since every time they made them, these not too sweet but really satisfying cookies disappeared.

(That's something I loved about the style of living there.  It was no big deal to just whip up another batch of anything.  No worries...we'll make more!)

A tiny side note; another thing I loved about the original house -  the big kitchen. I loved how everyone was in it. Making stuff, prepping stuff, snacking, drinking and chatting.  Oh, if only I had a kitchen this big and ample to gather all my loved ones.  This tugged at my heart every time I stepped into it.

kitchen.table.jpg
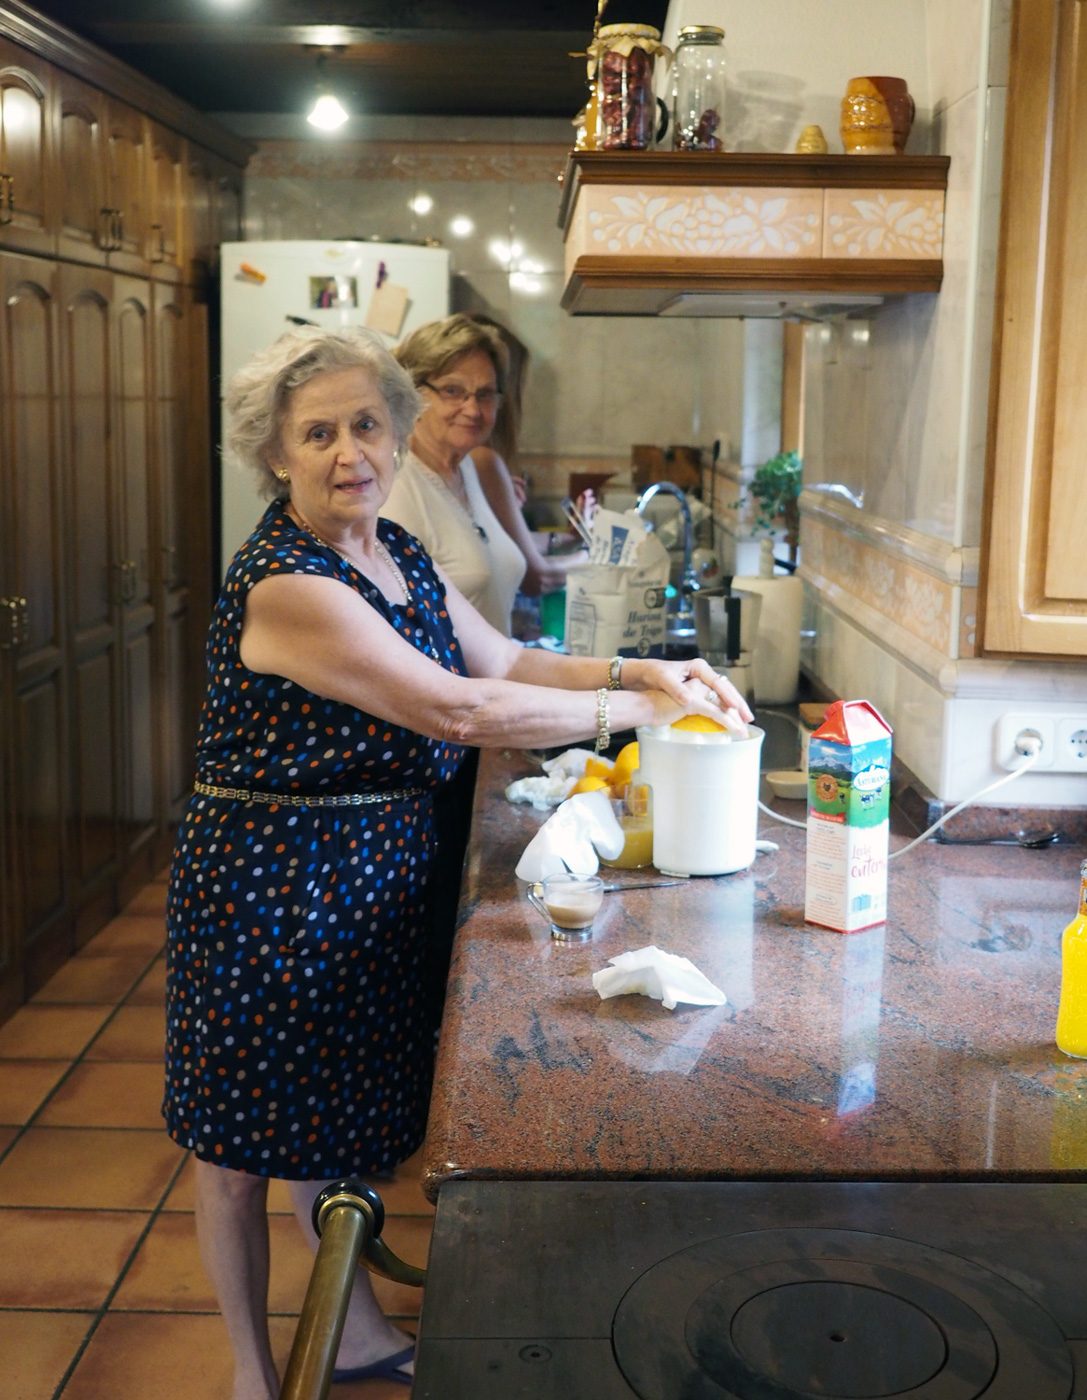
Maxi and Sofia making fresh orange juice while the sequillos are being made further down this long kitchen work space

Maxi and Sofia making fresh orange juice while the sequillos are being made further down this long kitchen work space

A dream of a space where everyone could wander in, sit down or participate in the festivities.  I can dream, can't I?

Back to Marisa's setup and making of the cookies.

Marisa's set up in Amieva.

Marisa's set up in Amieva.

Sifting the flour.

Sifting the flour.

flour.sifting.jpg
 

And now the details of how to make them.

setup.jpg

ingredients

600 gr sifted flour
2 eggs
250 gr  sugar
250 gr butter, melted
1 tsp salt
1 tsp heaping baking powder
5 T Anís or Anisette
(I used Vermouth because it was all I had.)


Instructions

In a large mixing bowl, add all the dry ingredients and make a hole in the middle. Then add eggs, (cooled) melted butter and Anís in the middle.  Begin to combine all ingredients together until it forms a dough. Taking small pieces, form a round shape (approximately 1.5" w x 1/2" thick) and place in tiny cupcake papers to make them the traditional way.  

My dough

My dough

Marisa's cute little cookies in cupcake holders.

Marisa's cute little cookies in cupcake holders.

Since I like finding ways that are not only efficient, time saving but help make each one look consistent, I rolled the dough out and used a cookie cutter.  However, I should have made them thicker like Marisa's. So, definitely make yours at least 1/2" thickness. (Not as thin as mine below.)

cookie.cutter.jpg

If you are using the cupcake papers, just place them on a baking sheet.  If not, then line the baking sheet with parchment paper and place each cookie at least 1" apart.  Bake at 350 degrees for approximately 25 minutes.

on.the.tray.jpg
Mine, a bit flatter, wider but still tasty.

Mine, a bit flatter, wider but still tasty.

Marisa's, gorgeous, chunkier ones.

Marisa's, gorgeous, chunkier ones.

Once they cool down, place them on cute plate or stack up on cake stand.  Well, the serving device might not matter because they may not last long before you need to make another batch.  

cookies.pieplate.jpg
CU.cookie.jpg

Thanks to Marcos and Angelica for sharing the joys of their home, family, friends and traditions with us.  So I could bring this little treasure back for you from the mountain tops of Spain. The simple but delicious, simply delicious Sequillos. Que disfruten!  (Enjoy!)

mountains2.jpg

5 Quick, No Bake Desserts - In a Pinch

static1.squarespace.jpg

I realize that this title will come as a shock to those of you who know how much I love to bake, but sometimes I need a dessert in a pinch.  If I've got 5, 6 or even more appetizers to make, plus the meal; well dessert just ends up getting the short end of the stick.  With these 5 fast and easy assemble desserts, you don't have to stress about making sure there is something sweet and appealing after your meal.  Plus a few of these can easily be brought as a dessert offering when you are the one asked to bring something sweet.


Fresh Ricotta with Figs, Peaches & Honey

There is nothing as simple as assembling items on a board or platter.  


This sweet and savory offering is just that kind of dish.  Arrange seasonal fruits, like figs & peaches for the summer, on a pretty plate or a wooden board. Fill a bowl with fresh ricotta & drizzle with honey.  It's just that simple. You can toss some nuts in if you like, but for the sheer simplicity of this dish, it's not necessary.  Let the purity of these vibrant flavors speak for themselves.  The creaminess of the ricotta against the nature sweetness of the fruit with that extra sweetness from the honey is soothing combination.


Chocolate Dipped Fruit

chocolate.dipped.fruit2.jpg

This one might take a tad more effort but not much more.  Use the fruit of your choice or the ones in season.  I had raspberries, blackberries and bananas on hand.  Dip each piece in melted dark chocolate and let cool on parchment paper.  You can roll them in crushed nuts or coconut to ratchet it up a notch.  Then arrange on a plate and watch these fly faster than they took to make.  Believe it or not, these little 'pop in your mouth' treats are so pretty that they will make an "ohh' statement on your dessert table.  So easy enough to make, you can get your kids to help.


Cheese Course

Cheeses with strawberries, grapes, mini bread sticks and Tortas de Aceite (Sweet Olive Oil Crackers).

Cheeses with strawberries, grapes, mini bread sticks and Tortas de Aceite (Sweet Olive Oil Crackers).

Blue cheese (such as Cabrales, Valdeon, Stilton or Gorgonzola). Add nuts, date loaf, figs in syrup, oranges.

Blue cheese (such as Cabrales, Valdeon, Stilton or Gorgonzola). Add nuts, date loaf, figs in syrup, oranges.

Ok, this is not my idea, of course, but more of a reminder in case this option was misplaced in the memory banks. Instead of serving cheese as part of your appetizers, save it for dessert and do it the French and Italian way. Enjoy it after the meal.

Fresh Fruit Lovingly bound by Chocolate

This colorful, flavorful option is similar to but slightly different to the above chocolate dipped fruit.  Instead of individual chocolate coated fruits, this version creates a bed of chocolate for the fresh fruit, nuts and sea salt to lie gently atop.  I made this on just such an occasion when I didn't have time but wanted to serve a dessert after lunch.  It was better than I thought and served the purpose beautifully.   I already had a chocolate ganache in the fridge. (Ganache is just chocolate with a tad of cream added to it.  This keeps it from getting completely hard and makes it pourable to glaze a cake or drizzle. I liked using the ganache for this version because once I refrigerated it, it became hard enough to hold the fruit together but still had a softness that added to the yumminess. A result I didn't quite realize would occur. 

Spread the ganache on parchment. Not too thin.

Spread the ganache on parchment. Not too thin.

Lovingly place the fruit in a visual manner that pleases your eye and your belly. Add nuts and sprinkle with course sea salt.

Lovingly place the fruit in a visual manner that pleases your eye and your belly. Add nuts and sprinkle with course sea salt.


Chocolate Bark

If you don't happen to have fresh fruit, then go the traditional chocolate bark route.  This version does not use ganache.  It is pure chocolate melted down.  I use a combo of dark chocolate and semi-sweet chocolate. Spread the melted mixture onto a baking sheet covered in parchment paper.  Then top with whatever suits your fancy.  I like cashews, dried apricots & dried cherries plus a healthy sprinkling of course sea salt.  That really makes the chocolate sing. Refrigerate until solid, then cut or break into shards.  No brainer of sheer joy. 


I hope these ideas provide you a few quick, easy but delicious desserts to have in your back pocket when you are in a pinch.  I promise you, your guests will not miss the cake or pie or any other more labor intensive sweet.