I recently had the awesome opportunity to work as an intern in the prep kitchen for a James Beard Award winning restaurant group. I know, pinch me, I’m a lucky woman. I will definitely write more about that experience, and share some of the many pastry items I made, but first since it’s summer, let’s start with ice cream. I made several ice creams during my 4 week residency. Two of my absolute favorites were Popcorn Ice Cream. Yes, you read that correctly. And Espresso Ice Cream. Both were made using a traditional cream base then whisking in egg yolks, cooking them to temperature, then using an ice cream machine. Velvety smooth result.
Since I don’t have one of those big hunky things in my home, I searched for easier ways to bring home the flavor, and make my hubby happy. He loves ice cream, and devoured both those flavors when I brought home samples.
In researching homemade methods, it seems that without using an ice cream machine, most recipes eliminate the yolks. Just as well. No yolks. No stress. Without the eggs, the whole process is much easier, since tempering the eggs, then cooking them slowly is a lengthy and delicate process. In a split second you can end up with scrambled eggs. (Although, then you would have a complete breakfast - espresso right inside your scrambled eggs.)
A no egg ice cream is just as yummy and 10 times easier. I think we can all agree that making our lives simpler is a good thing. Believe me when I say, I am always looking for more efficient ways to do anything. (As a matter of fact, during my time in the kitchen there, I came up with a different ways to punch donuts. And they were gracious enough to let me reorganized the menu books. Reorganized the utensil and gadget areas. And were open to a suggestion on assembling the coconut cakes. I am an efficiency junky.) So, let's get right to making this eye opening Espresso Ice Cream, shall we? Just in time for the 4th of July weekend.
Ingredients
2.5 c whole milk
4 c heavy cream
1 c sugar
1 t vanilla
4 T instant espresso , diluted
pinch salt

But a few ingredients, and all mixed together. You can't get easier than that, my friends.
Instructions
Mix all the ingredients in a mixer. Whisk until combined. I diluted the espresso powder with a couple tablespoons of warm water.

Pour in the cream and milk

Sugar

Espresso and vanilla.

Whisk it all together. Seems silly to show you but I have a thing for telling a story with images.
For the next step, there are a few different methods to get it to soft ice cream state. Some people eat the ice cream at that stage. It seemed a bit too soupy for me. Mine went into freezer so the mixture to get to a harder consistency. I split my batch into two so I could use two methods for comparison. (Experimentation is hard work but I'm willing to do it for you to bring the best results. Who I am kidding? The end result was ice cream!!)
Shake Until Your Arms Scream Method:
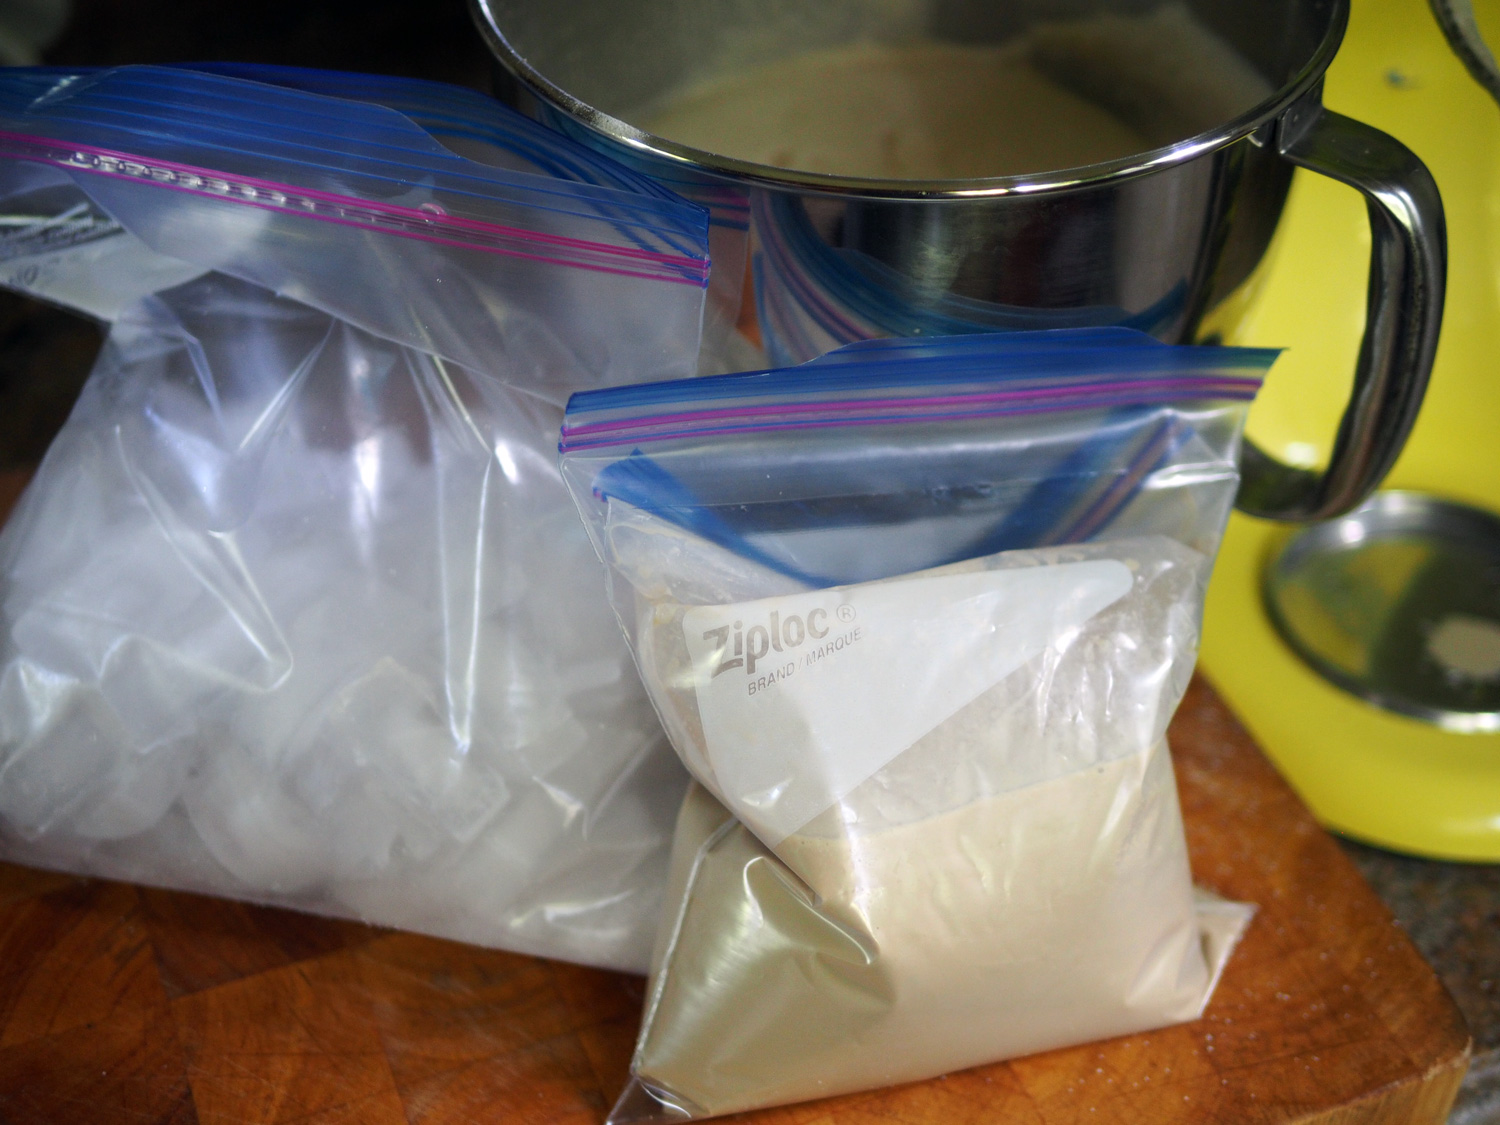
The first method I used was the plastic bag method. I poured the liquid in a quart plastic bag, and doubled the bag to prevent leakage. Then placed that bag into a gallon plastic bag with 4 T coarse salt and 4 cups of ice cubes. Sealed and vigorously shook it for 10 minutes. This was a work out for sure. I never knew how long 10 minutes lasted until my arms screamed out, "Is it ice cream, YET?" Once thickened, I poured the semi soft ice cream into a container and placed in the freezer to allow it to harden more.
That version seemed tiring, so I was thrilled that the other method was much less strenuous.
The Lazy, Just Freeze It Method:
I continued to whisk the mixture until it thickened. Then I place it in a glass loaf pan with plastic wrap covering the surface to prevent freezer burn. Then surrounded by ice and placed in the freezer. My arms thanked me. However, I forgot to continue to mix it every 1/2 hour or so as was suggested, but it seemed to freeze up just fine. So this is truly the lazy way, all benefits version.
Here are a few videos for you to watch.
In the end, everyone seemed to love both versions. So you pick.
Work out with benefits.
Or straight up benefits.
Either way, this ice cream will get you raring to go. Other huge benefit ...bringing joy to your loved ones. I know it did mine.

JuanCarlos trying to eat with moderation.

Espresso ice cream scoops
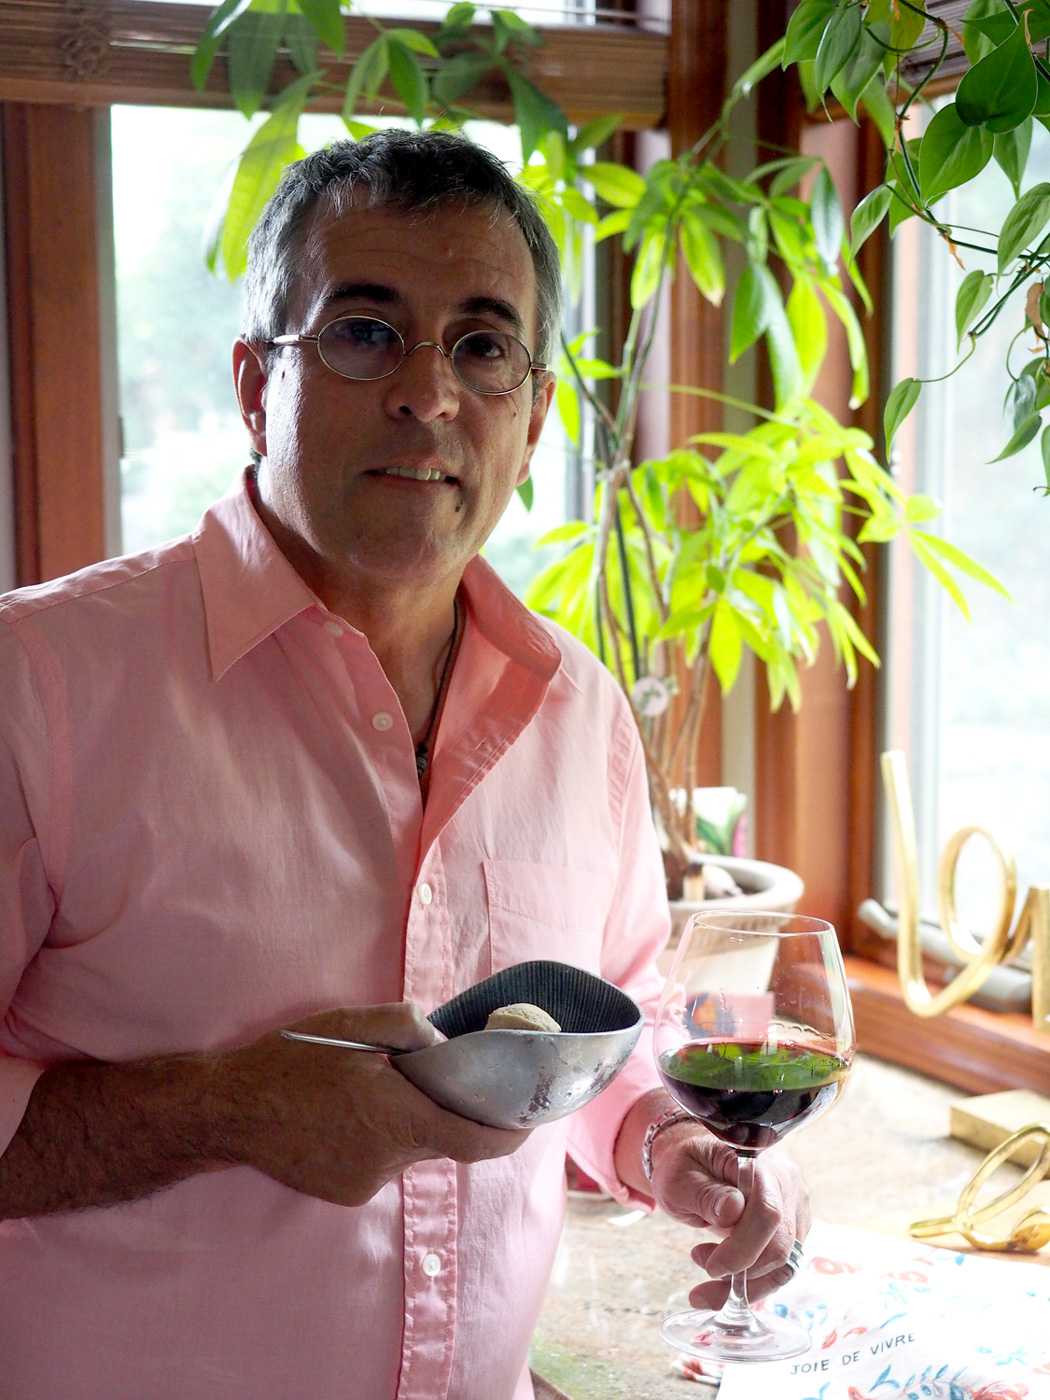
My handsome husband enjoying a bowl of espresso ice cream with his other latest favorite, red wine from Châteauneuf-du-Pape.
Happy 4th, and summertime fun!