Rose-colored Salad with Roasted Beets & Goat Cheese

Years ago I happened upon the stunning pink lettuces known as Millennial Pink or Radicchio La Rosa del Veneto. Back then I created a Pretty in Pink Salad for Easter dinner that had a fair amount of ingredients. After talking to some readers recently, I found out that they wanted simpler recipes* so I decided to create a scaled down version of that salad and test it out for small dinner party. And since it’s almost Easter again, I figured that this edition of the pink salad might be an easier one to pull off for your Easter holiday meal.

*Side note: Given this valuable feedback (which I greatly appreciate) I will be posting some super easy, weeknight meals. It didn’t occur to me to provide simpler meals as I figured they might seem like obvious combos or too simple to warrant a post. But I have since learned that they are helpful. More to come soon.

Back to rose colored lettuces.

There is something about the color of these leaves that grabs me every time. The look and feel is soft and delicate. It makes me feel like I should be hosting an elegant tea party with fussy floral plates. Since the flavor is quite subtle, pairing it with the sturdier structure and definitively more bitter tones of radicchio creates a nice balance. I will admit that these lettuces are not easy to find. Traditional grocery stores probably will not carry them. Since they are from the radicchio family, Italian Specialty markets carry them, which is where I buy mine.

As I mentioned this was being tested out for a dinner party with our friends, Tecla and Scott, up at our country house. Since I knew Juancarlos and I had plans most of the day before their arrival, prep was key in being able to get the meal to the table without too much fuss. This turned out to be a great make ahead, and assemble later salad.

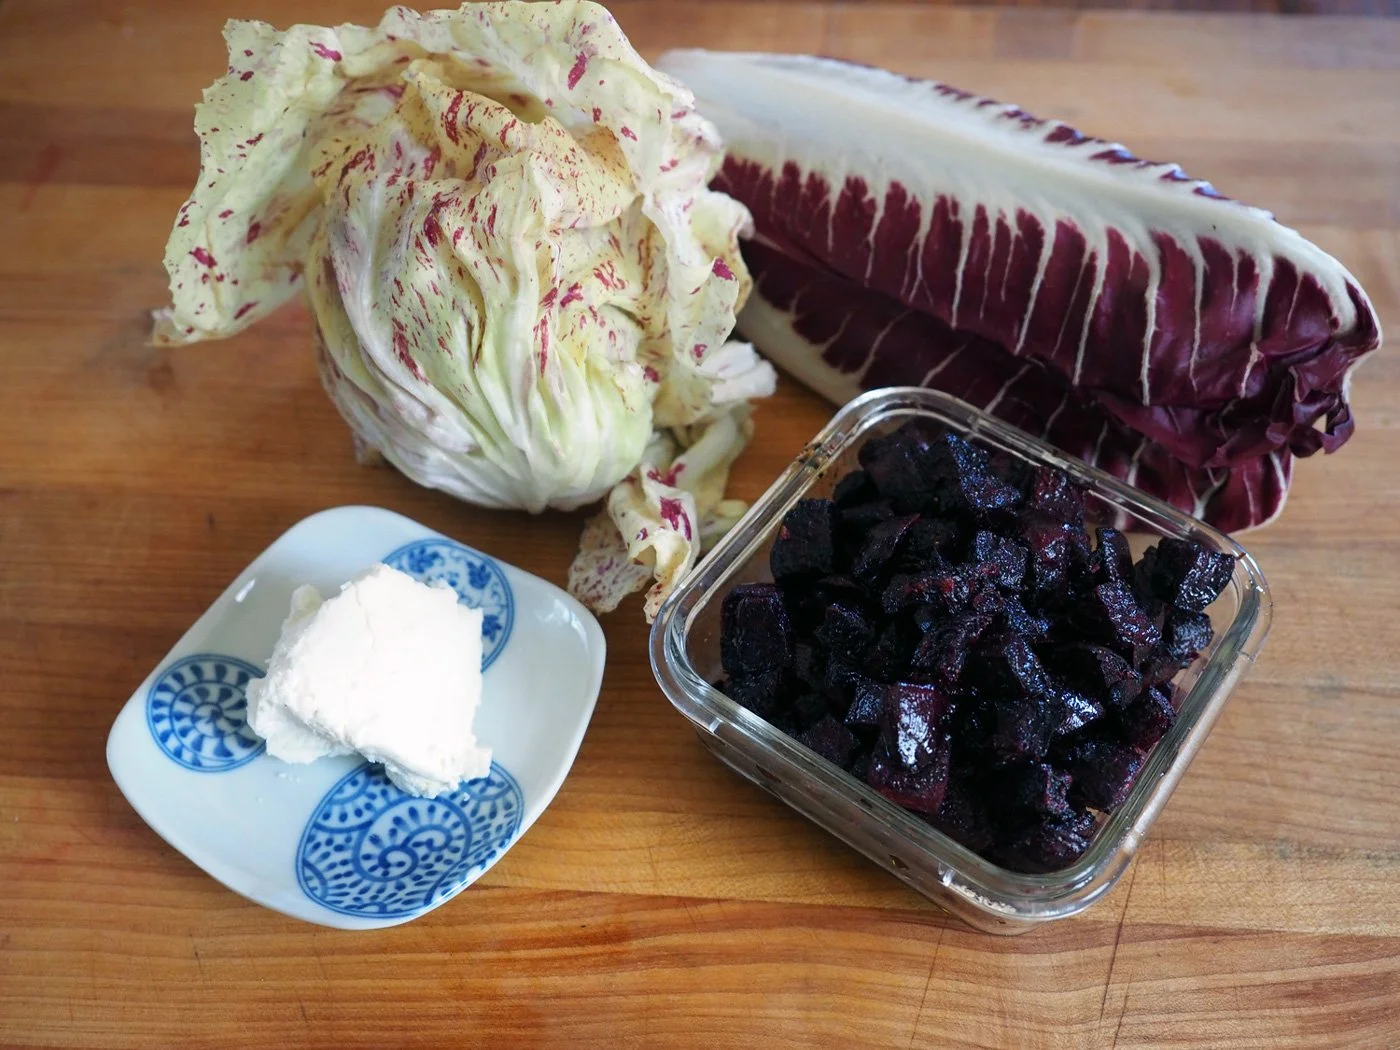
The Main Ingredients: Pink Lettuce, Radicchio, Beets, Goat Cheese

Ingredients

Serving 4
4 medium Red Beets (I figured 1 beet/person)
1 head of Pink Lettuce
1 head Radicchio
1 small shallot
1/2 tsp each of Thyme
1/4 tsp each of Salt & Pepper
Oil
Goat Cheese, I used about 2 tbsp/person

Dressing
1/2 c Oil
2 Tbsp Red Wine Vinegar
2 tsp Whole grain Mustard
3-4 Tbsp Lemon Juice
Salt, Pepper

Instructions

  1. Peel and cut the beets into small chunks. I recommend wearing gloves when preparing beets as they easily stain hands, clothes and anything they touch.

  2. In a bowl, combine the dry spices and oil, whisk and add the beets to coat.

3. Place the beets on a baking sheet and roast at 425 degrees until lightly browned and tender. Set aside. (You can make these a day ahead and store in container in the fridge.)

4. Cut 1/2” thick rounds off the end of the radicchio and secure with a toothpick. Chop the remaining radicchio into shreds. (If you are preparing this ahead of time, place in a container with a dry paper towel on top, or wrap with paper towel and place in plastic bag until time of assembly)

Side note: It occurred to me that it would be easier to place the toothpicks into the radicchio first, then cut rounds. Work smarter.

Beautiful long radicchio

Radicchio slices, ready to be skewered

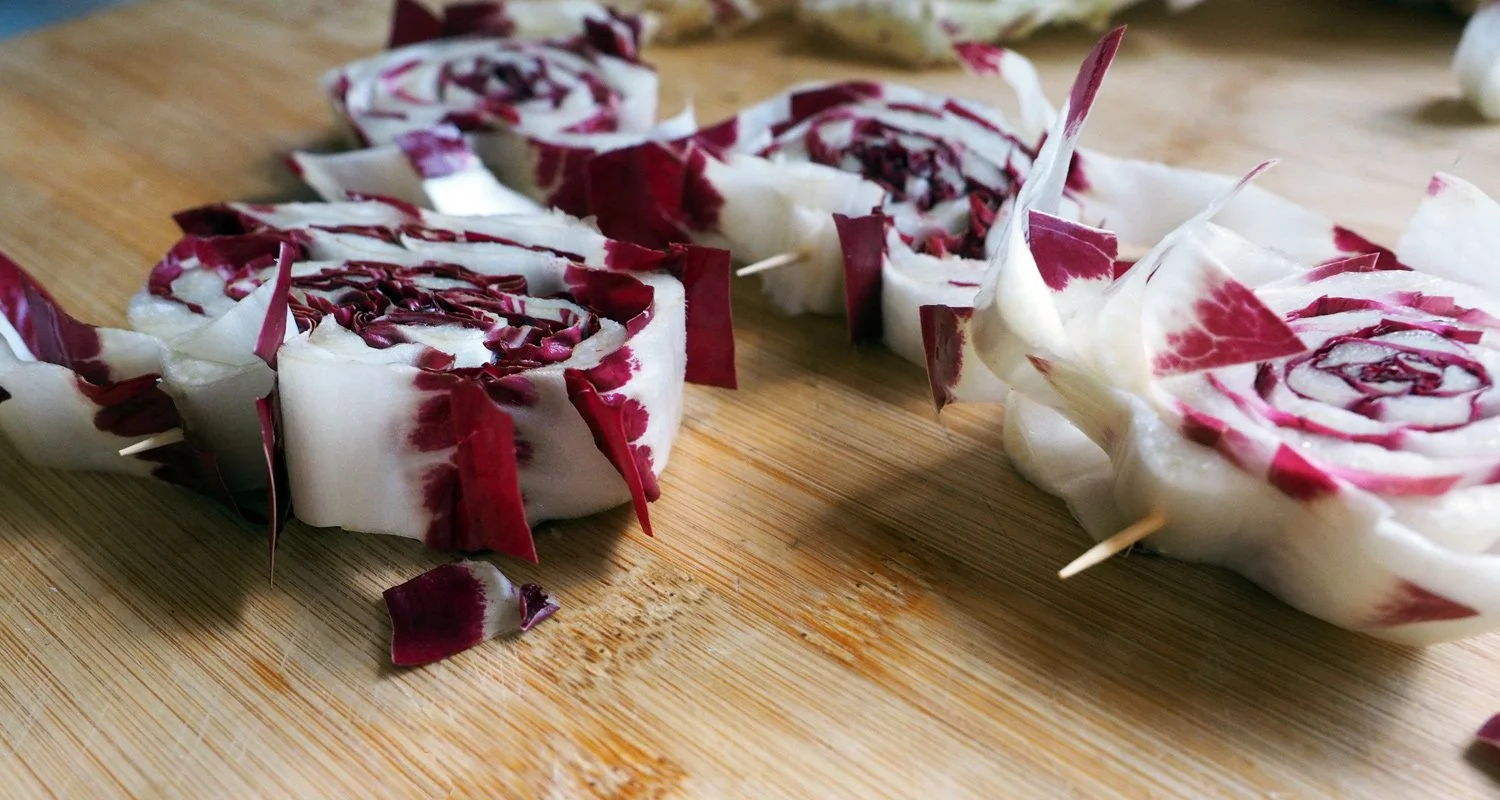
Place the toothpick through the middle to hold the leaves together.

5. While the beets are roasting, grill the radicchio rounds in a pan with olive oil, salt, pepper until charred and softened. (If making ahead, let cool, then store in fridge in a sealed container.)

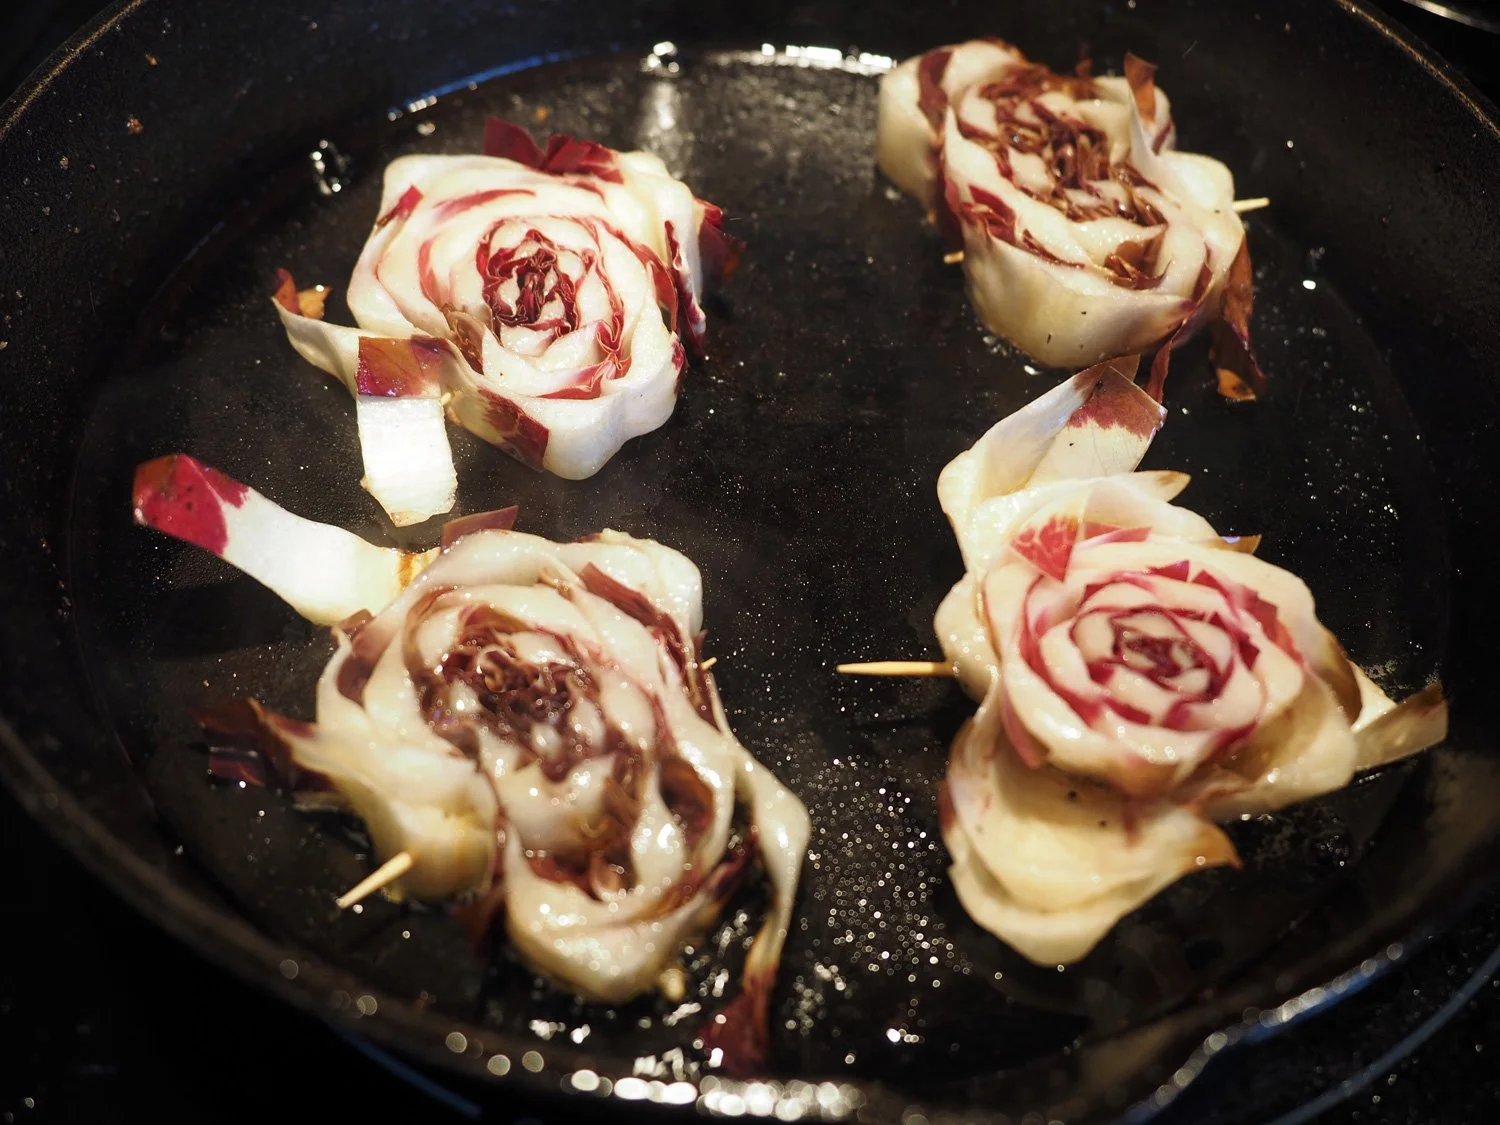
Grill until just browned and softened.

6. Wash and separate the outer leaves of the pink lettuces to find ones that can be used for the cups to hold the salad, and place them on individual plates. Chop the remaining lettuce and radicchio for salad base.

The size of this lettuce are ideal for lettuce cups.

Chop the rest for the ‘meat’ of the salad.

7. Thinly slice the shallots.

8. To make the dressing, simply whisk together all the ingredients.

9. To assemble, place the pink leaf on the plate, then fill with the lettuces and the beets. Place the grilled radicchio on the plate. Top with goat cheese and sprinkle the shallots on top and drizzle with dressing.

Note: This can be a hot/cold salad as well. Simply warm the beets and radicchio right before assembly.

I love using the larger leaves as a cup to hold the salad.

A colorful mix to start the meal.

This salad was enjoyed by all, as there was not a single leftover on the plates.

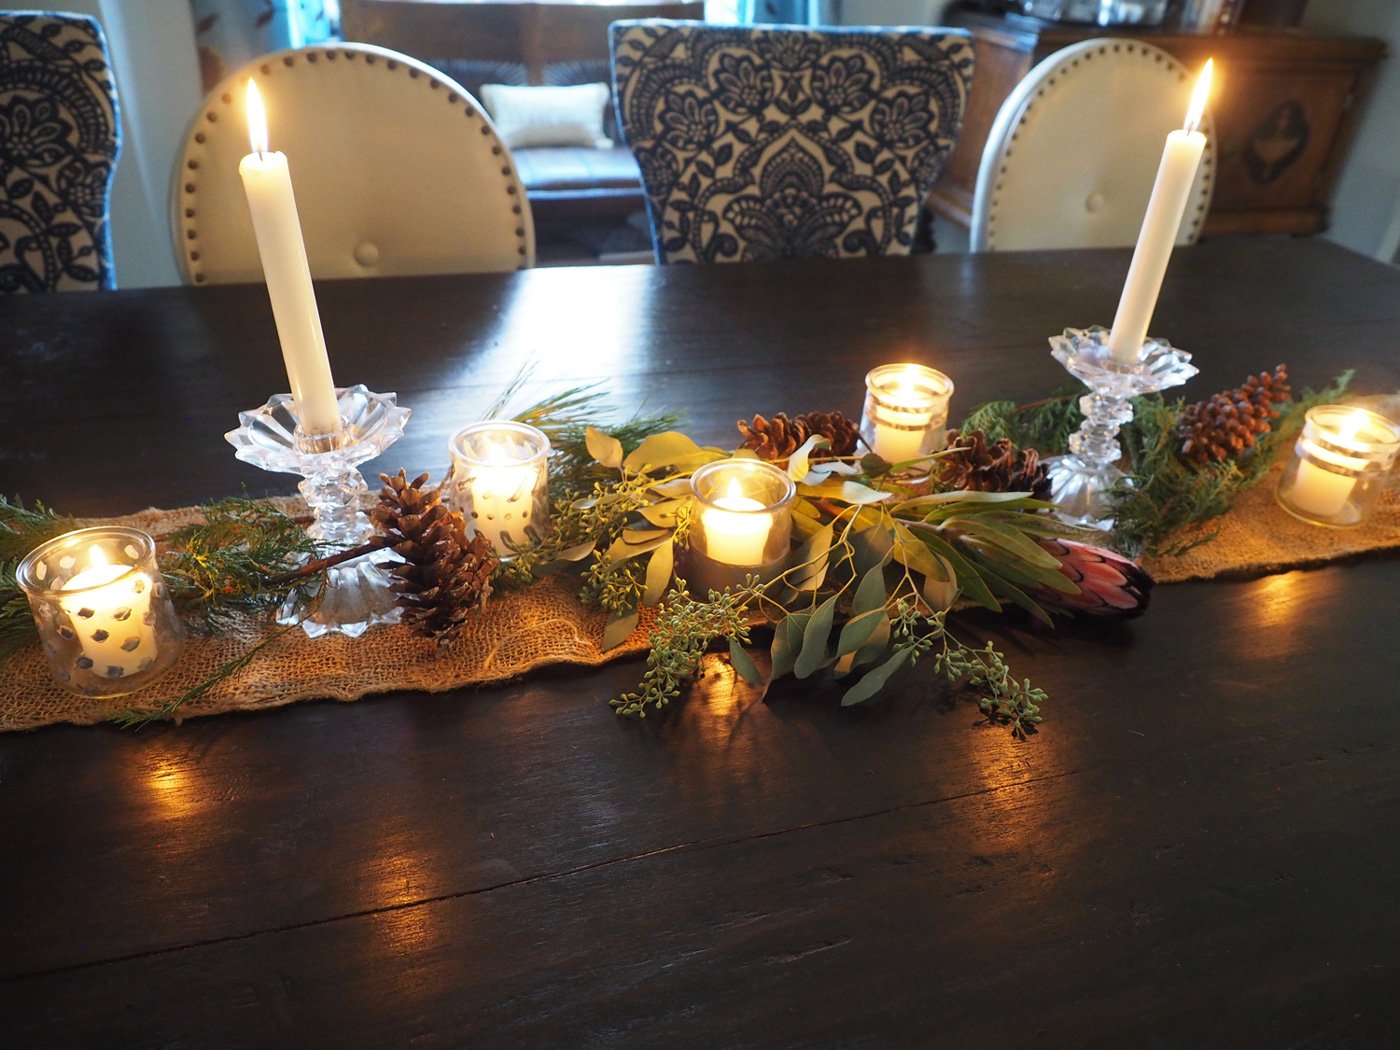
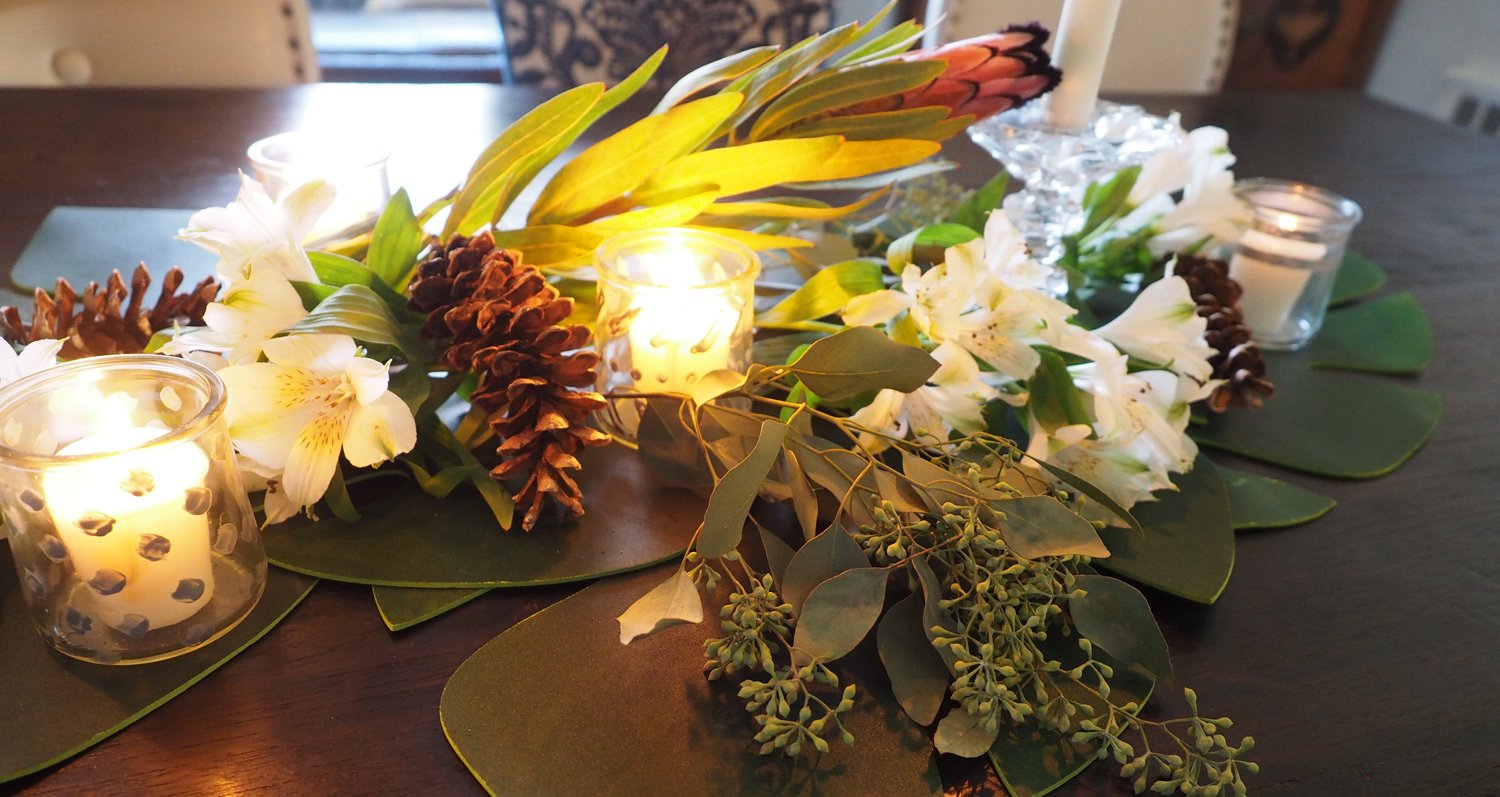
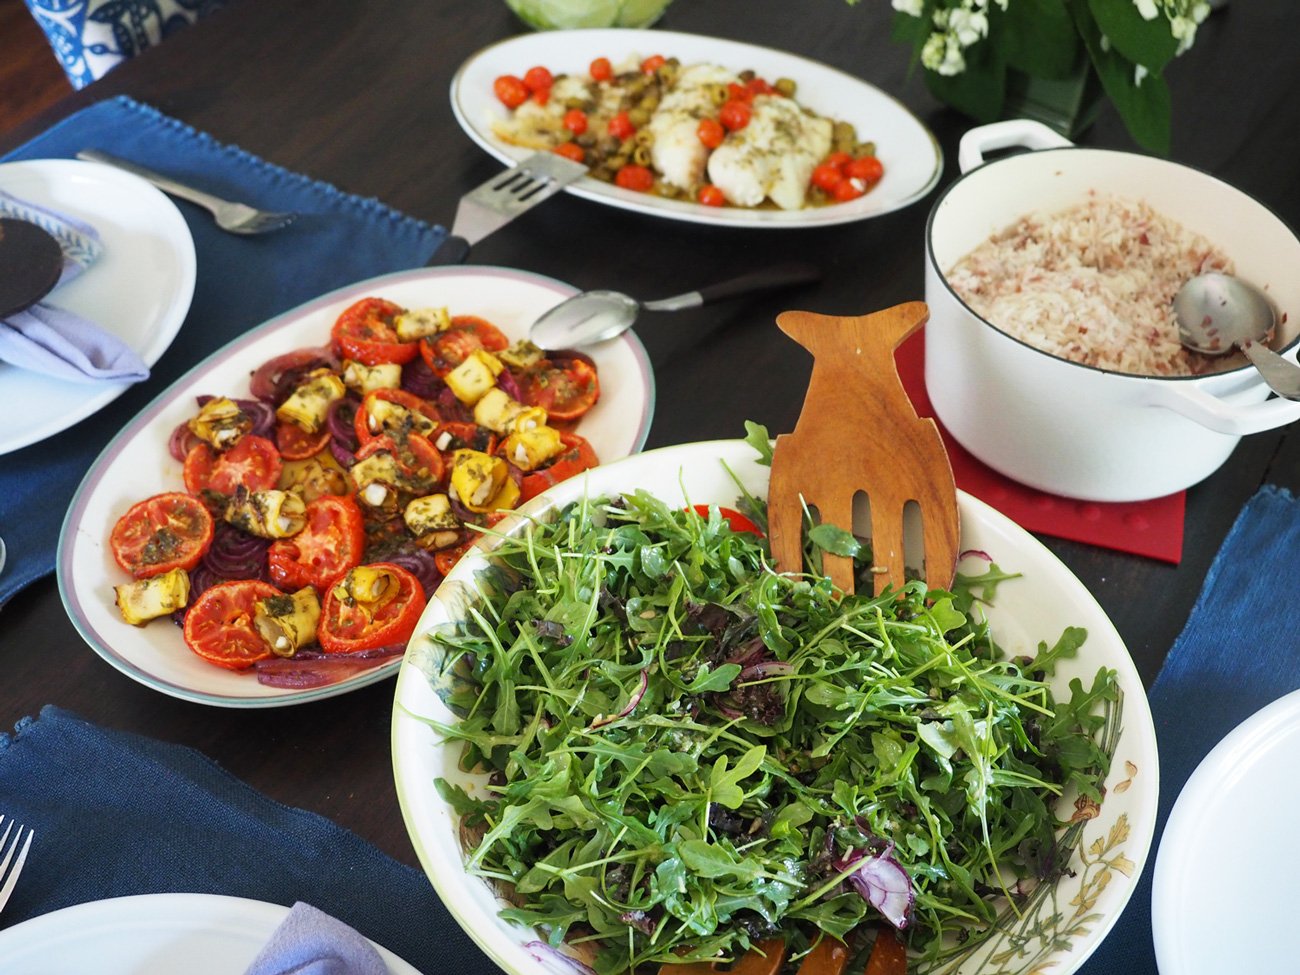
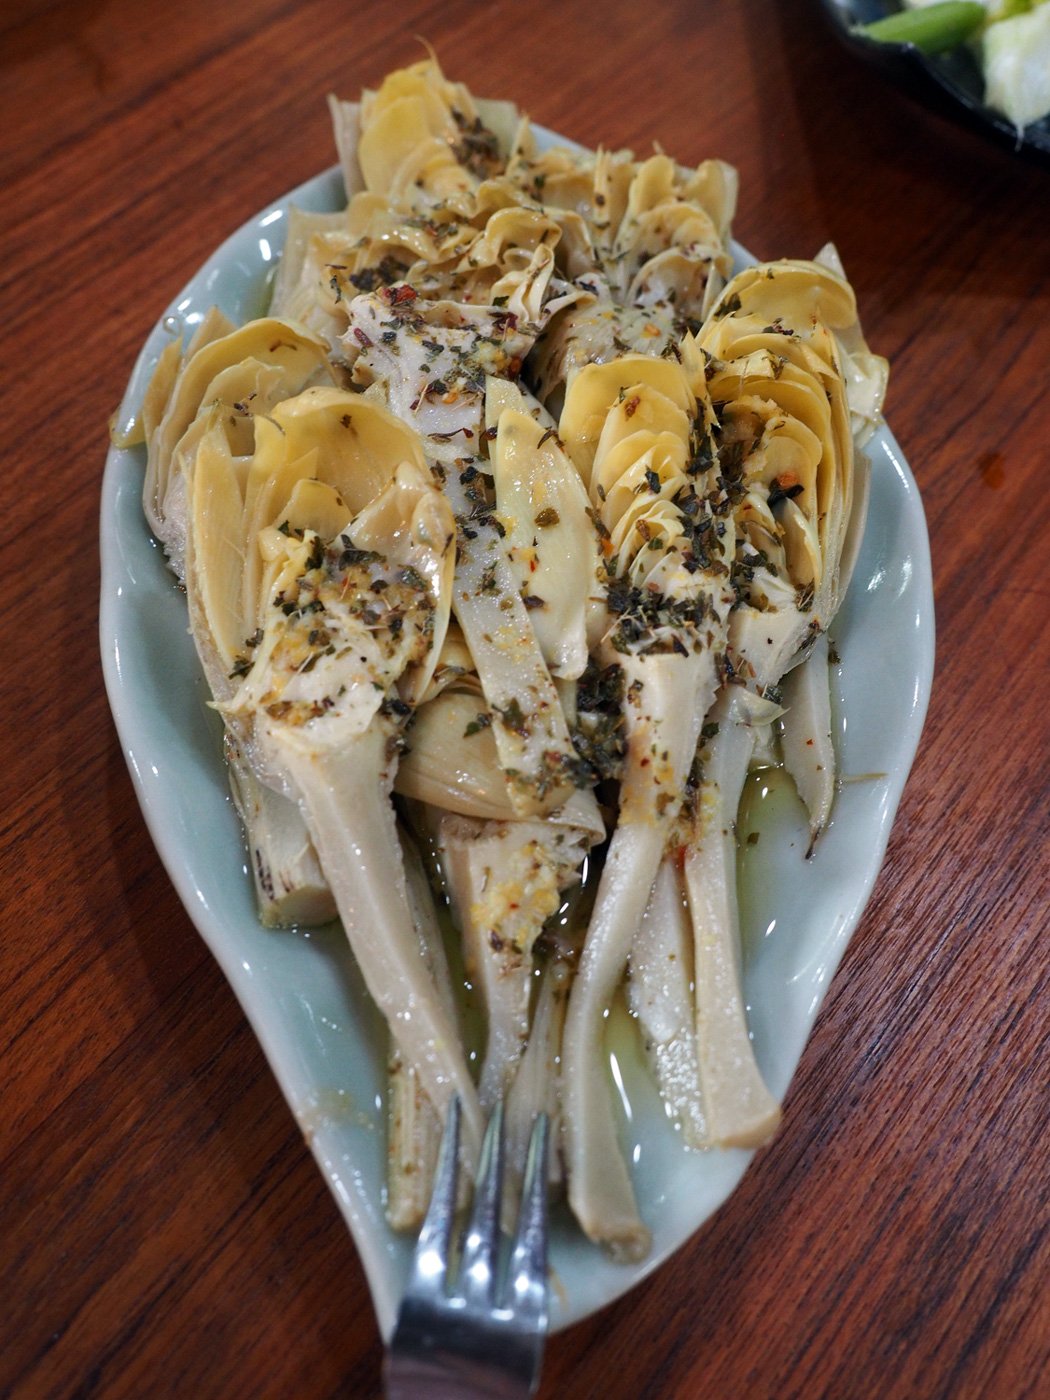
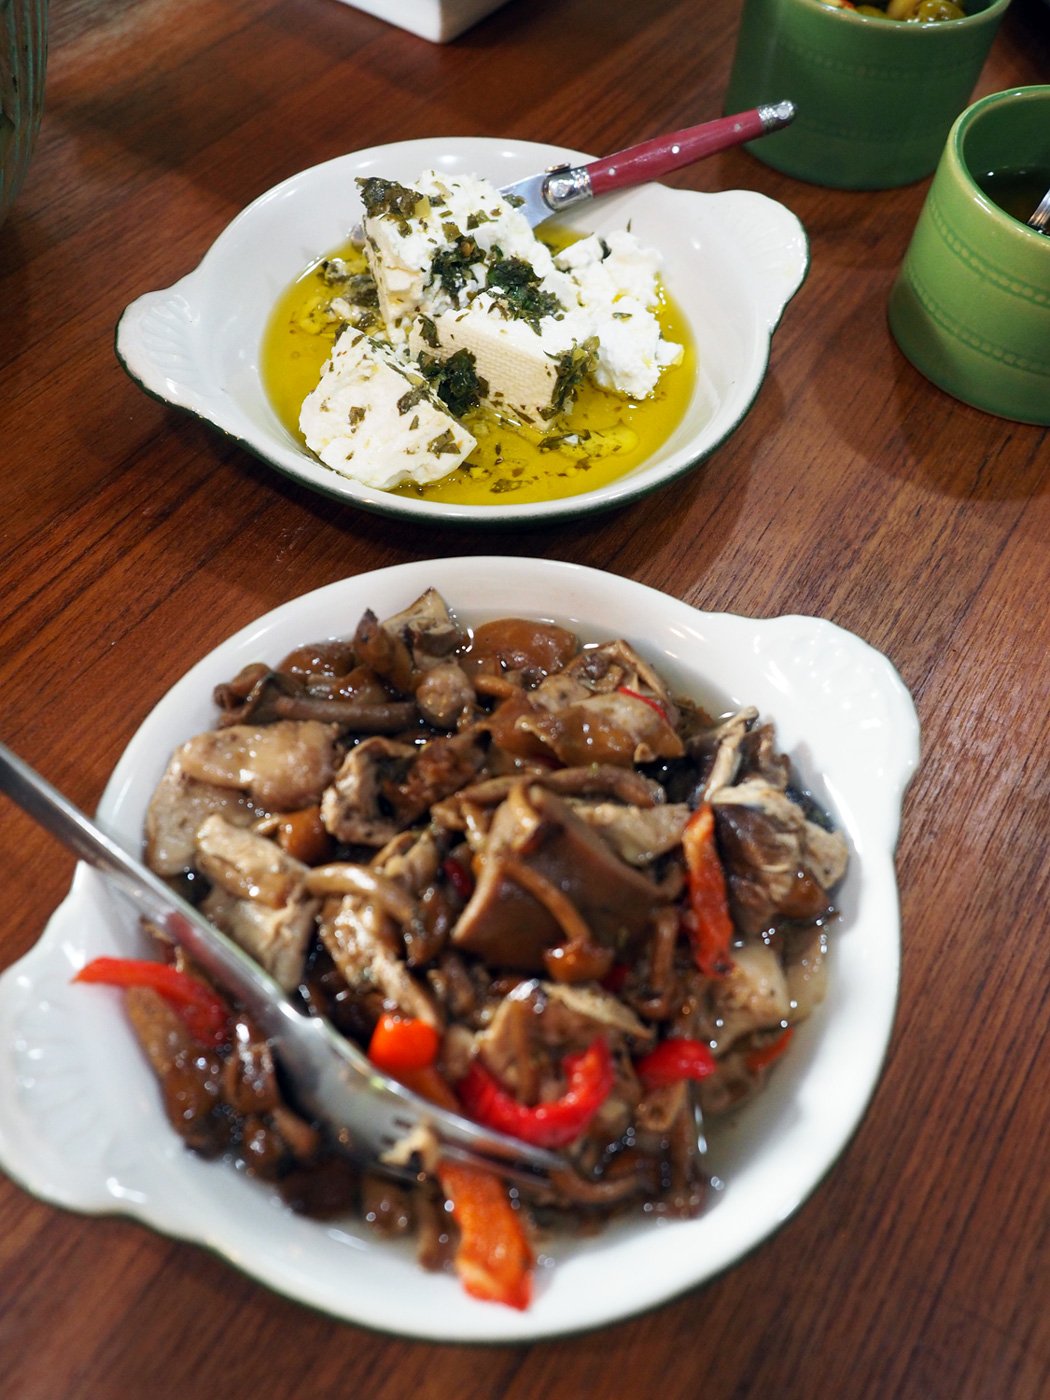
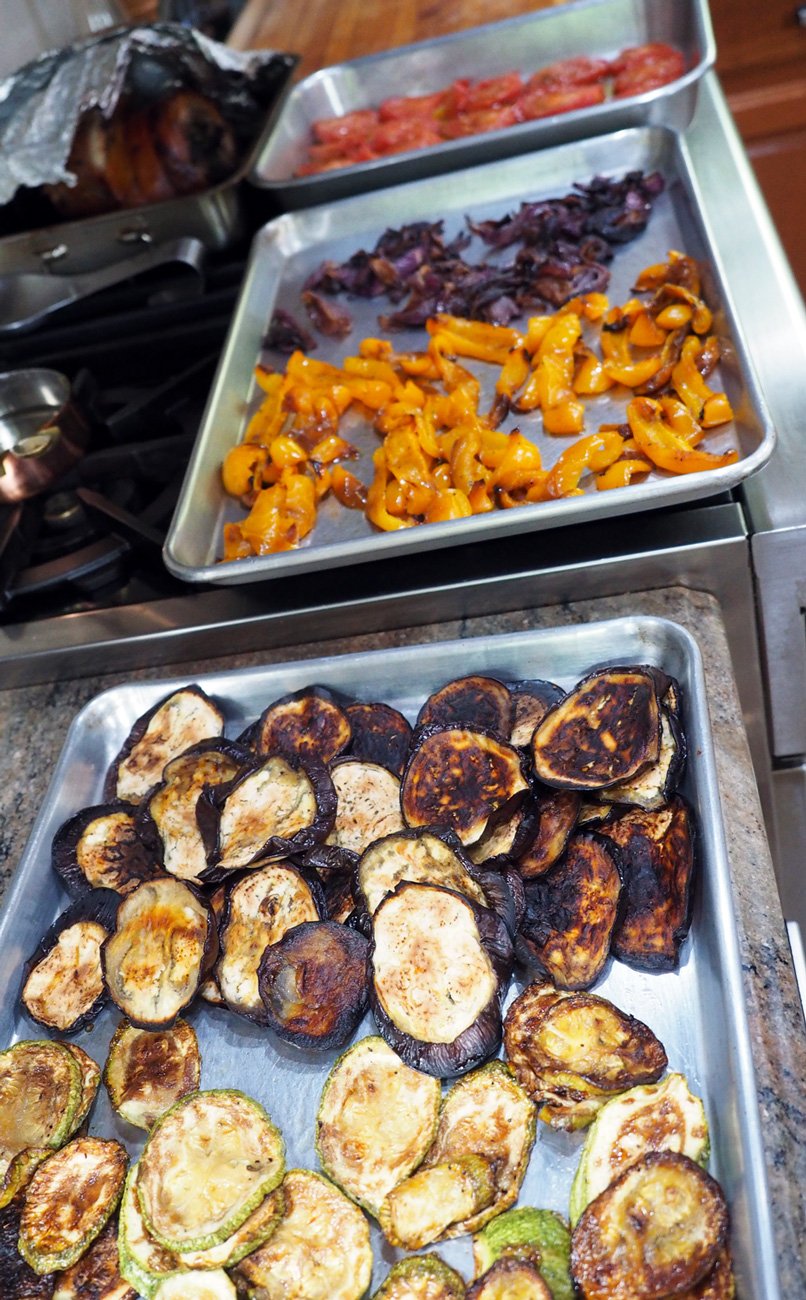
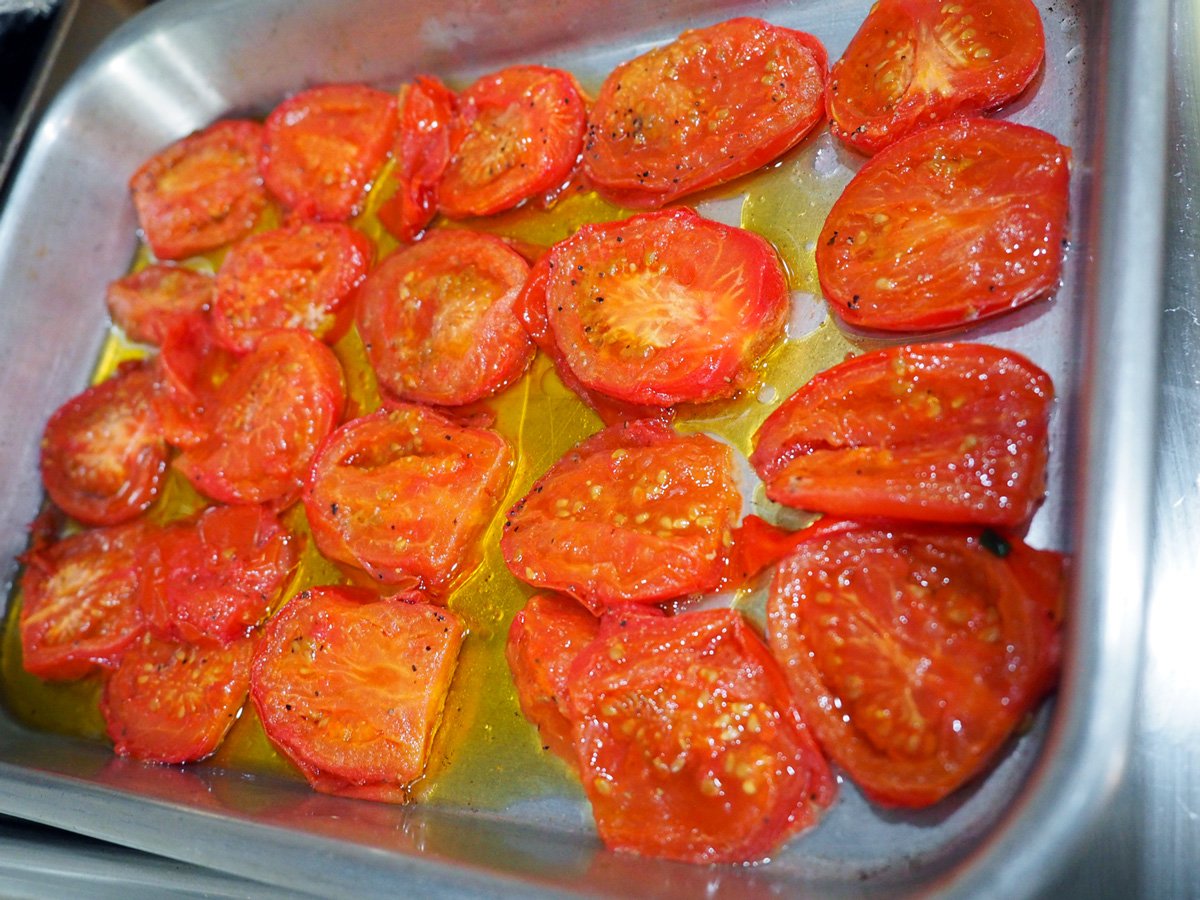
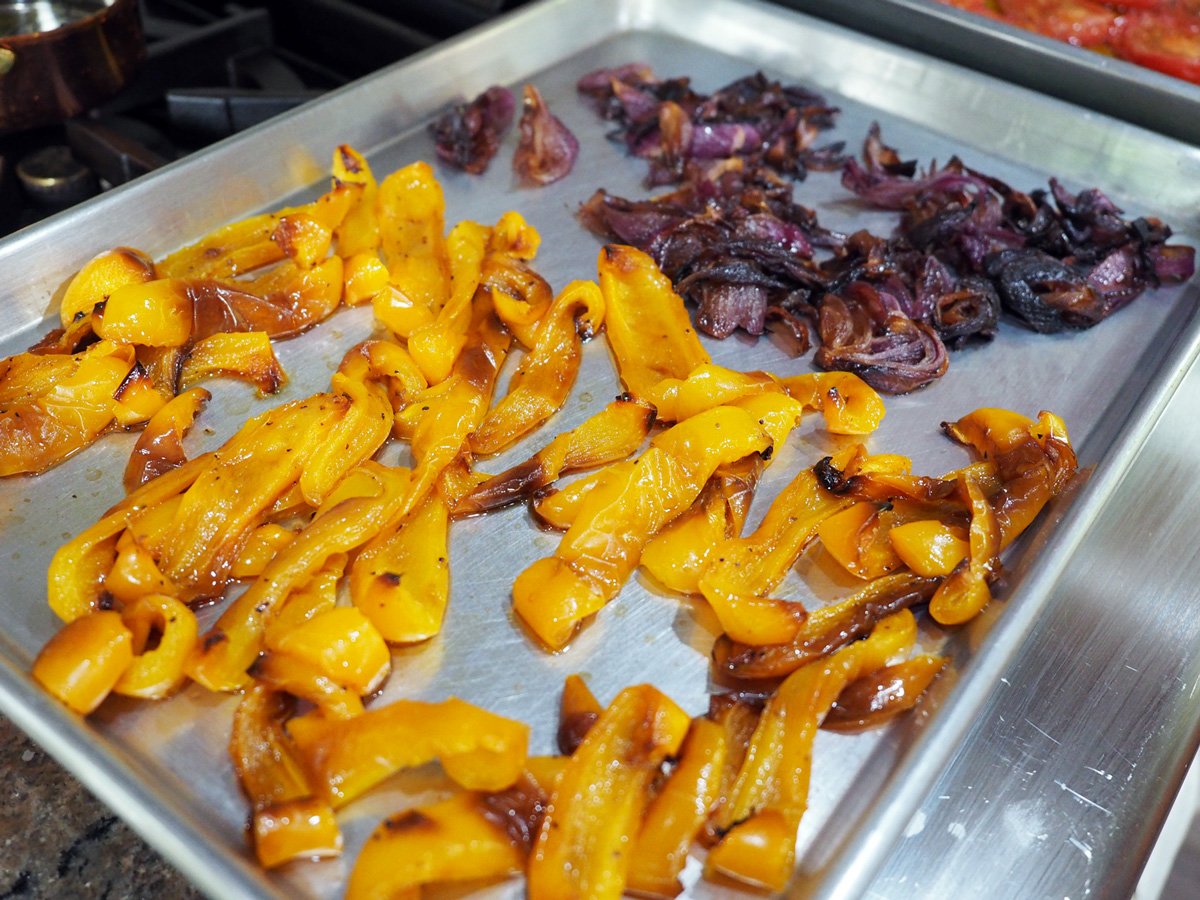
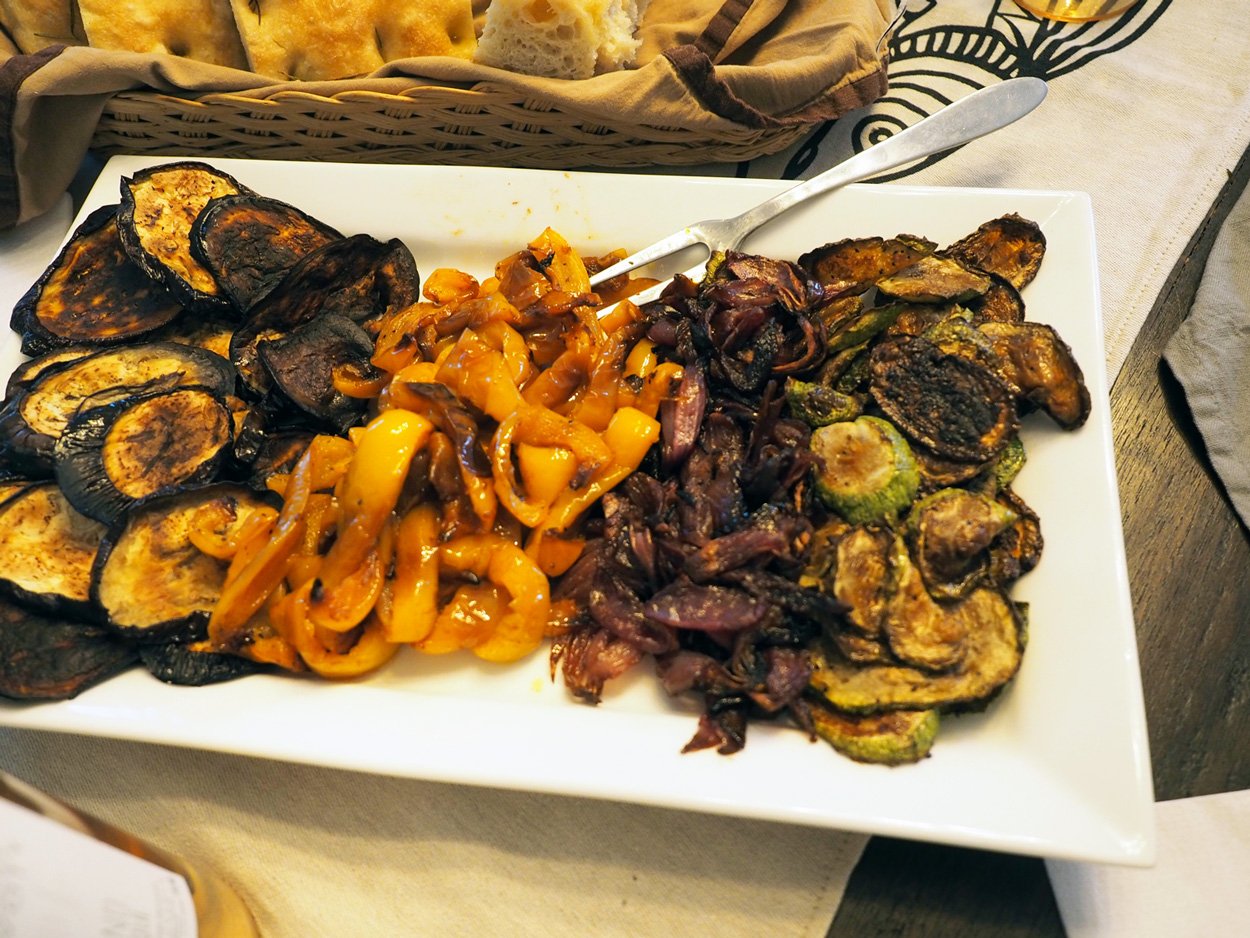
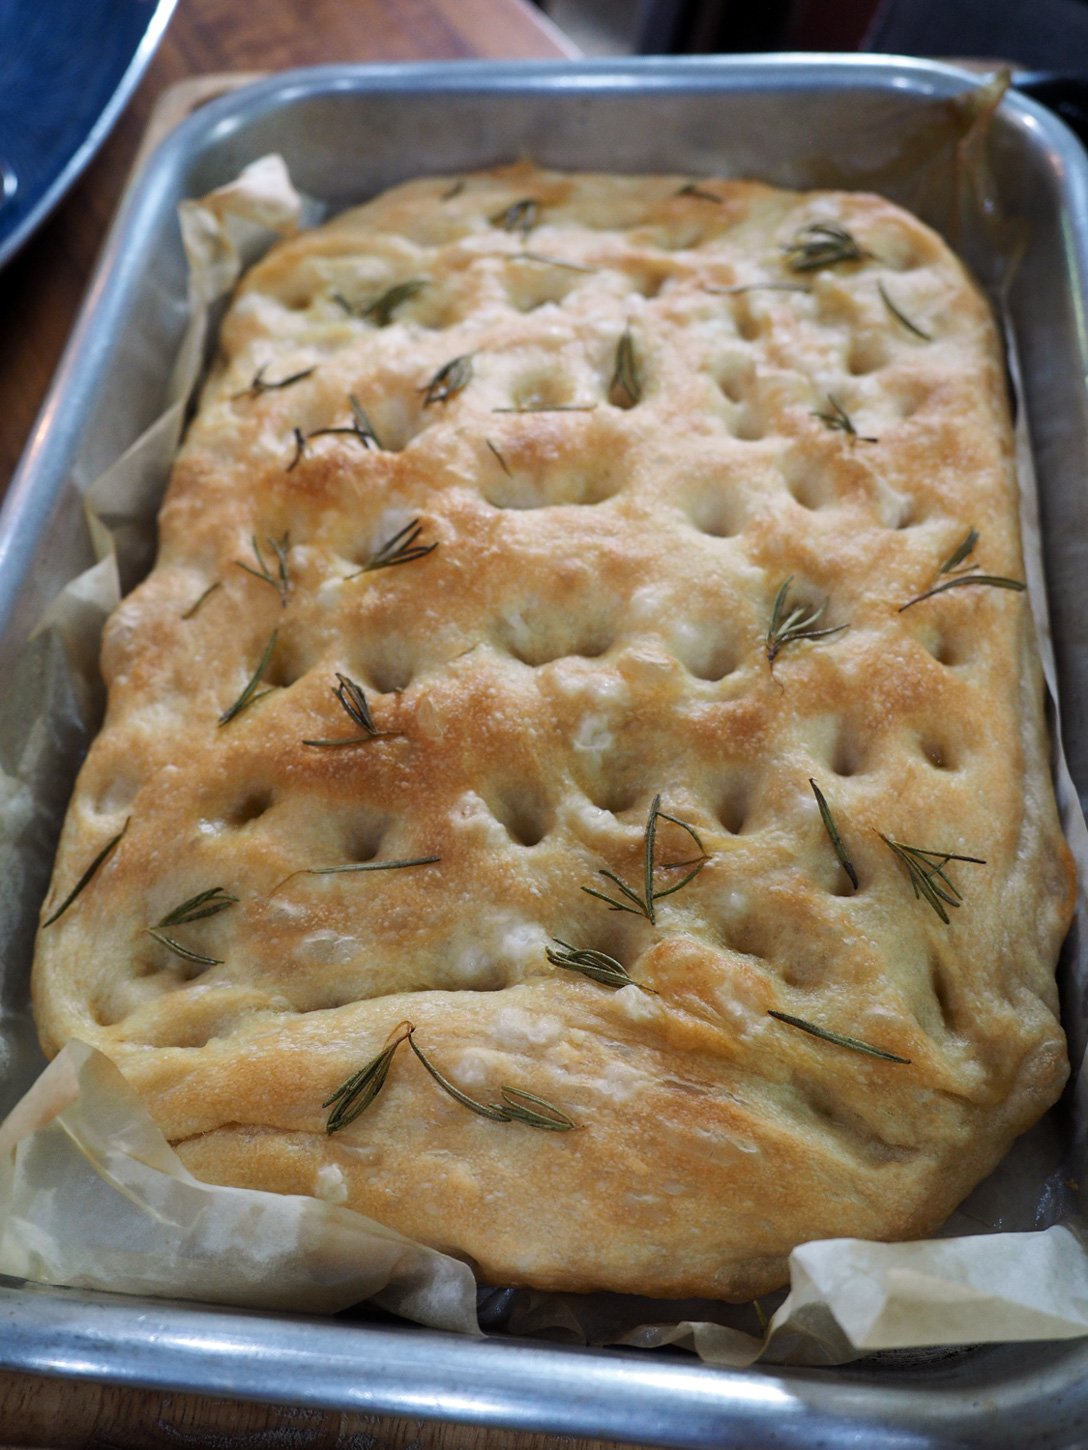
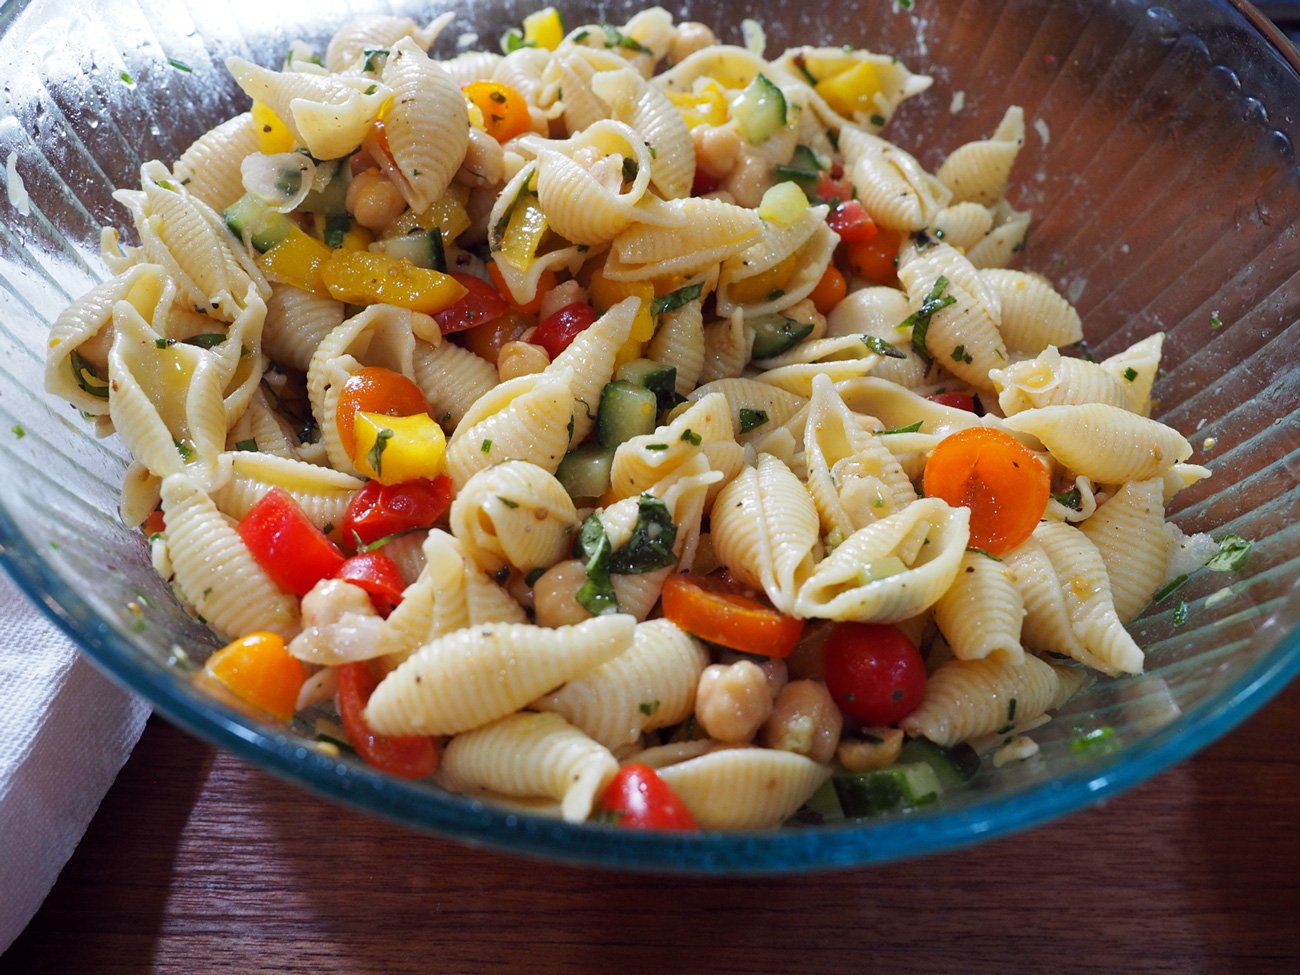
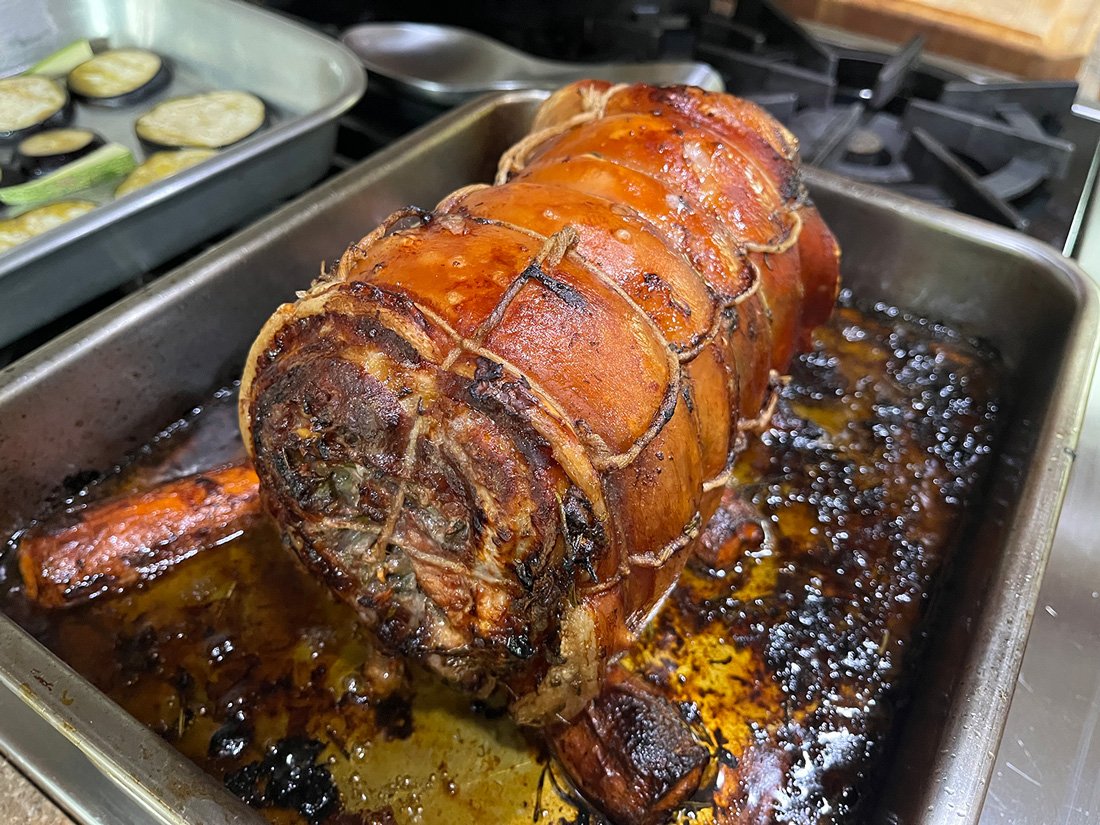
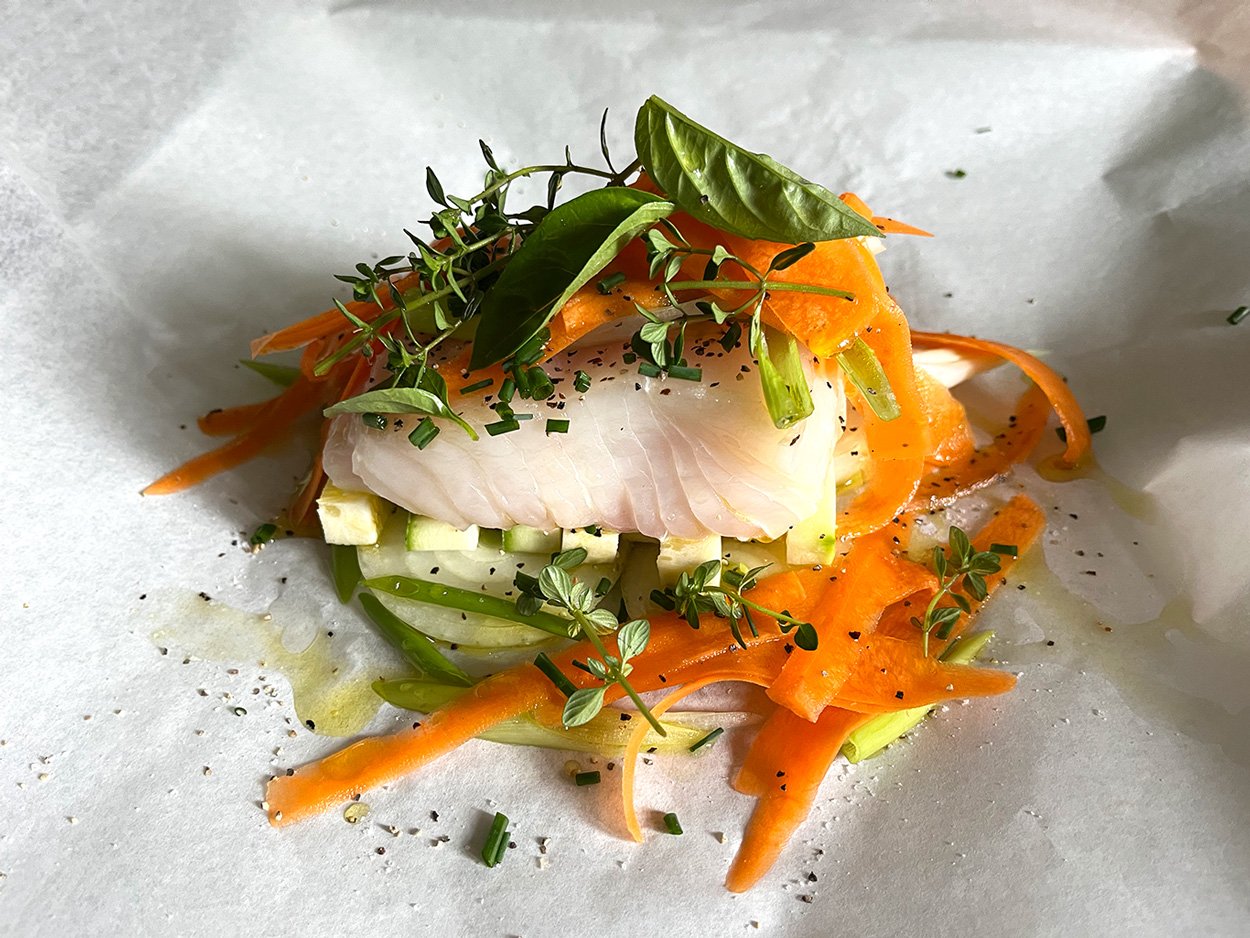
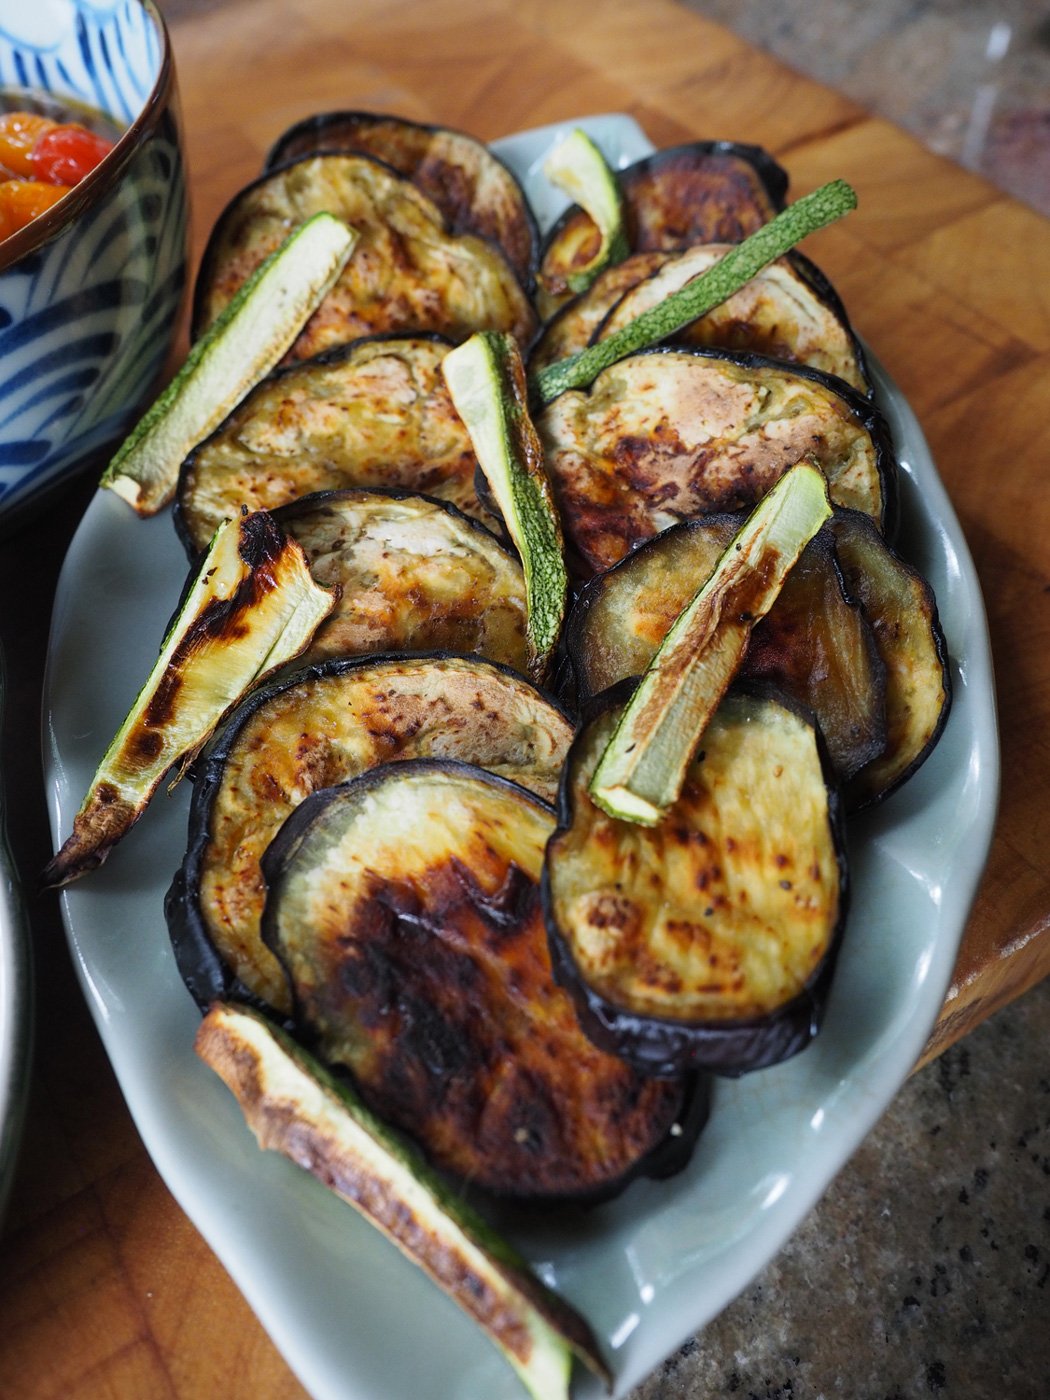
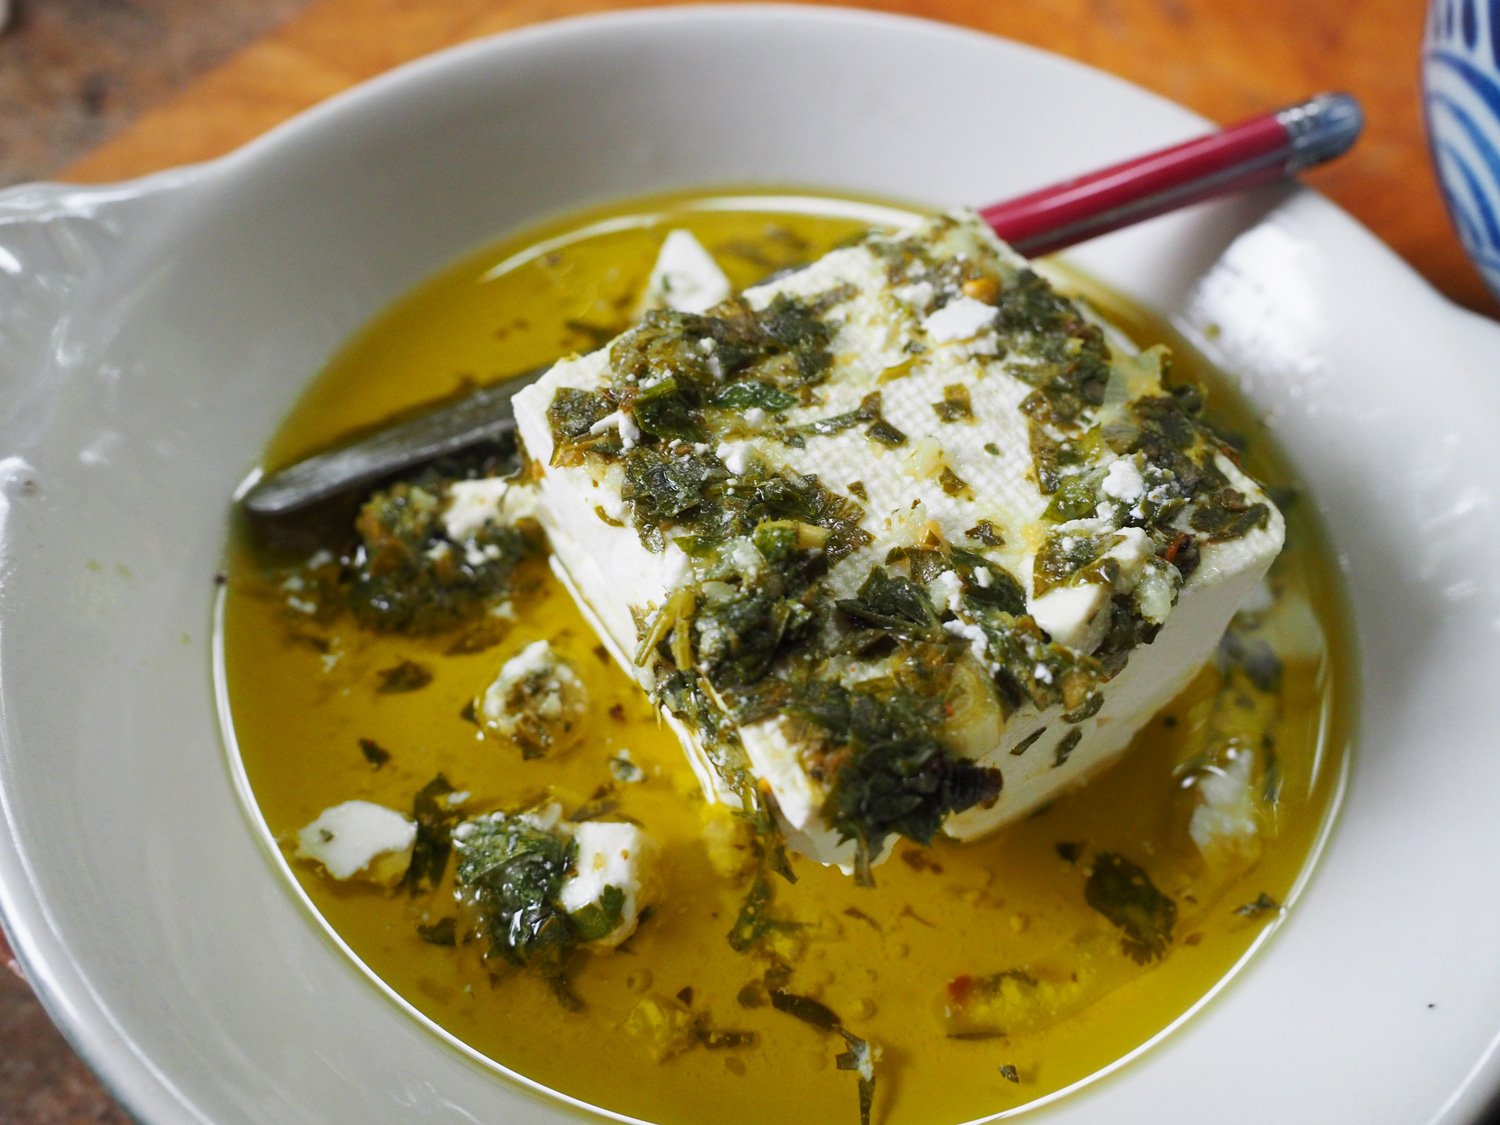
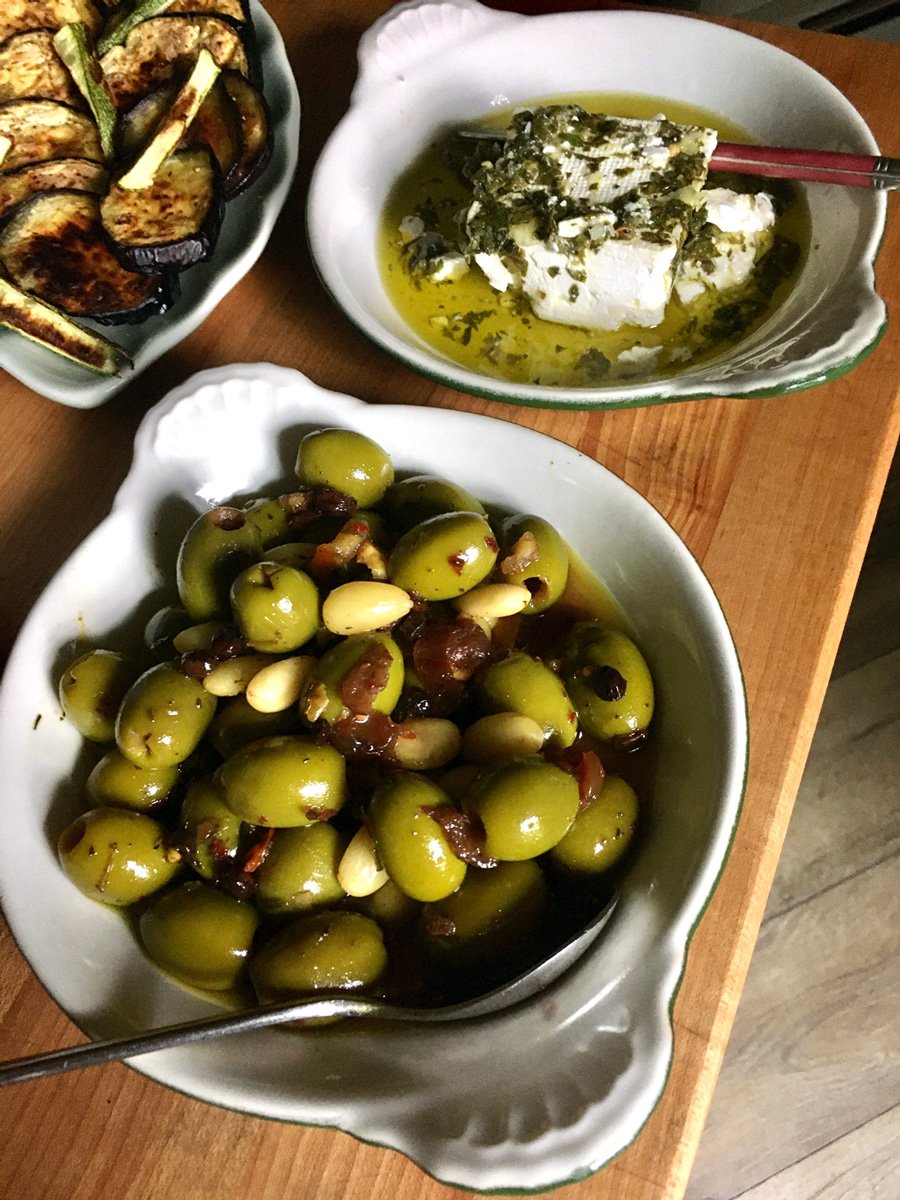
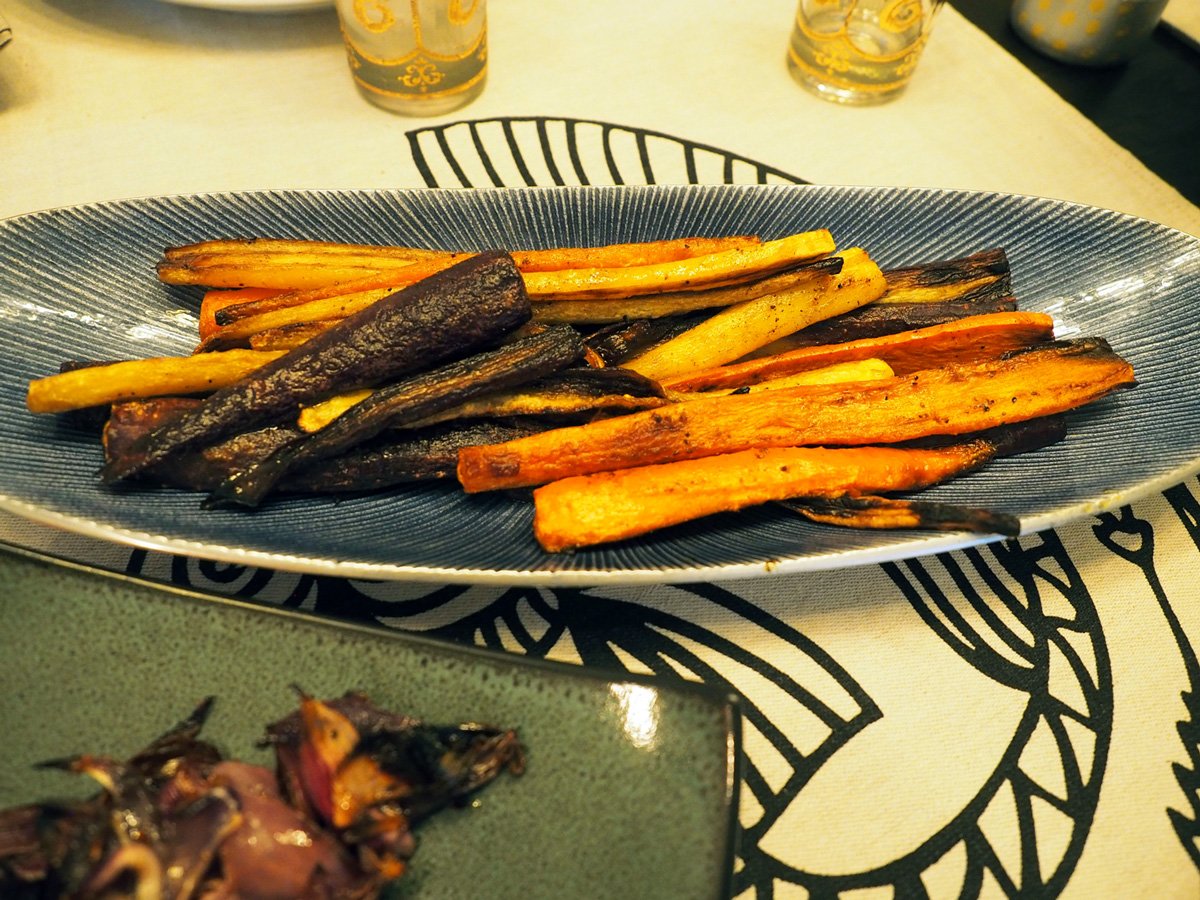
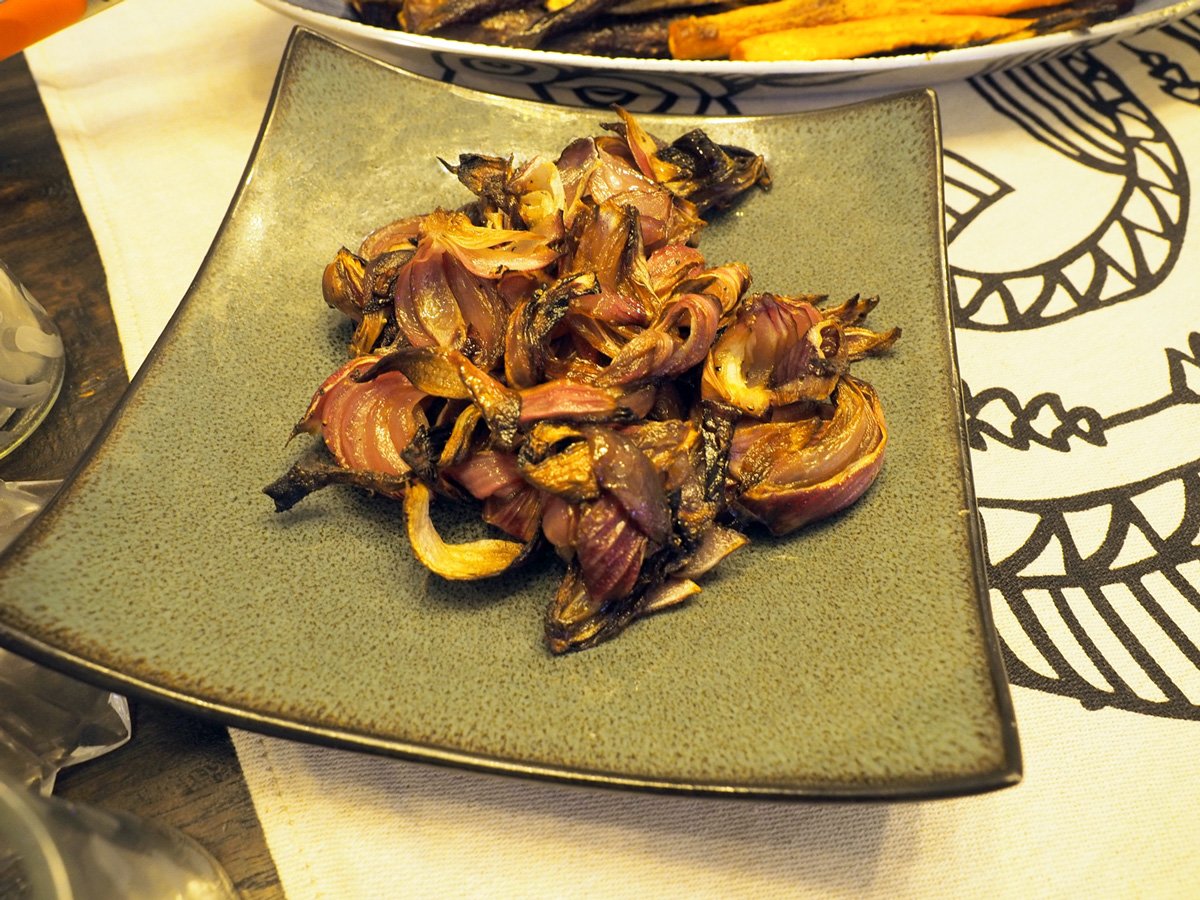
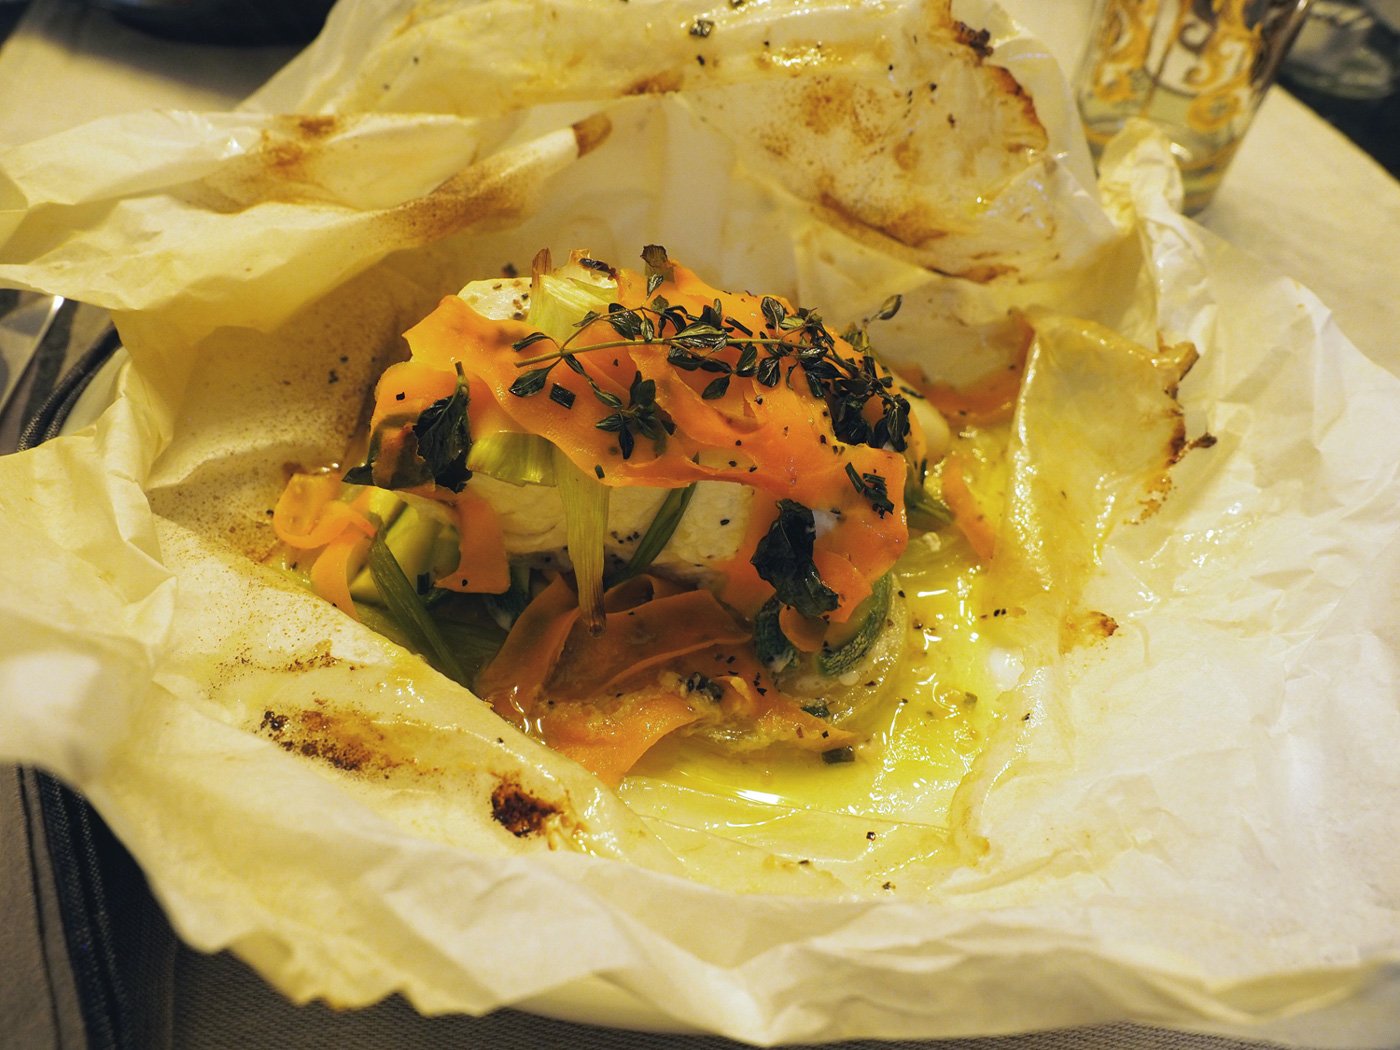
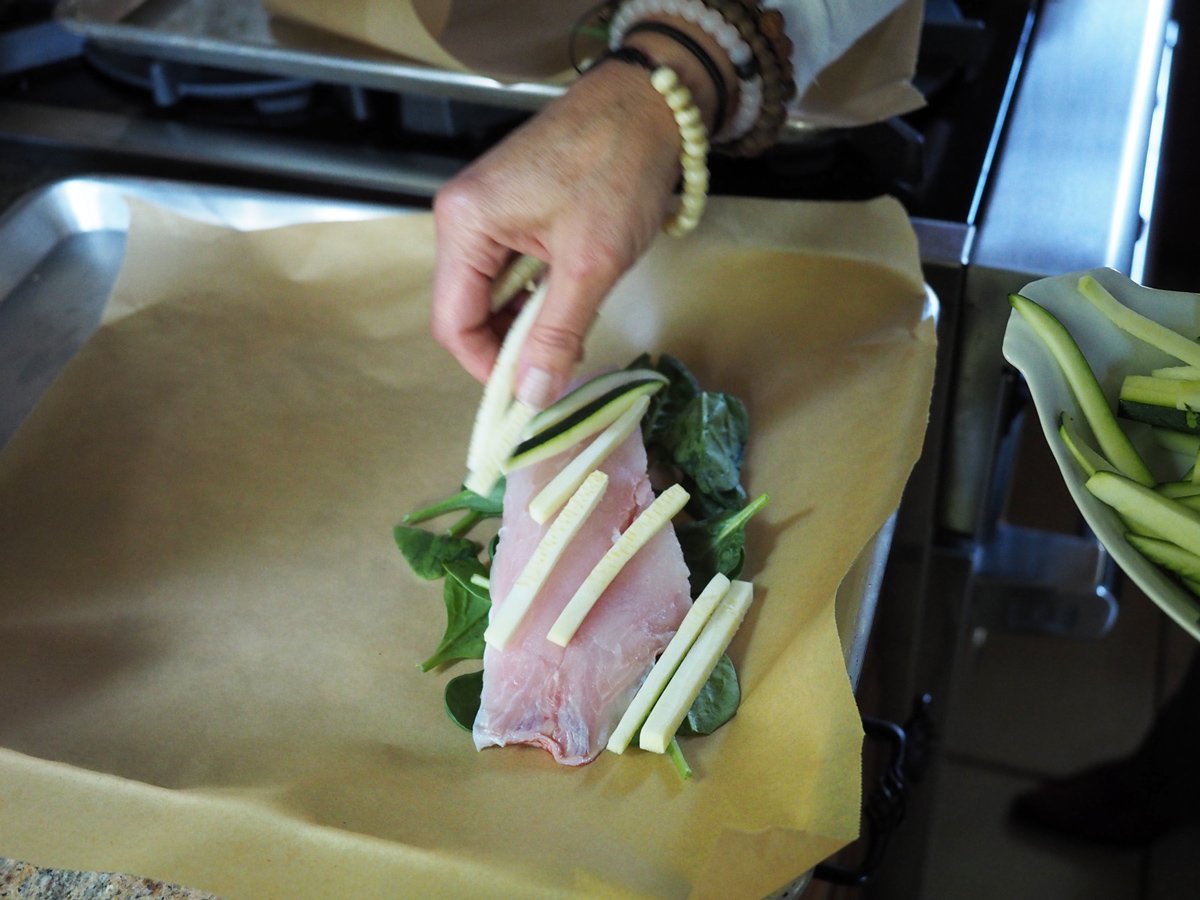
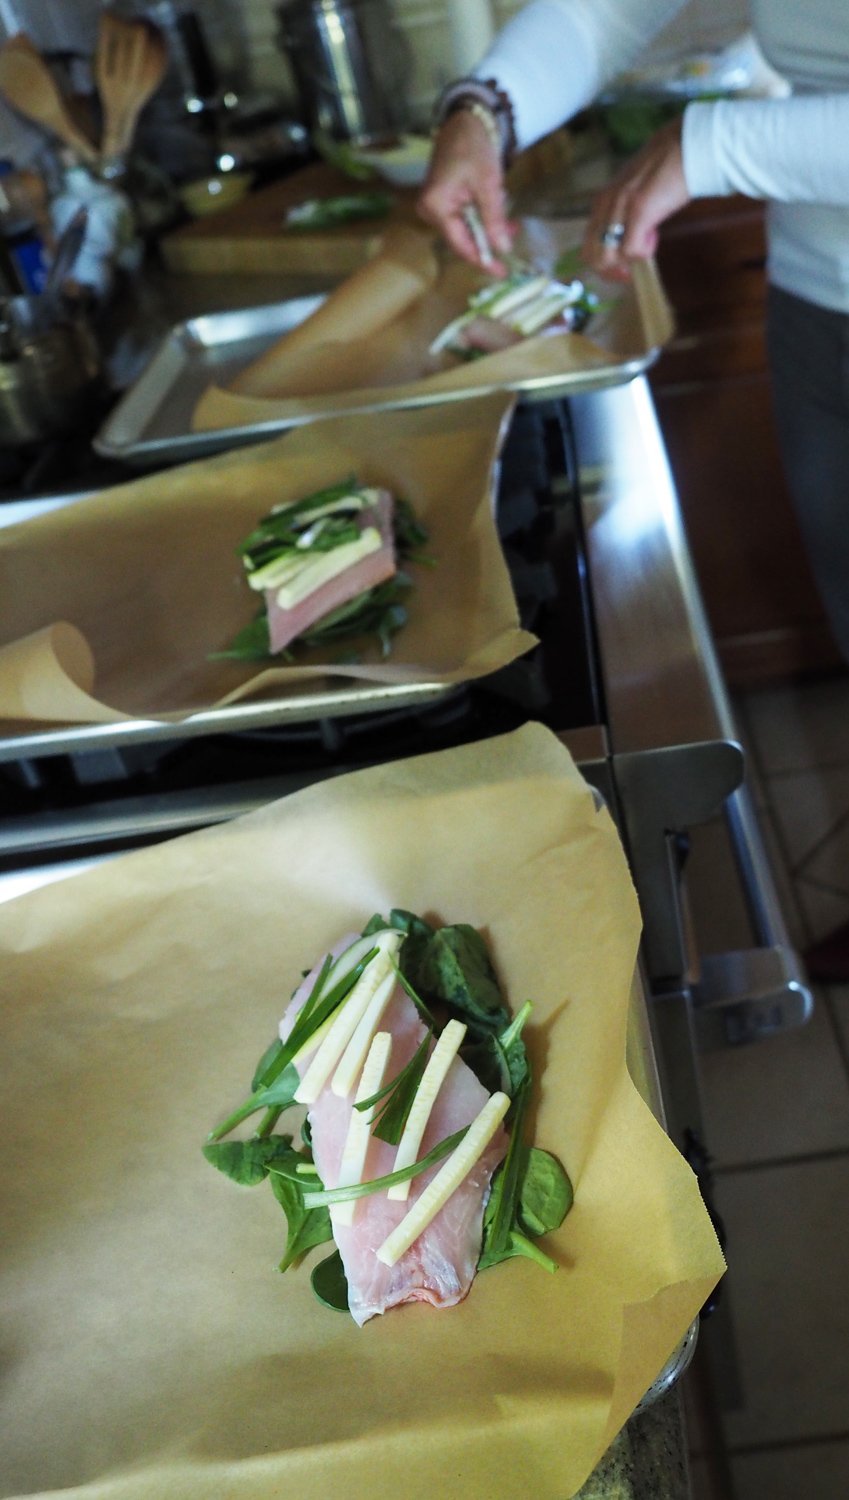
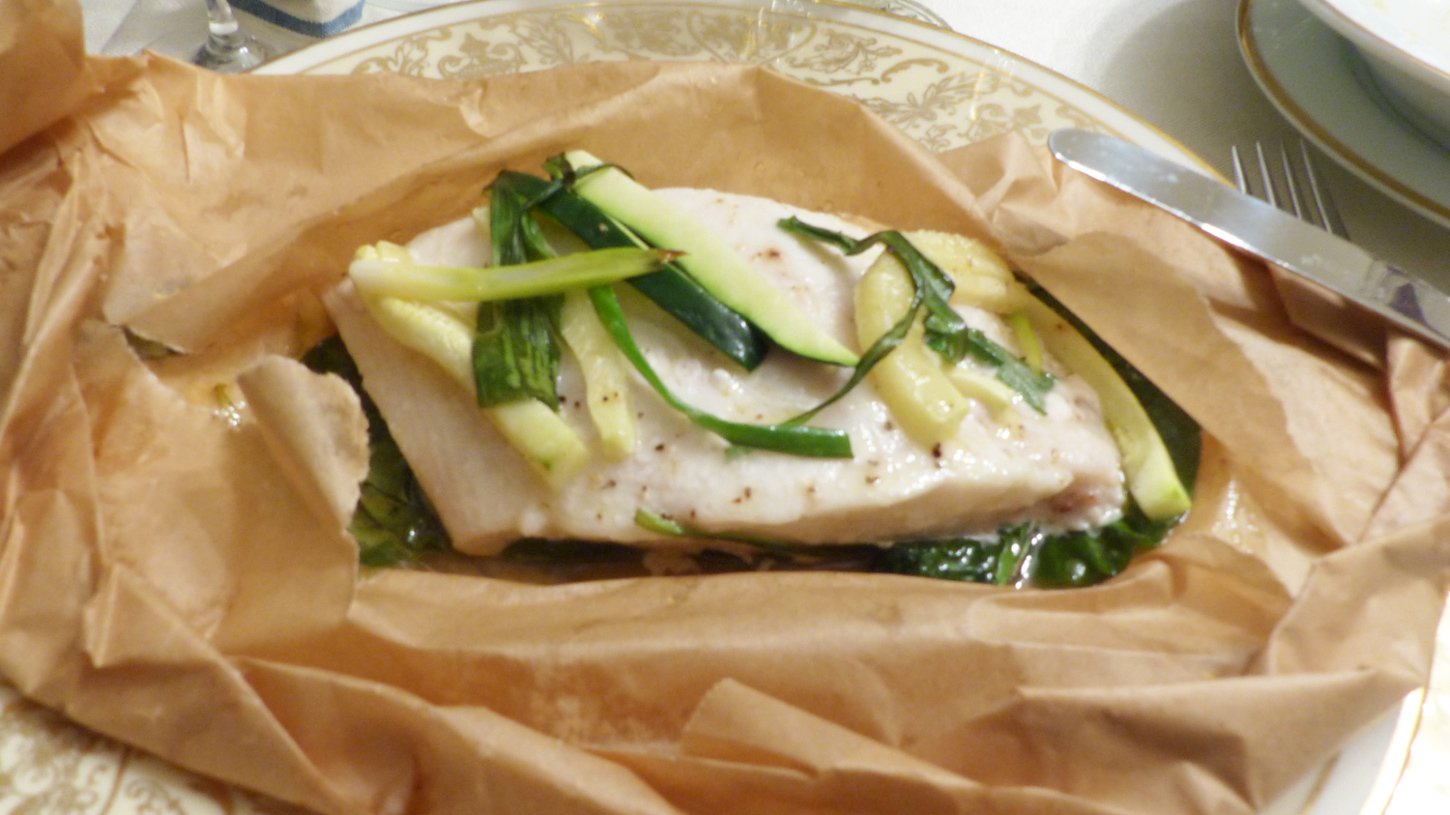
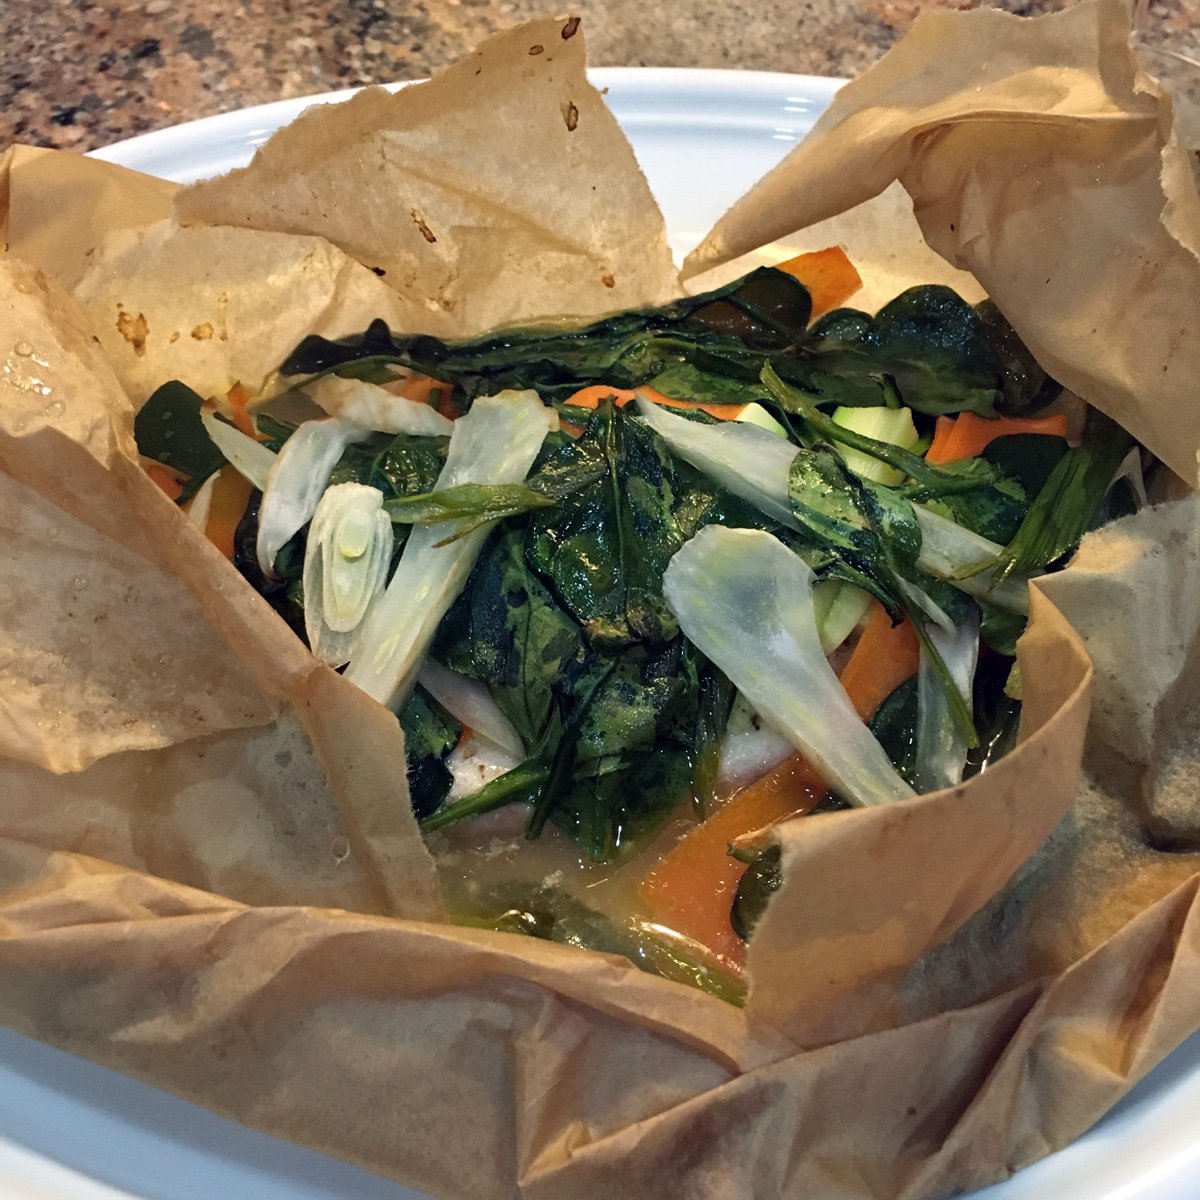
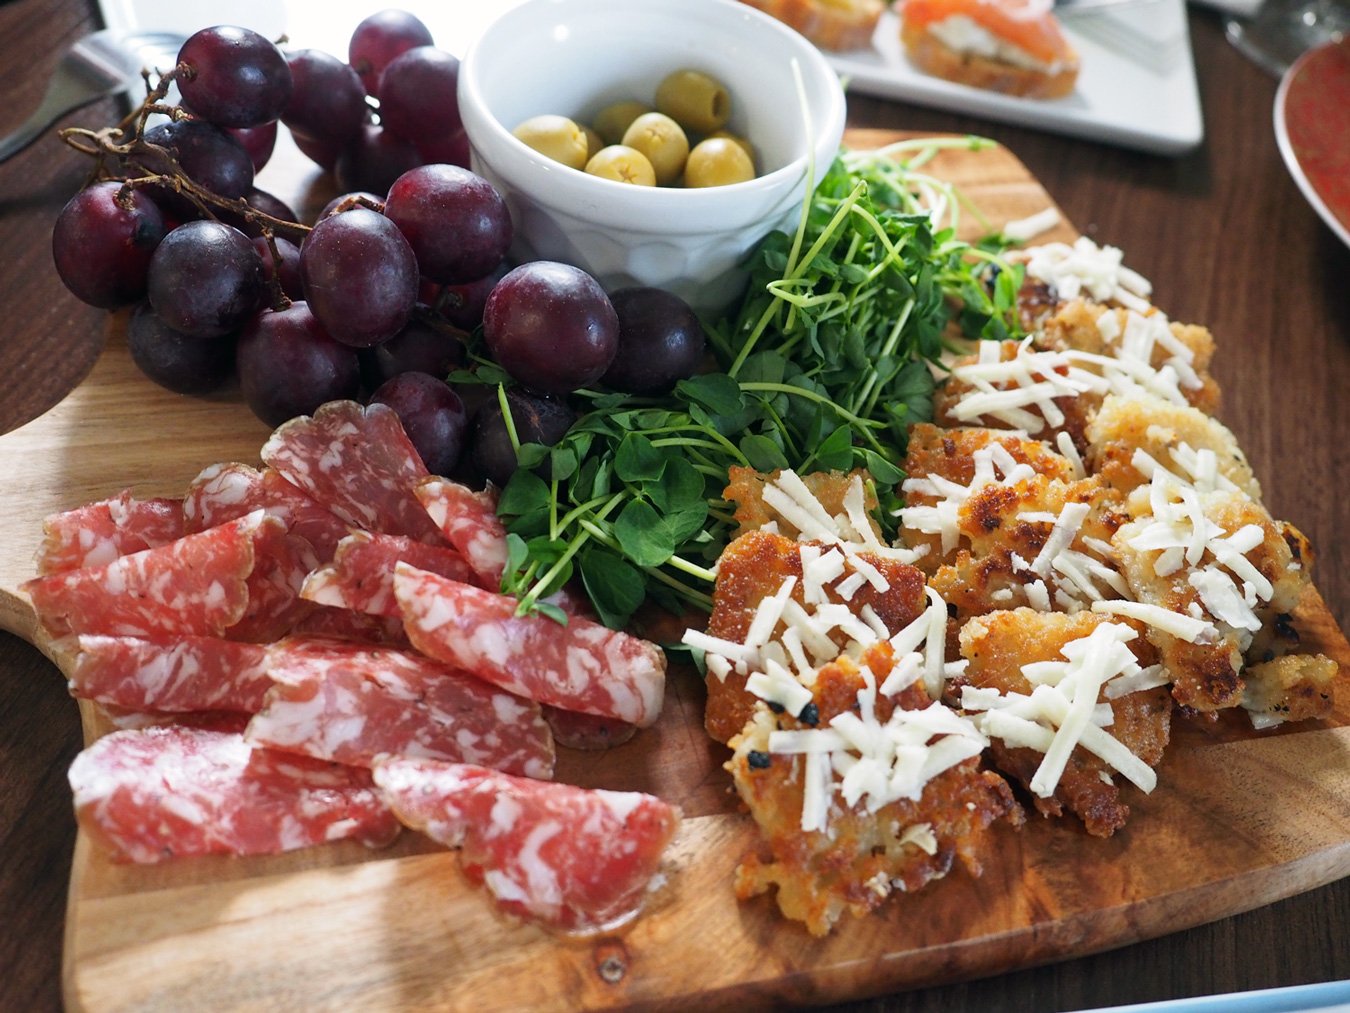
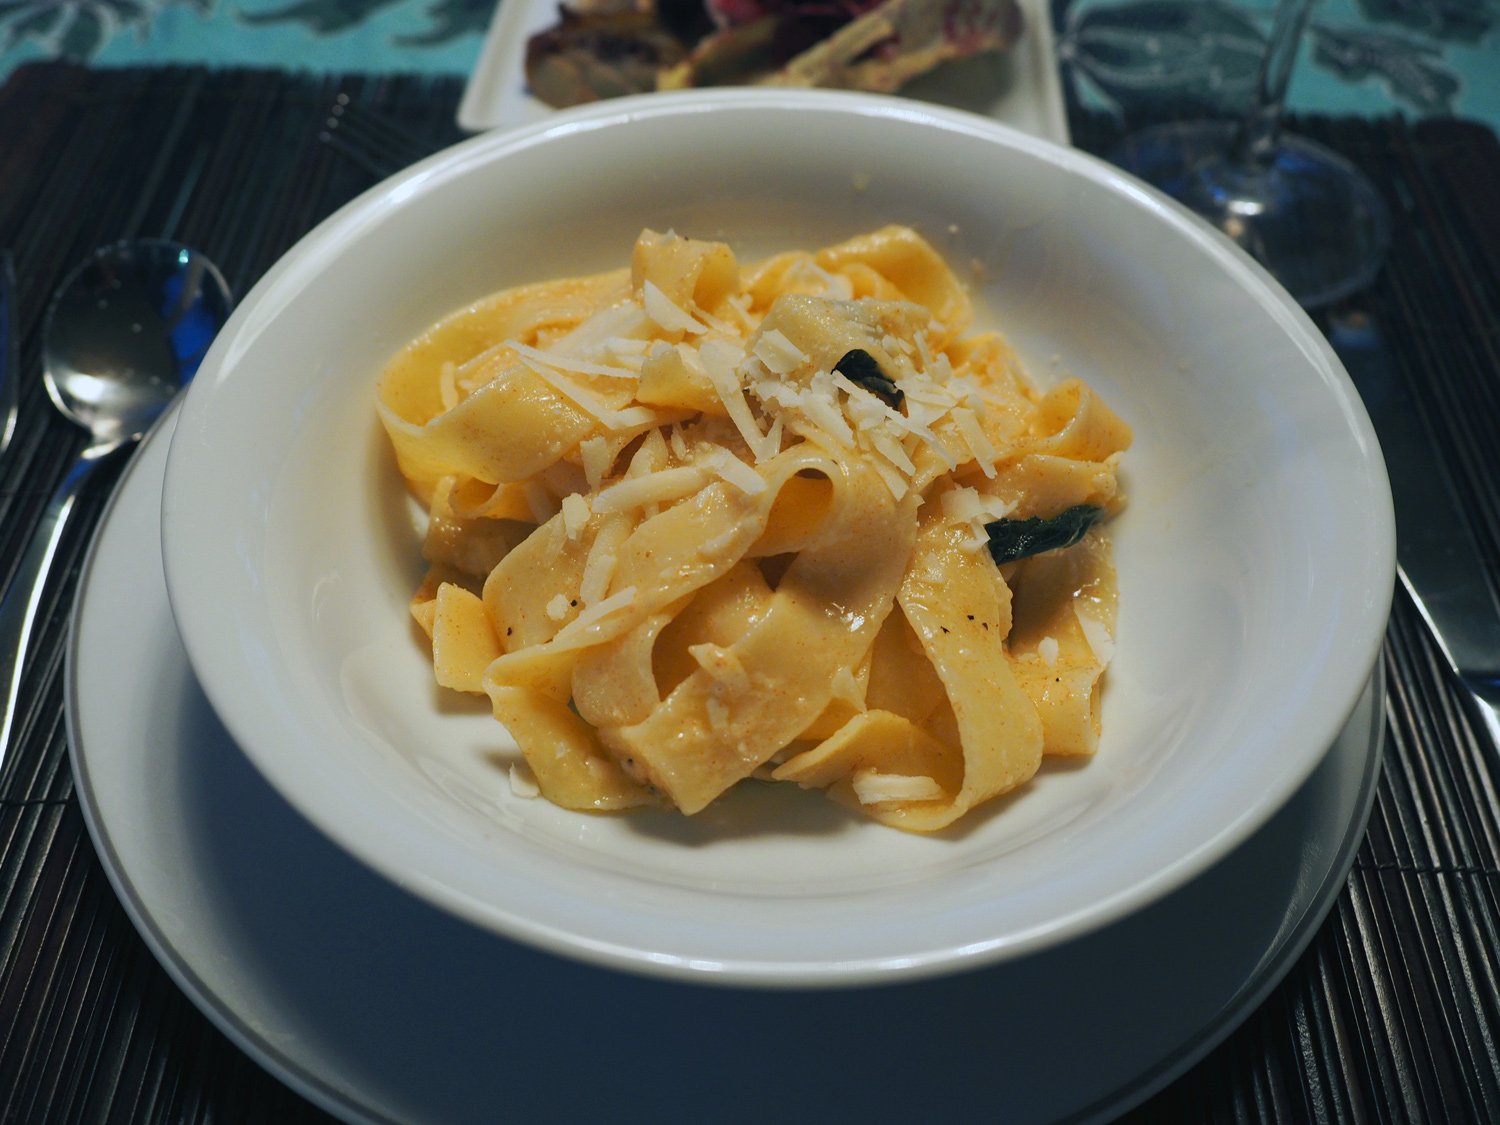
Here are just some of the other dishes we served. Since this was my first real dinner party at our country house, I was getting my entertaining feet wet and wasn’t able to photograph the full menu.

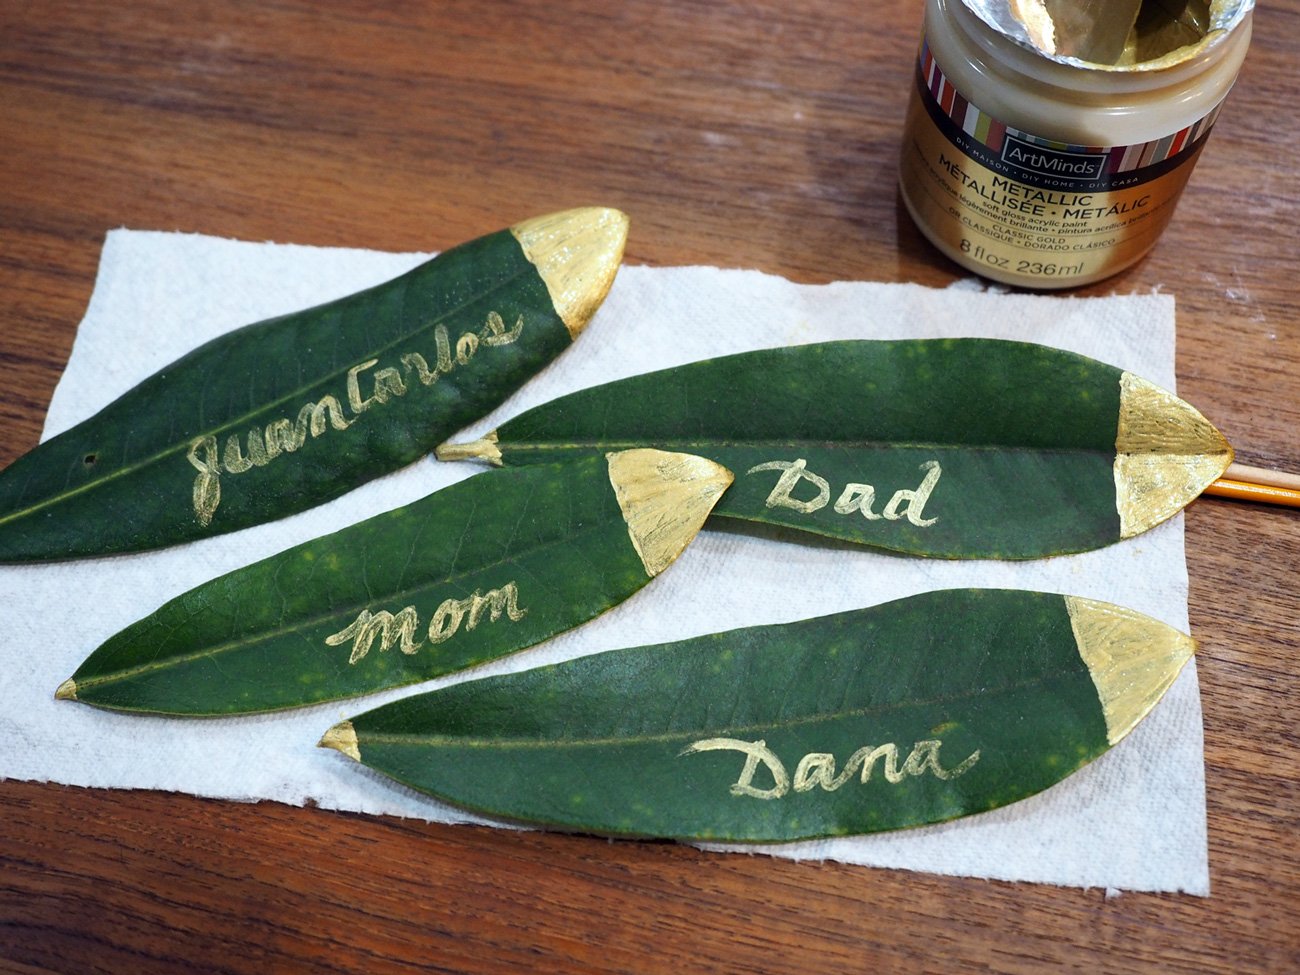
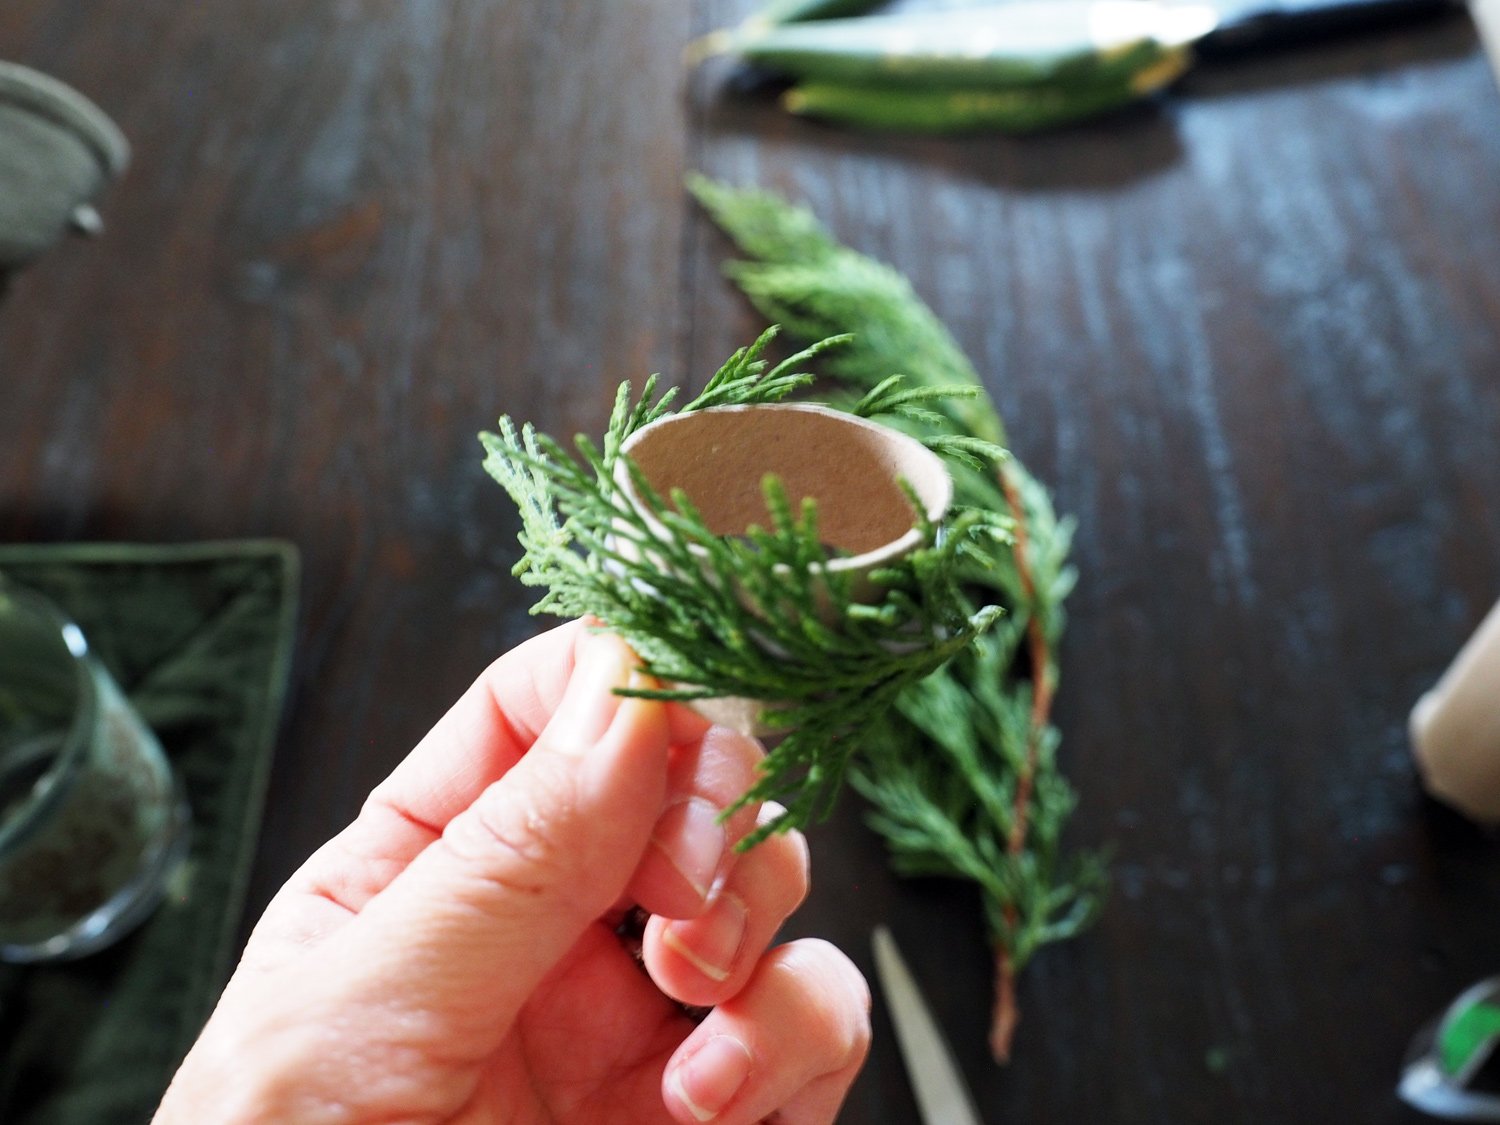
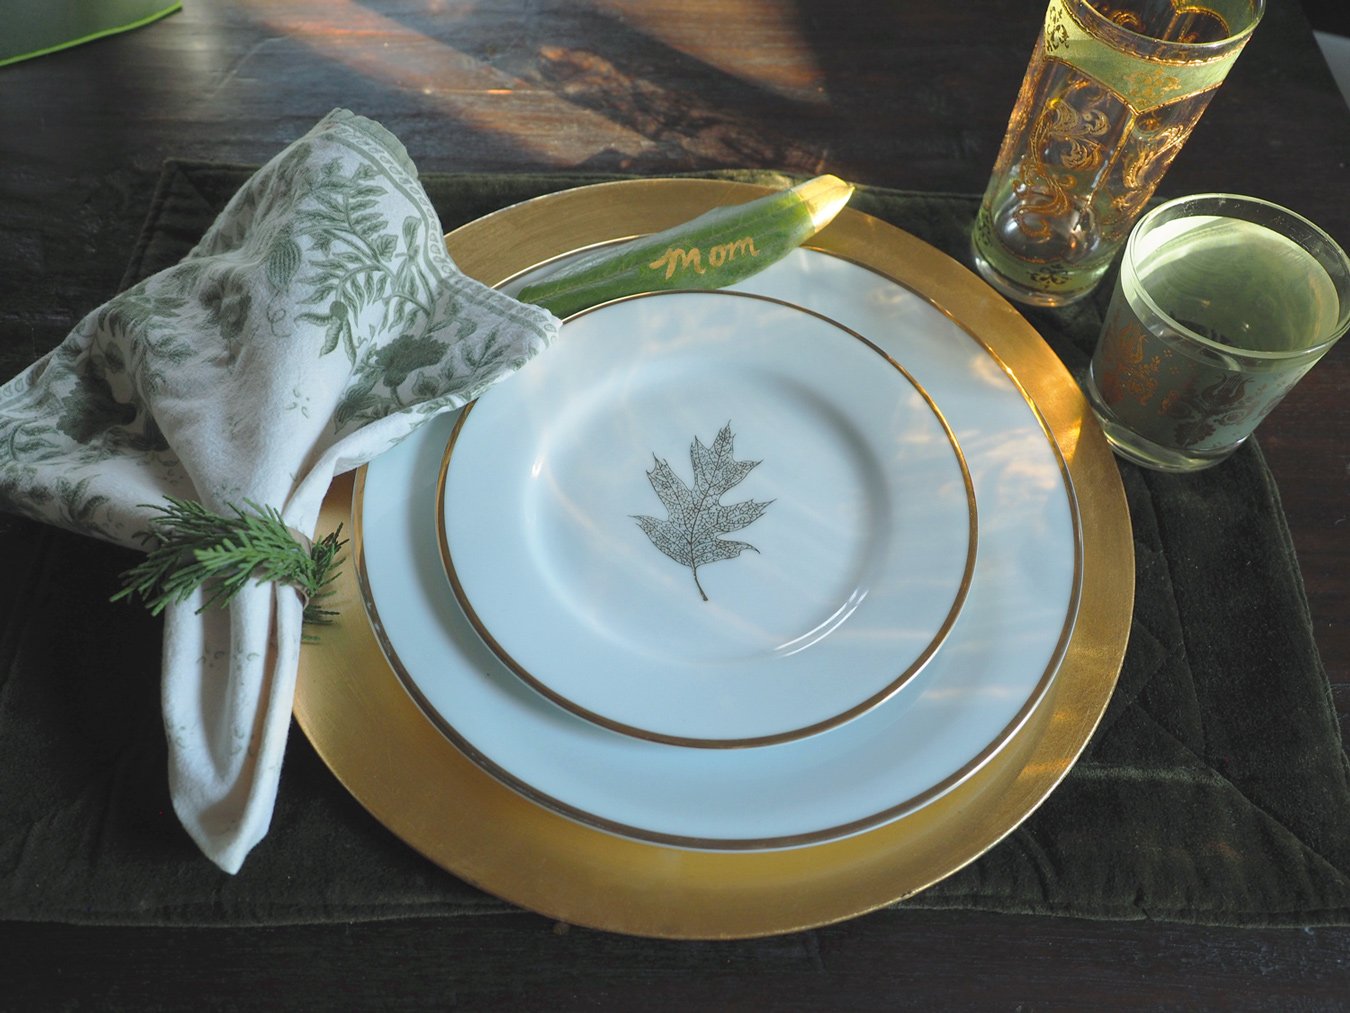
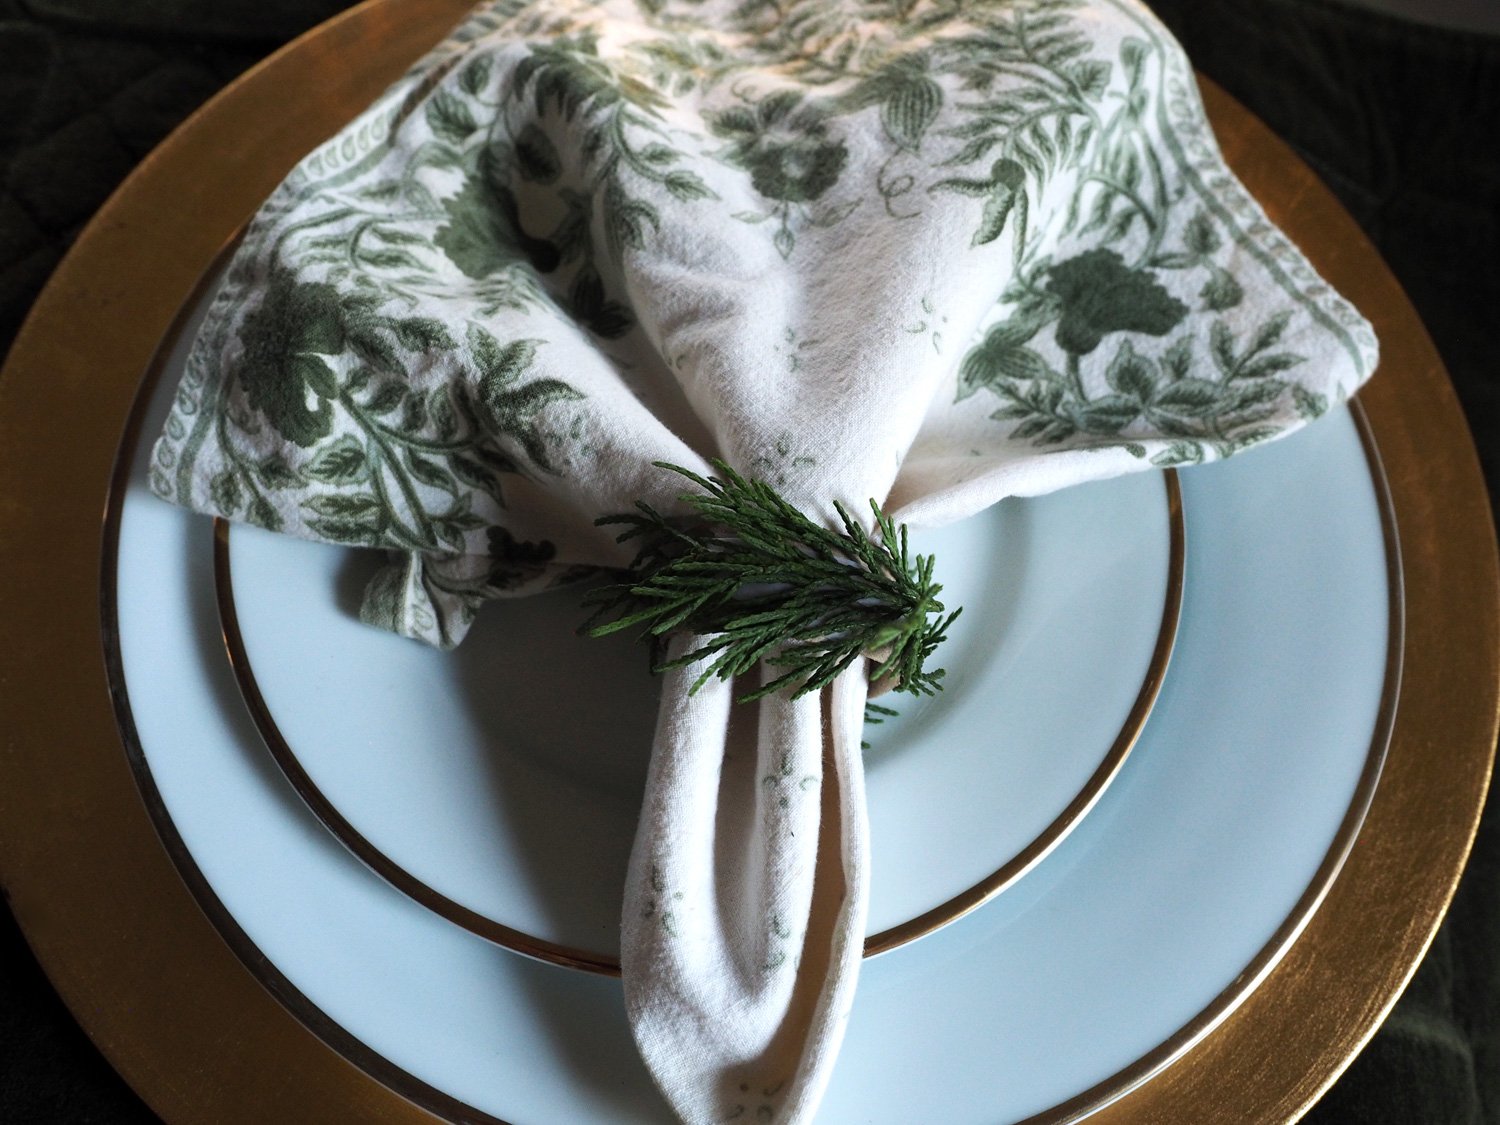
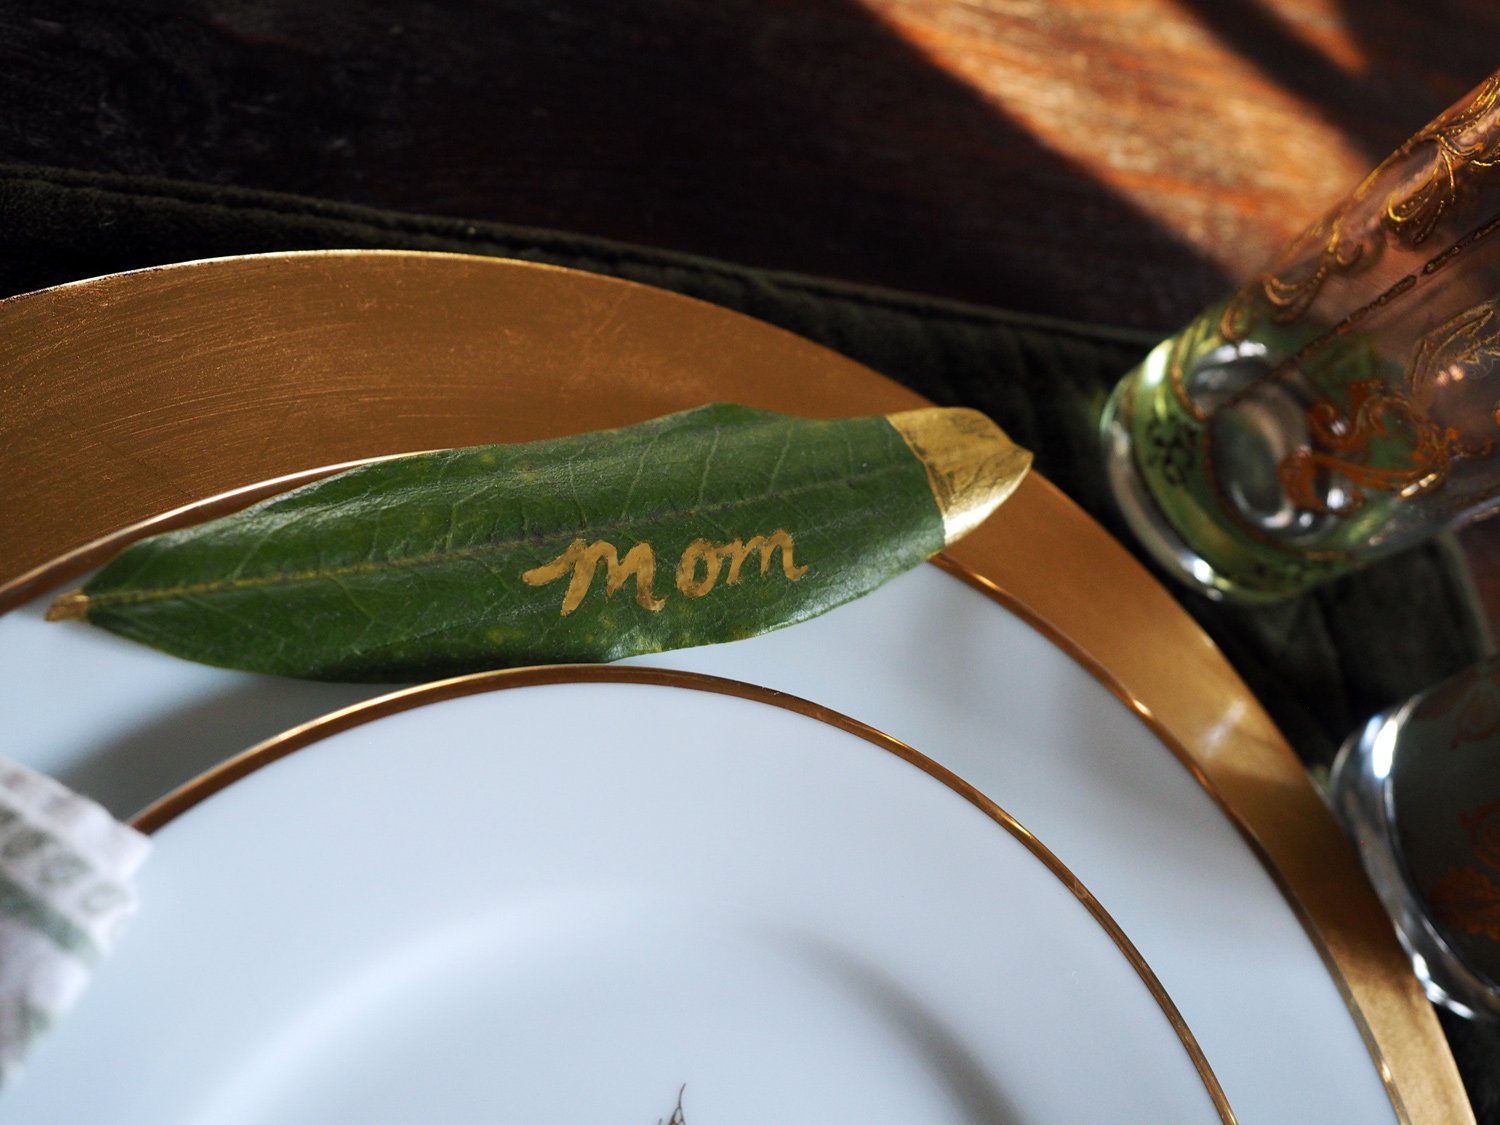
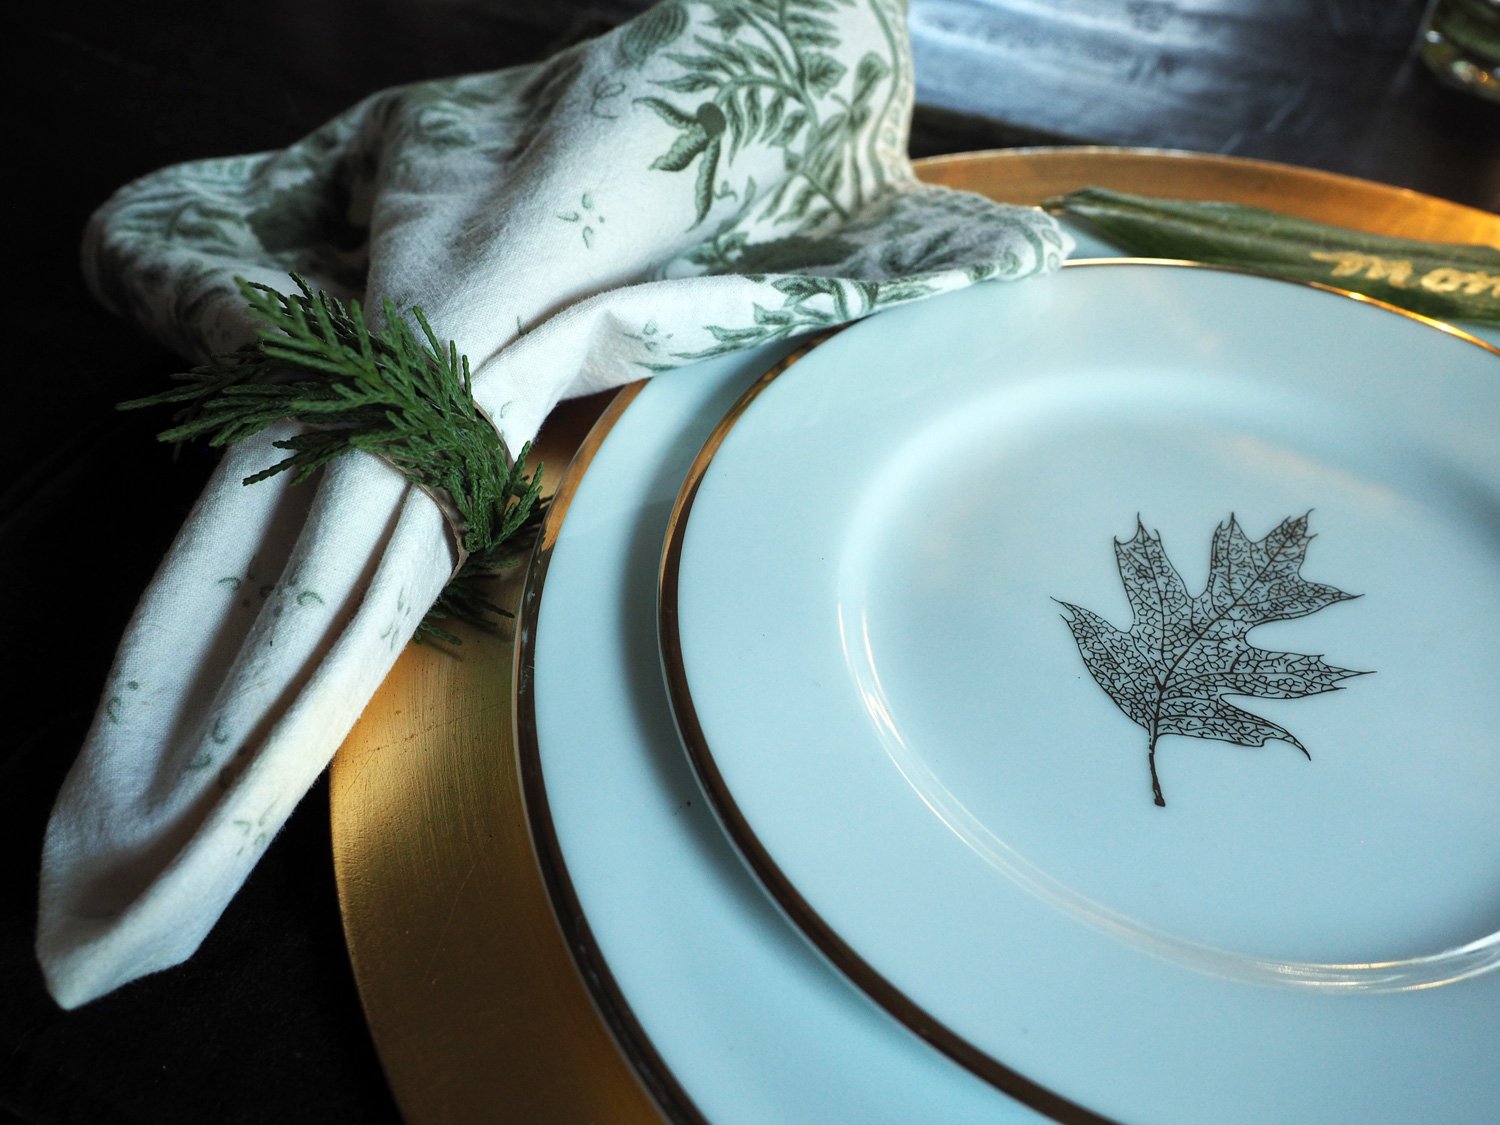
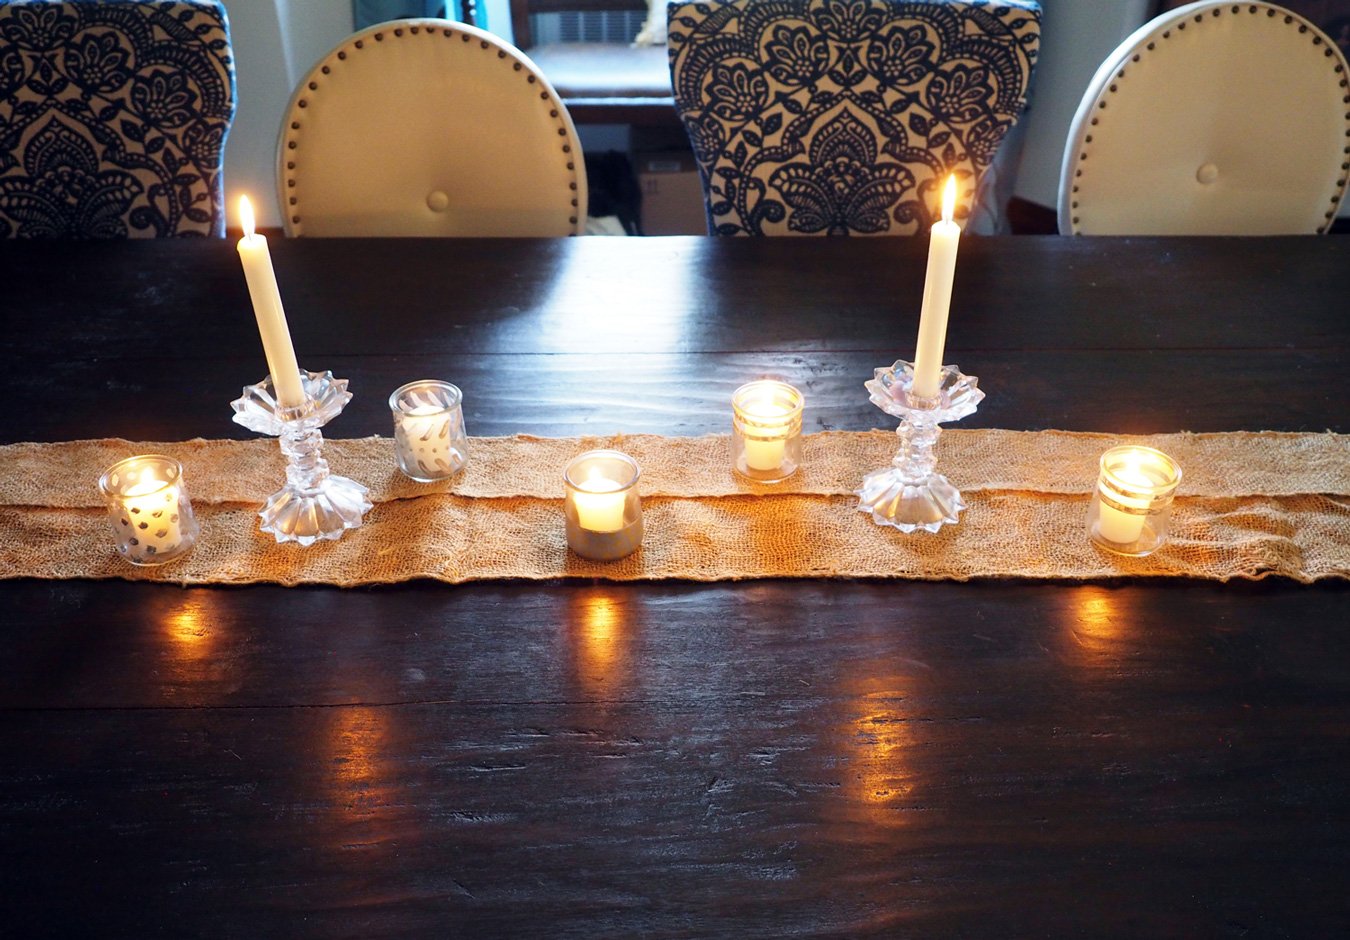
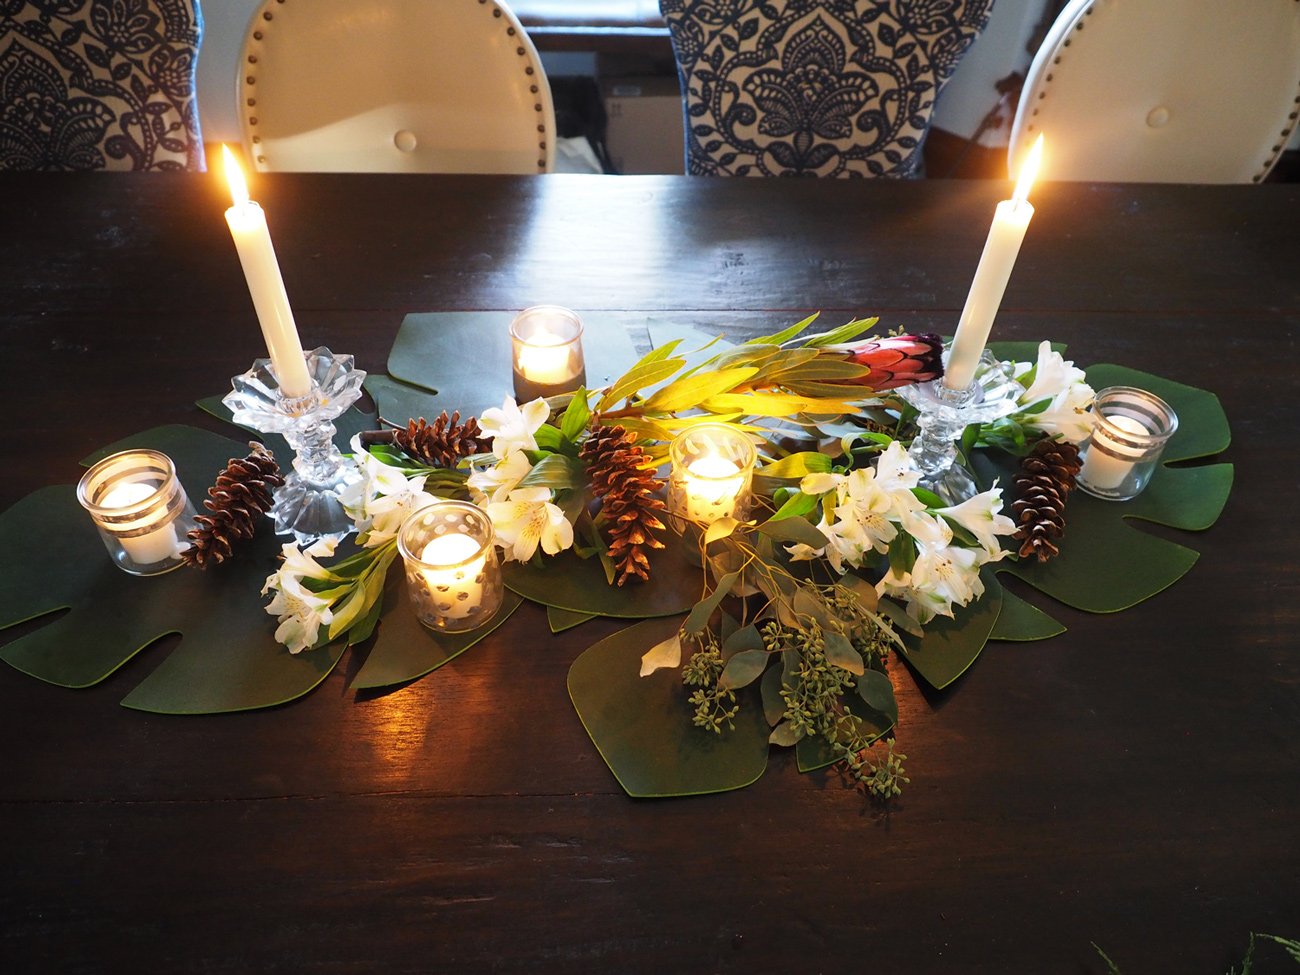
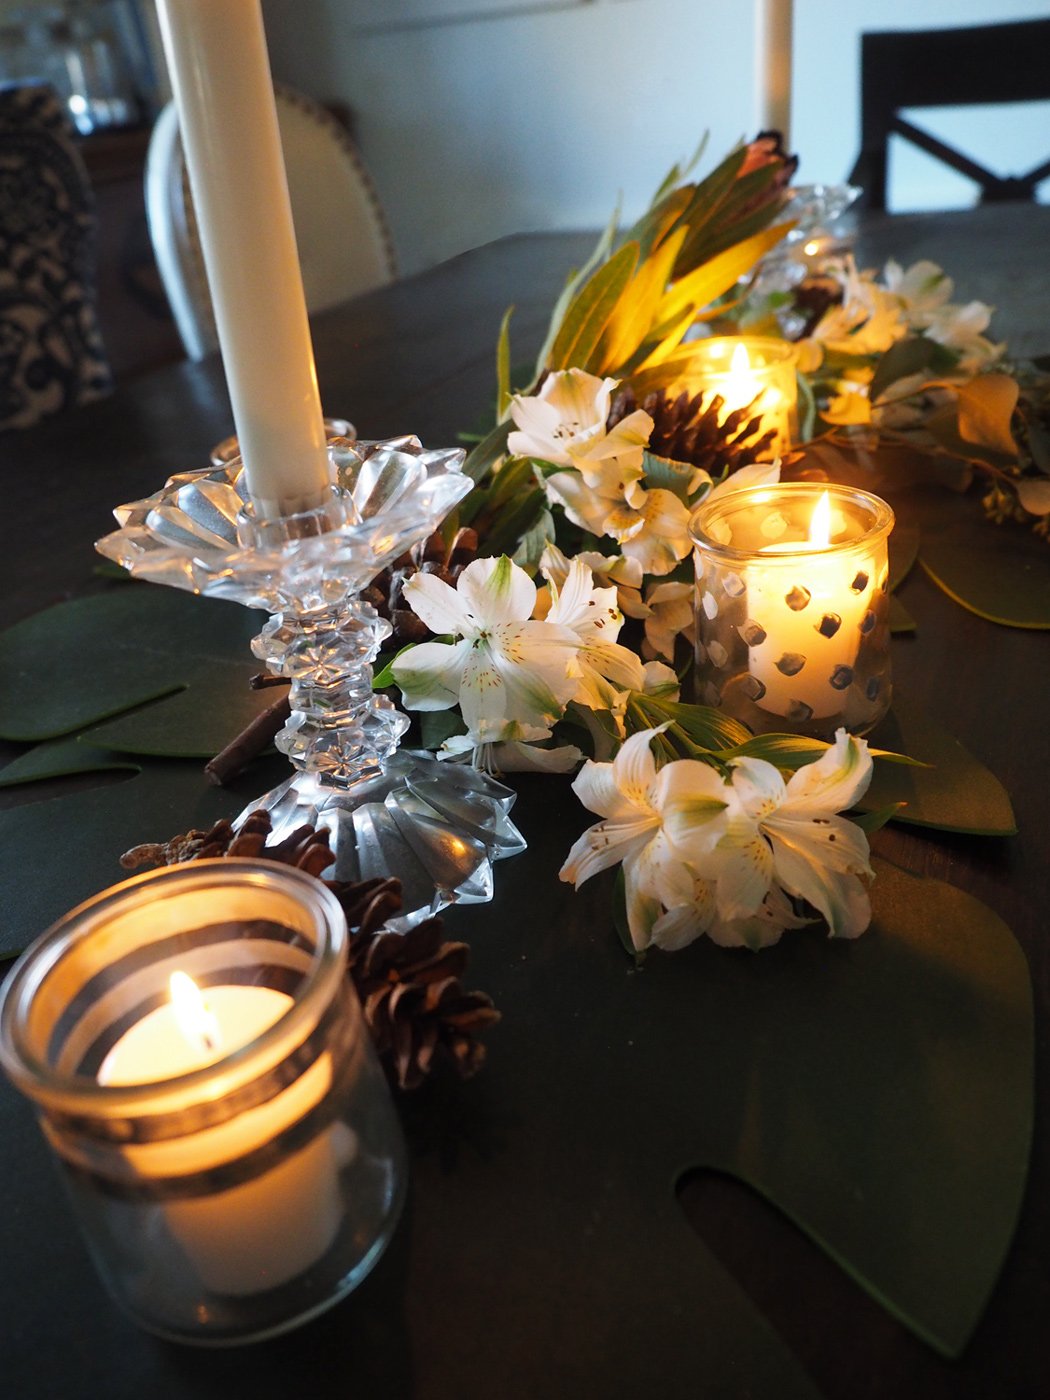
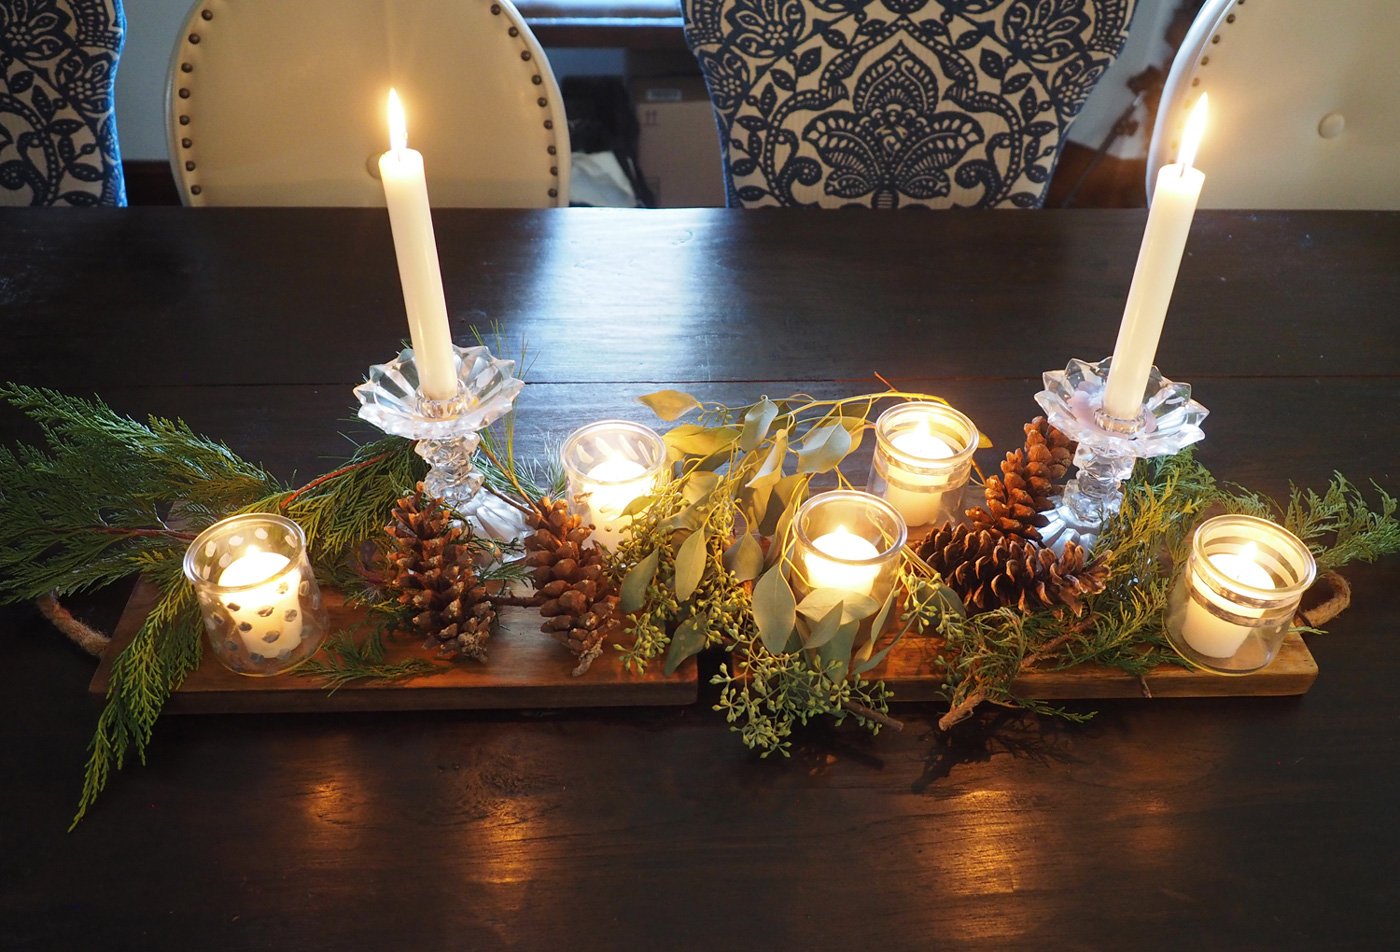
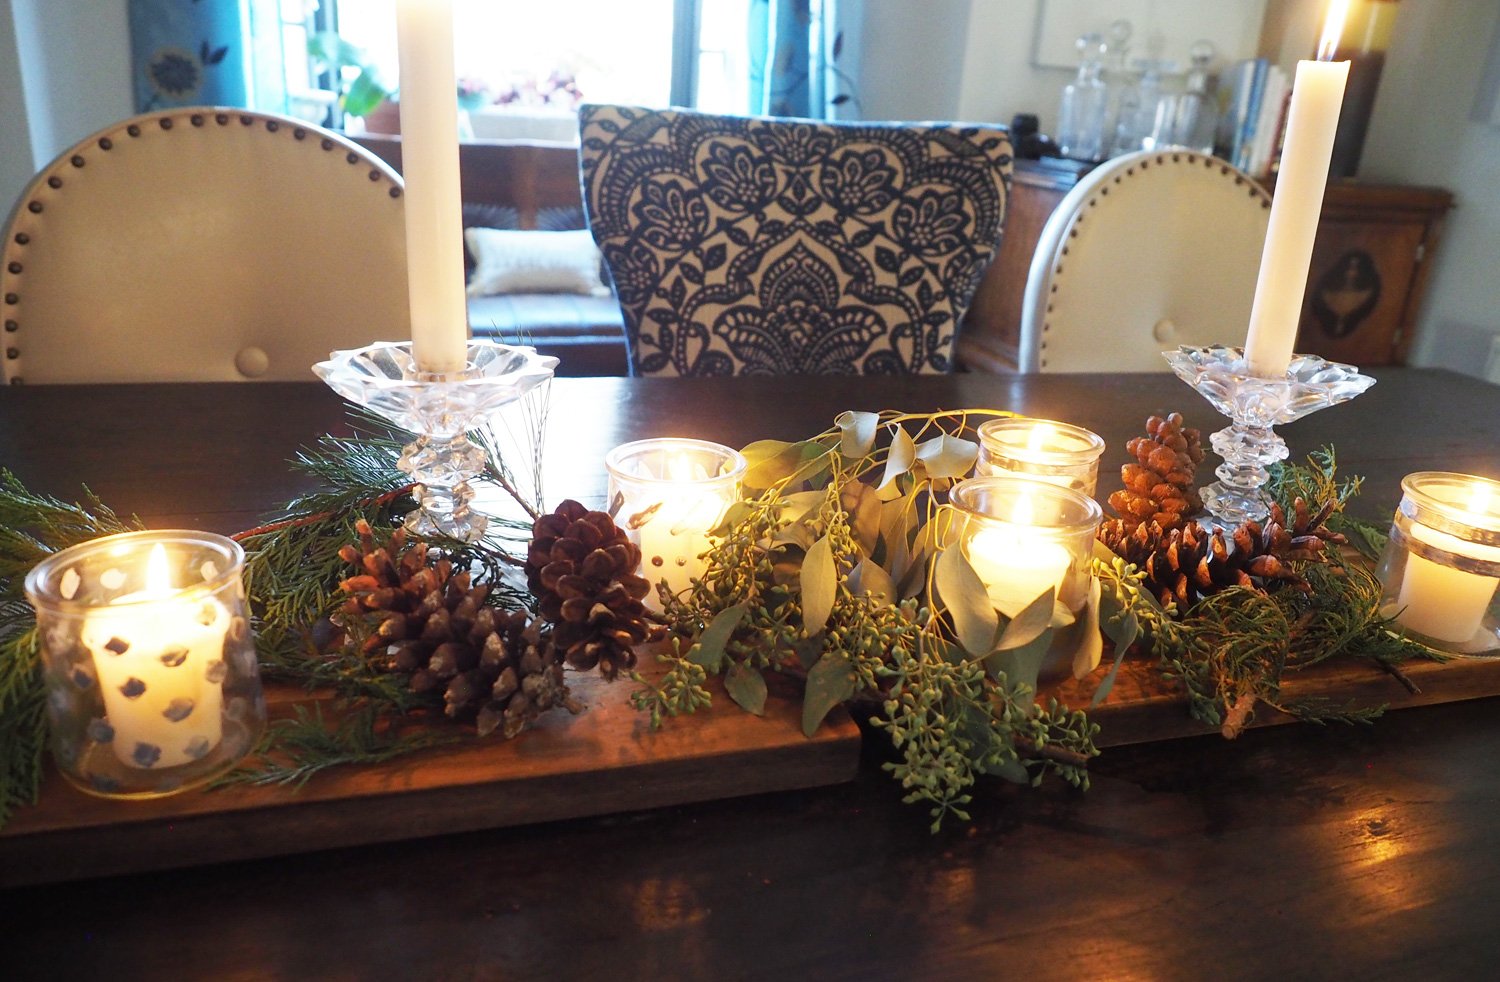
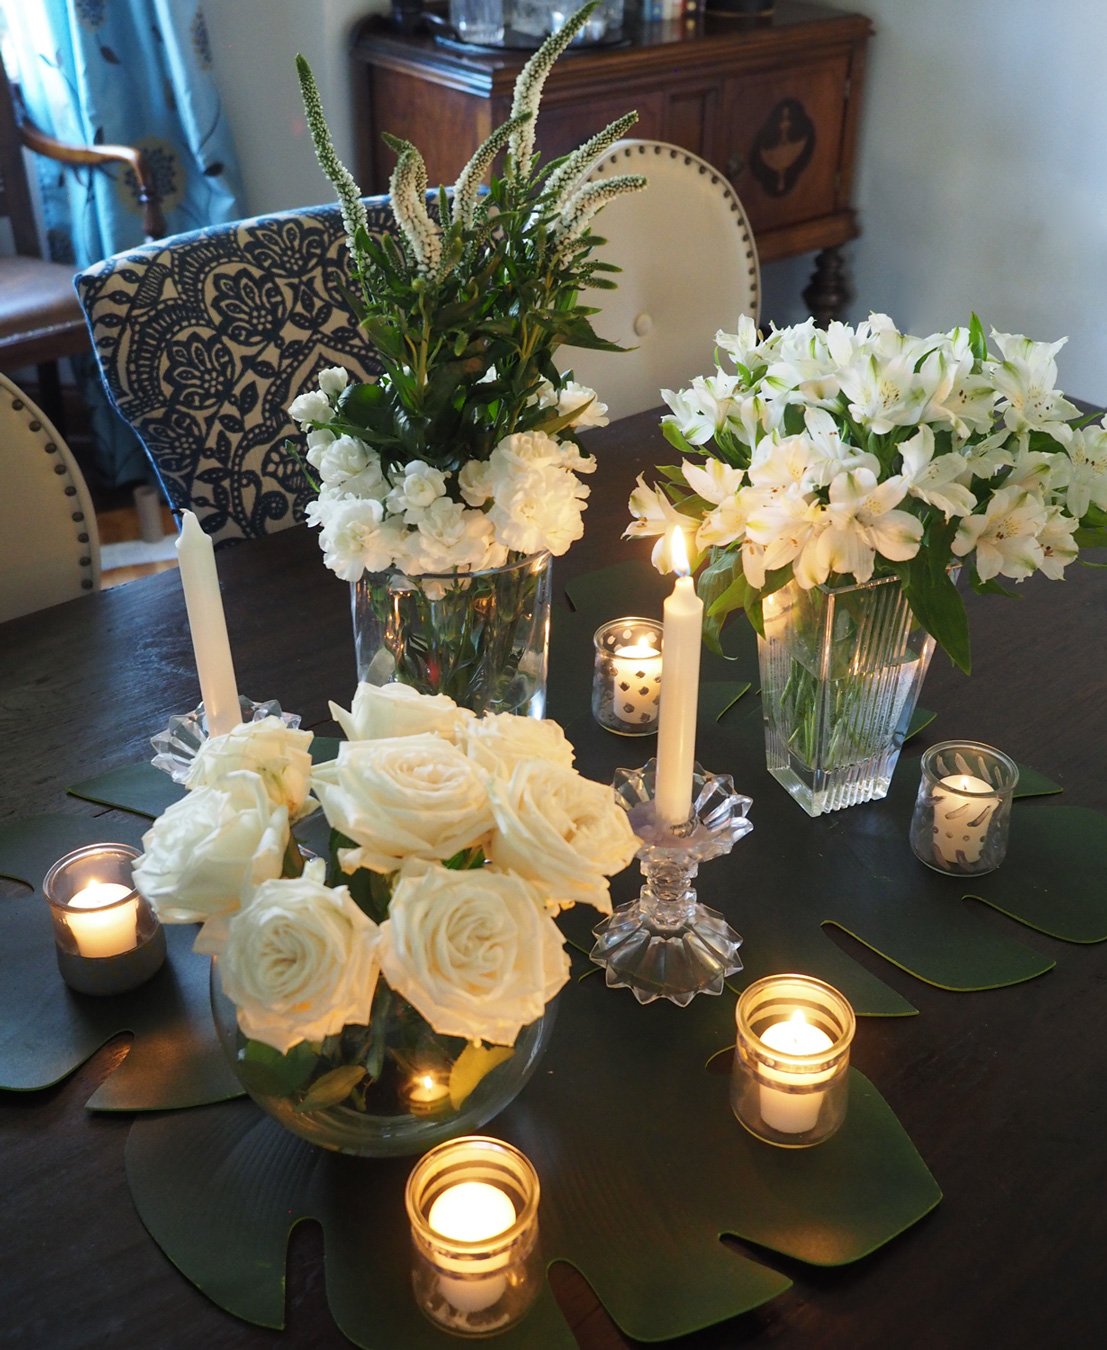
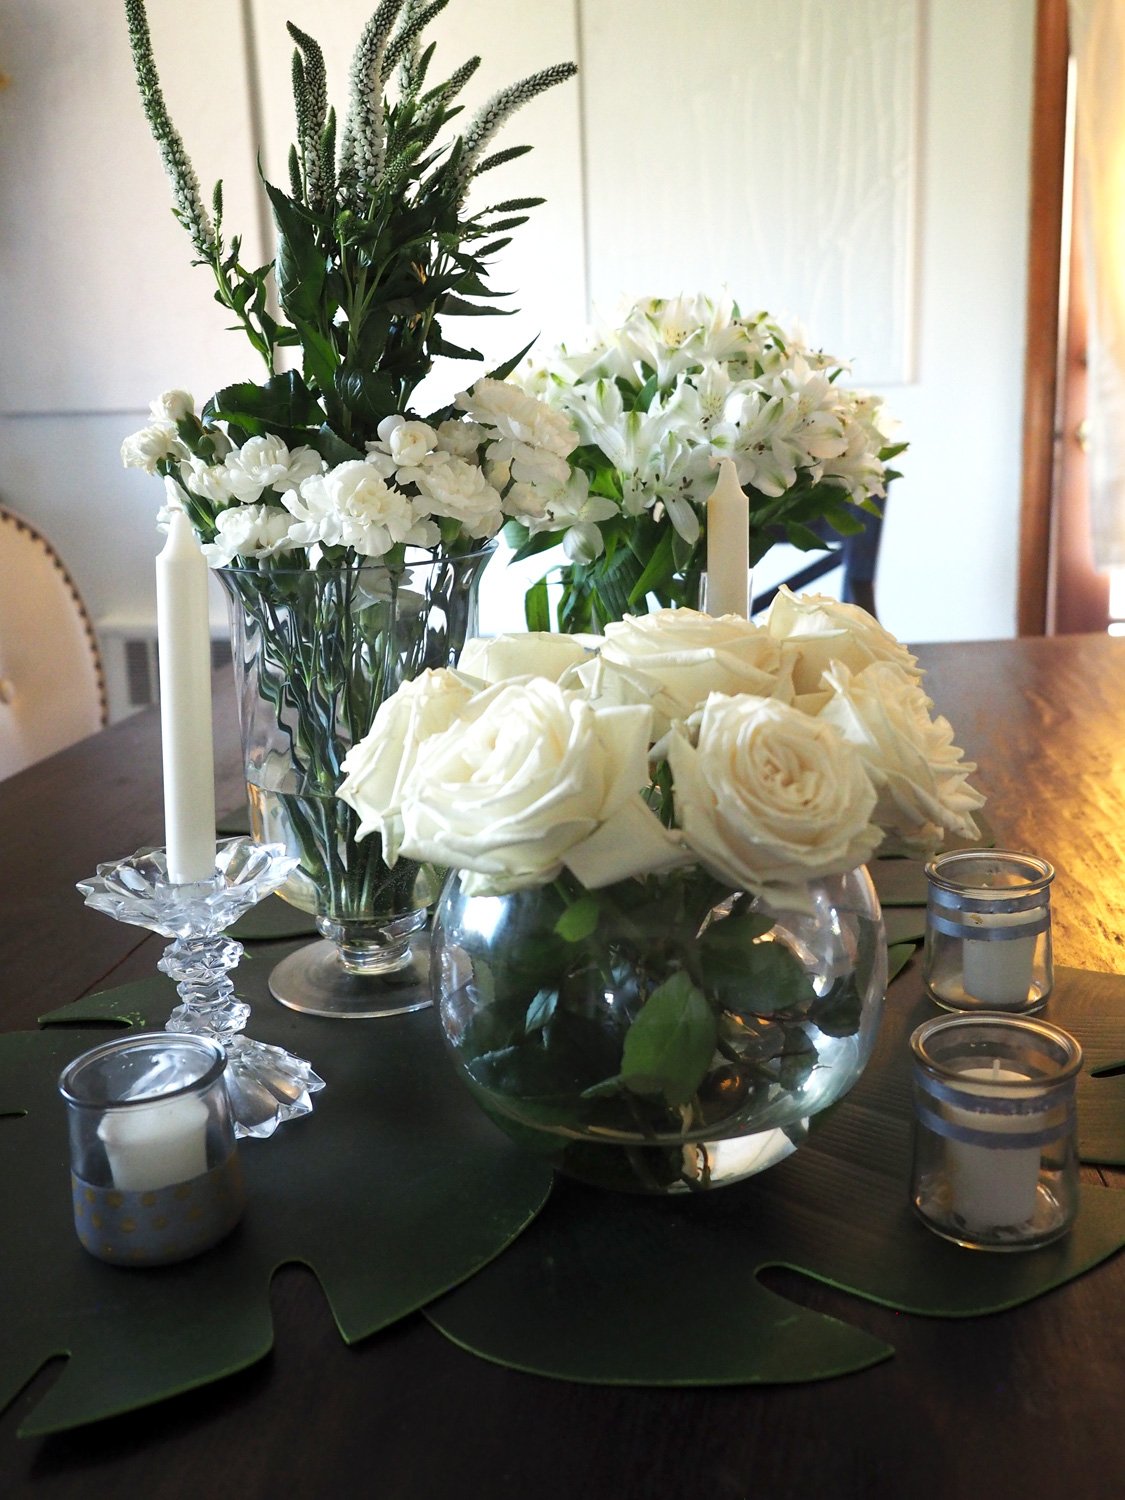
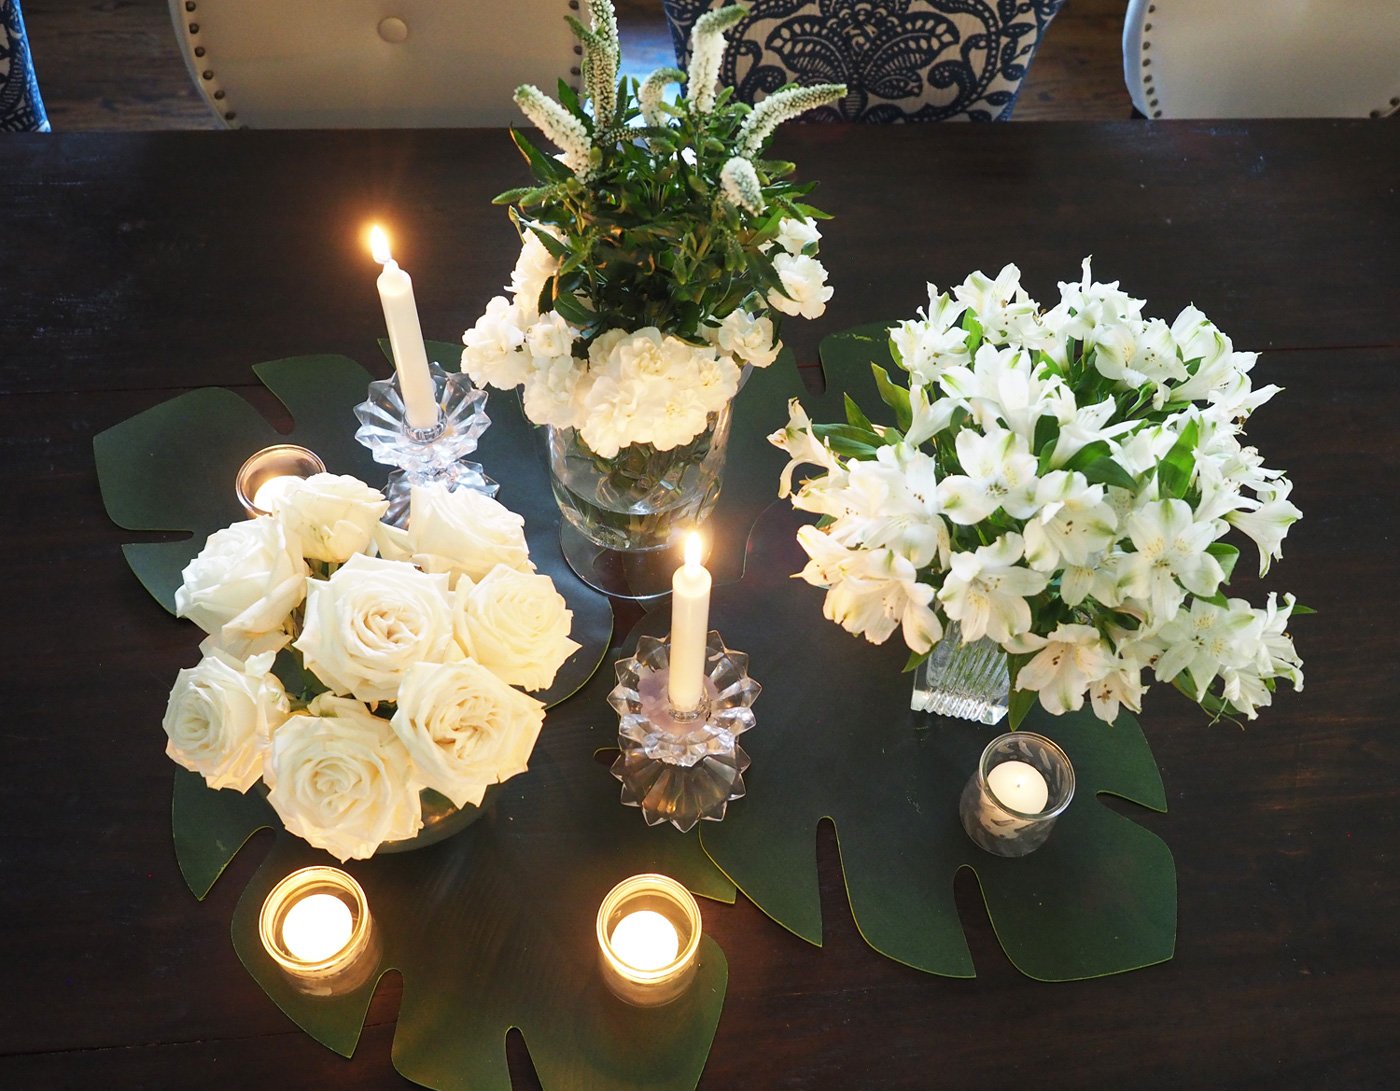
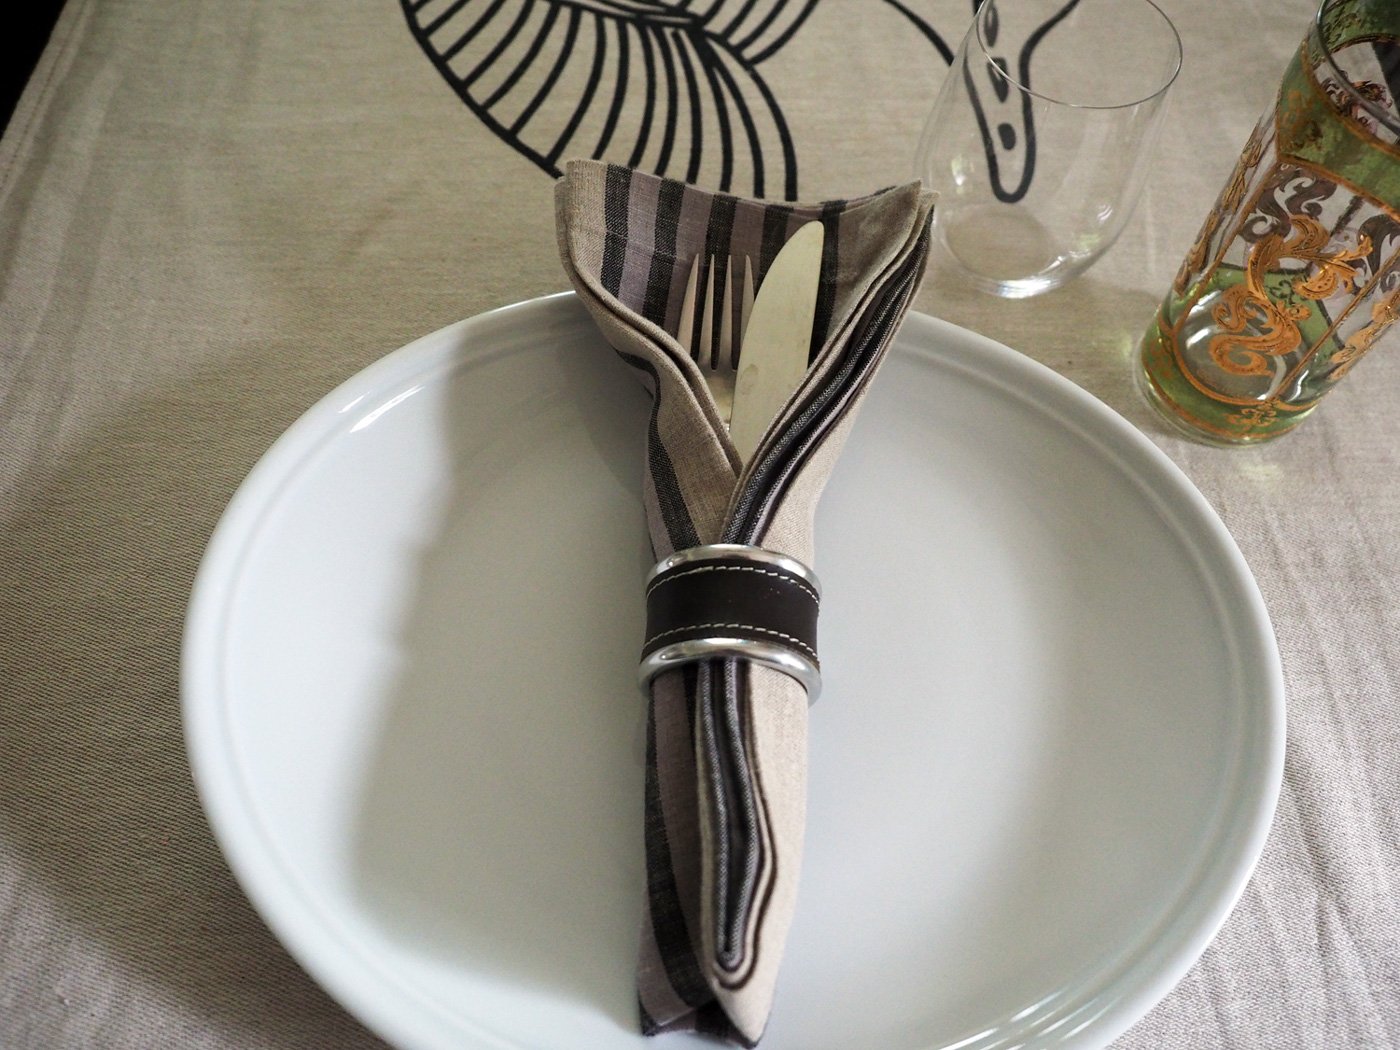
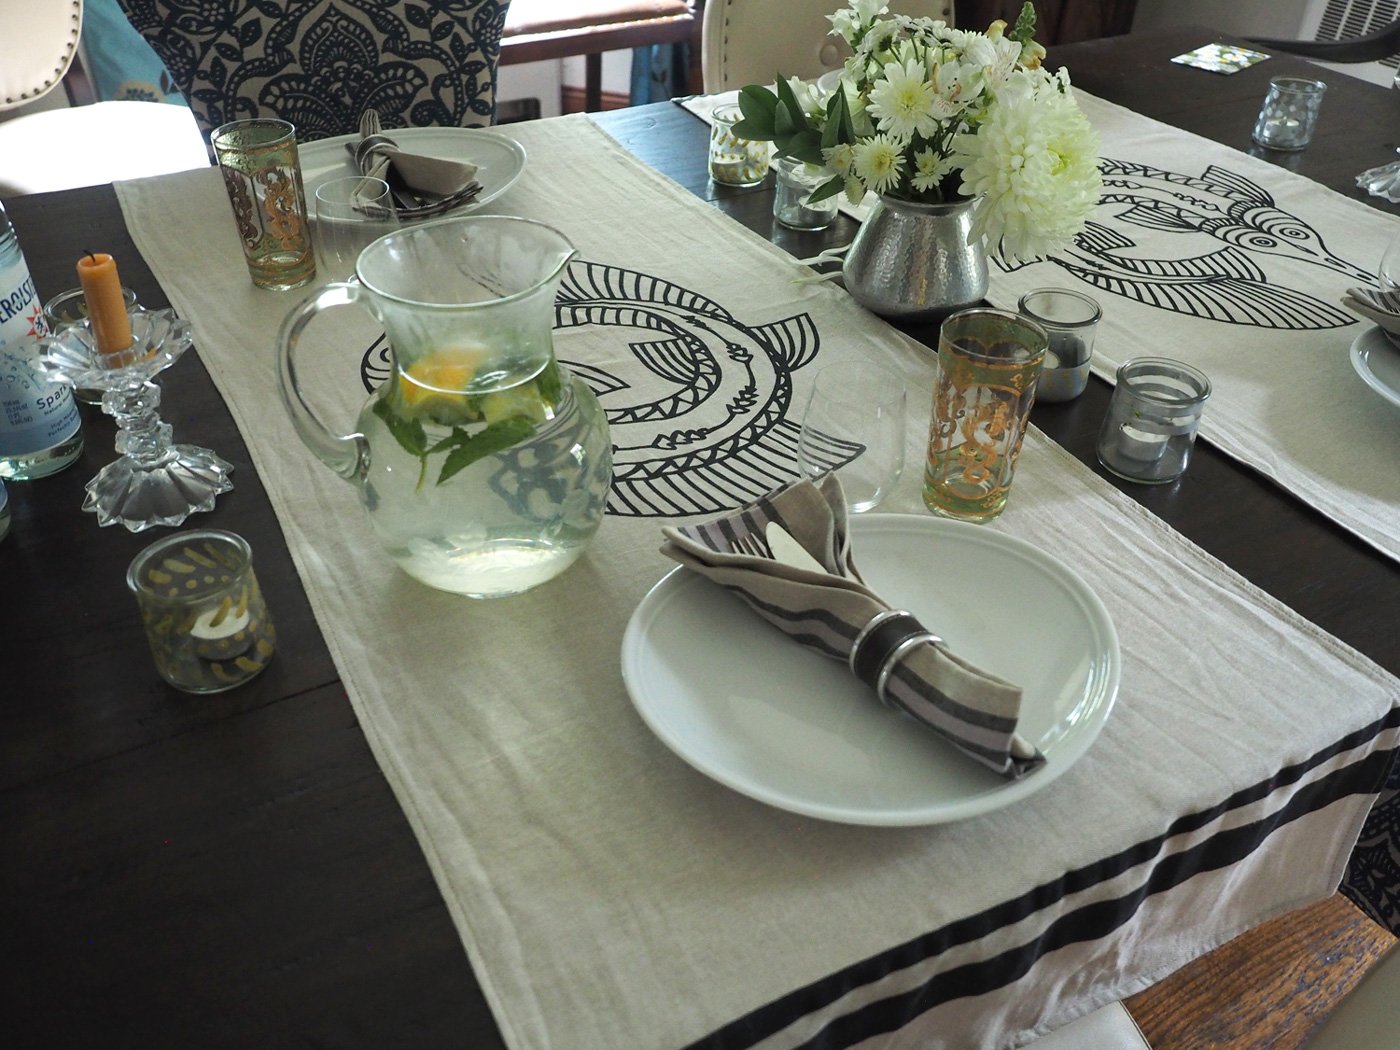
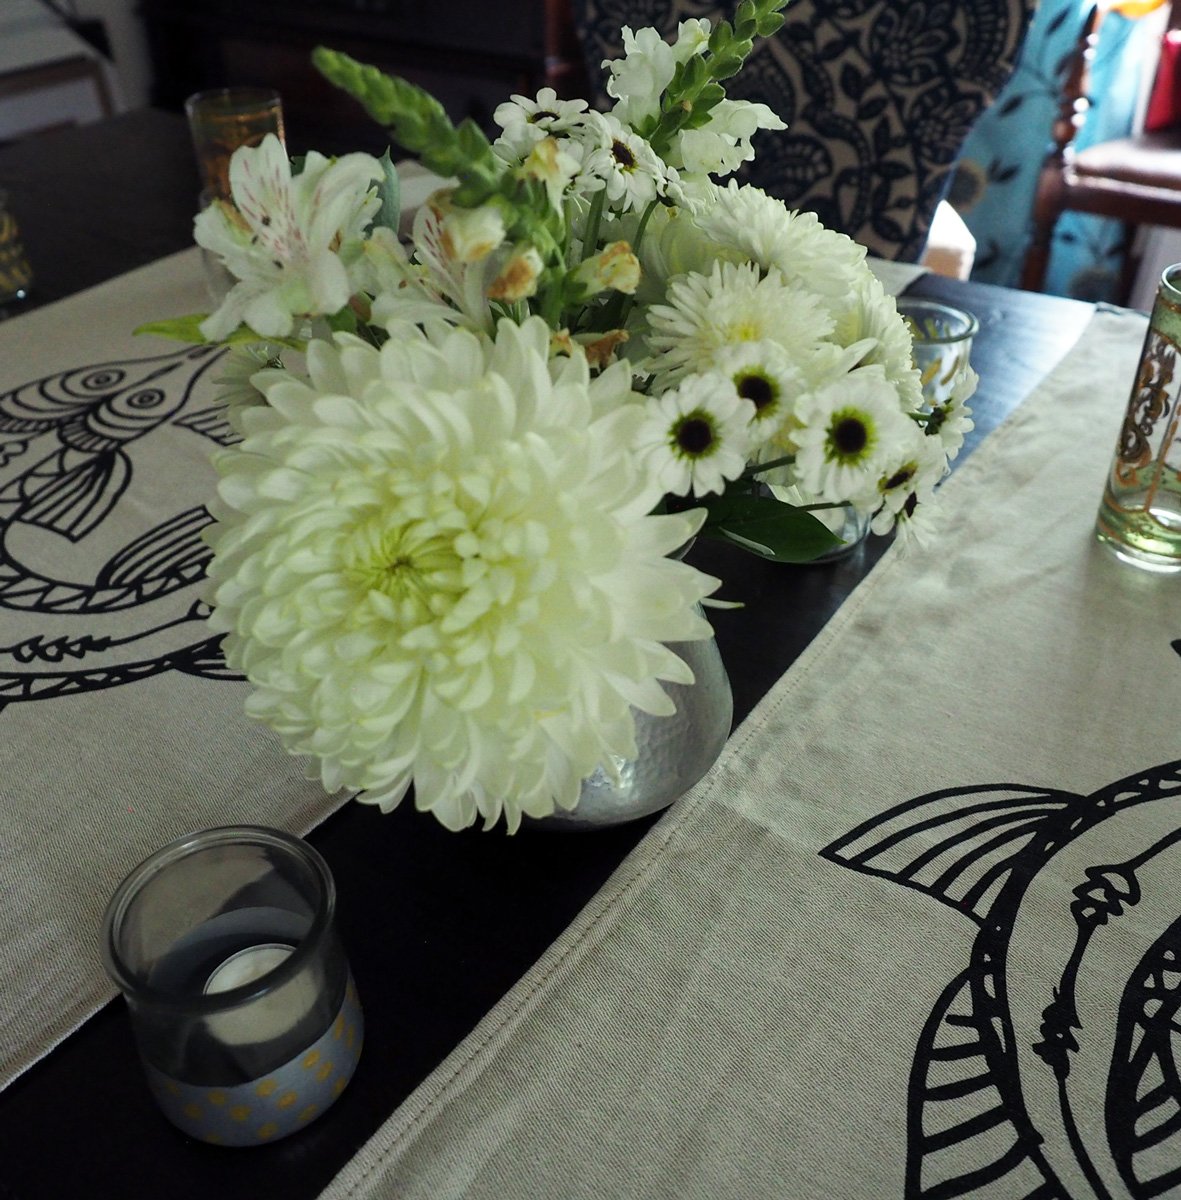
You know me, I always set a table, even in the country. I brought the floral cloth and napkins from our home and then used the placemats and dish & glassware from the country house. As you can see, this is a simple table set up. It doesn’t have to be all decked out to feel purposeful.

Simple table setting

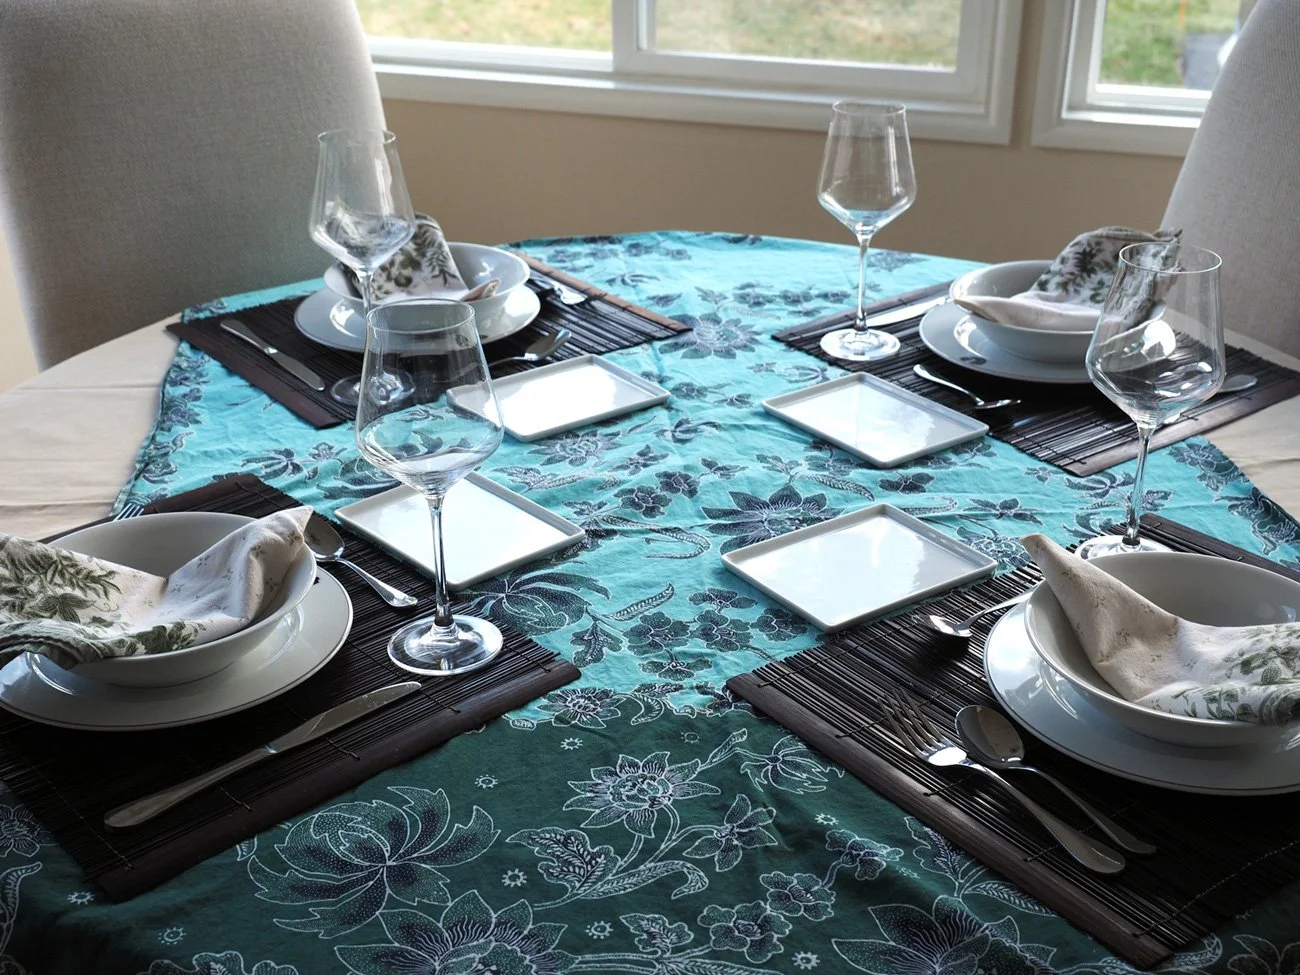
I used a remnant material to add some color and fun to the table. It doesn’t have to be all jazzed up, just a tad of effort to make it feel special.

Another wonderful evening with our friends… country entertaining that warms my heart.

Tecla and Scott. The best dinner guests.

Affordable Holiday Table Decor

This holiday season snuck up on me. Can’t say that I’m as prepared as my usual list making self. Maybe you find yourself in the same situation. So, when thinking about what I could offer you for this holiday I looked to see what have been the most frequently viewed posts. It’s no surprise that the various table setting and napkin folding posts take top billing. (I’ve included those links below). If you’ve utilized those you might be in need of a few new table decor ideas. Since my holiday season has been beyond busy for a litany of reasons, I don’t have time for super fussy decor. But does that mean my table should be bare? I think not. These ideas are intended to be simple, elegant and affordable. Time’s a wasting, so I’ll stop my yapping. Here we go.

These first two ideas are a bit more home grown, but add a sense of whimsy to a place setting. Typically I do not assign seats with place cards when I entertain. I let people choose where they want to sit. That said, I’ve always felt that having the host choose where guests sit elevates the dining experience. There is a certain sophistication to it. Plus, if the host is truly thinking about table conversation, careful placement encourages people to interact with other guests. For this holiday season, I subscribe to this thinking and will be telling people where to park themselves.

Wanting to keep it simple and organic, as well as something you all could easily re-create, I pulled out my scissors and scrolled through my garden looking for a hearty, long leaf. I cut Rhododendron leaves which were ideal in color, size and sturdiness. I found some decorative paint in my stash and painted the tips and stems gold . You can also use a Sharpie or one of those gold paint pens from an art store, such as Michaels or Target. Then I scripted the names on the leaf. That’s how simple this is.

The next little DYI project is for those of you who don’t have seasonal napkin rings. This one is right out of the creative crafts bucket. You’ll need:

  • Toilet Paper Rolls

  • Double sided tape, or regular tape rolled to double sided

  • Snipped greens from the garden

  • Scissors

Next:

  • Cut the roll into 3/4” rounds (or whatever thickness you prefer).

  • Wrap the tape all the way around the roll, or you can try glue. I just didn’t want the sticky fingers that often times occurs when using glue.

  • Trim the greens to small, manageable pieces and place them around the taped part. Add tape or glue to tack down the fronds or if you want to cover more of the roll.

Once you’re done playing, slide your holiday themed napkin through the ring. Then lay the leaf place card against white plates set on a gold charger with a deep green velvet placemat and you’re all set.

Cost: $0 since I had the paint, and the leaves and greens were from my garden, and the roll of toilet paper, well…

Now, onto centerpieces. I like when the table decor allows for guests to see across the table. A low profile centerpiece does just that. Bear in mind that this idea is for those who like to have a permanent centerpiece as it is not meant to be removed for dinner.

Simply place a neutral runner or fabric down the center of the table. This could be brown kraft paper, burlap or muslin. I used two rolls of natural burlap I purchased awhile ago at Michael’s Craft Store. The more earthy toned the better for this theme to keep the feeling of nature. I like to add the candles first in order to have a sense where to place the other decorative elements. From there you just start filling in the spaces using the greenery trying to tuck the end stems under other greens. Add some pine cones to fill in the gaps. I bought this whole bunch of greens which included a Quesnelia flower for $8 at Trader Joe’s. I had the pine cones from my garden. A beautiful, warm centerpiece for $8!

This next one is a variation on the above idea but using actual large leaves or large leaf placemats instead of the natural colored runner. I picked up these placemats years ago when I was hosting private events at Despaña in Soho, NY. I used them a multitude of ways back then, and they are still coming in handy. You can find these in various stores, but of course Amazon has everything under the sun. Thus you’ll be able find a fairly prolific selection of leaf types in the link above. Lay them down the center of the table, and as previous, place the candles first. Since the base is green, I suggest leaning into more white florals and pine cones for this version to create more contrast.

And because I’m a sucker for options, if you like the above two ideas but need them to be removable, then build the centerpiece on long wooden boards, or trays. This way the entire centerpiece can be lifted to create space for food platters.

I created all the centerpieces directly on top of my dining room table without a tablecloth. You can either use placemats for your place settings or lay down a neutral tone cloth first. Your choice.

The last, simple but elegant centerpiece is a trio of vases in varying heights of all white flowers. What I love about this design is how the monochromaticity elevates even the most common flower. By utilizing a single color, you create more impact, allowing you to use affordable, inexpensive florals to create something stunning. Sure, red & green are lovely for the holiday season, but they are visually abundant this time of year. Which is why I adore a Winter White theme. For me, it is elegant simplicity. The best part is that you can easily lift these off the table if you need the center space for food platters. Added bonus; when you don’t need them as a centerpiece, you now have three separate floral arrangements to spread throughout your home. I used the large leaf placemats to anchor the entire centerpiece, allowing for the candles to feel more integrated.
I used 4 types of flowers, all purchased at Trader Joe’s for a total of $24. For less than one of those multicolored, mulit-flower bouquets I was able to create a stunning, sophisticated and abundant centerpiece.

  • Roses $10

  • Carnations $5

  • Veronica $5

  • Alstroemeria $5

I hope these give you a few more holiday decor ideas for your table this season. Wishing you the happiest and healthy of holiday seasons. As you know, I love hearing from you in the comments. Let me know what you think and if you used any of these or other ideas. Thank you for your loyal readership.

For more table setting & holiday ideas, check out these posts:

Napkin Folding - 5 Basic Folds - Countless Options

Table Setting - A Multitude of Options

Napkin Folding - A Few Festive Ideas

Thanksgiving Table Settings - Casual to Elegant Although this post has a Thanksgiving/Fall feel there are elements that can inspire any holiday table.


Seasonal Summer Lunch with Lifetime Friend

Now, I know that this post is long over due with a title of Season Summer Lunch. But even though this menu features some seasonal items, you can still get most of them or swap them out for ones that are in season. I felt this post was important to share not just for the food but for the sentiment of friendship, and the enduring bonds built from long ago. One of life’s great gifts is having friends. Even better, is a lifelong friend. So as luck would have it one of mine happened to be passing through Westchester. Dianne and I have known each other since Junior High. We even went to the same college, Binghamton University. Without dating ourselves, trust me when I say that we have been friends for a very long time. Busy lives, crazy work schedules and distances have kept us from seeing one another but lifelong friendships are just that… forever. So, the only logical thing to entice her to not just drive past my house on her way to Connecticut was to offer up a summertime lunch. Some of my picks; Tomatoes (both from our garden & farm stand), yellow squash and other greens would be the feature. Thankfully Dianne is a foodie too and so the enticement worked as well as the timing. With initial menu ideas in the works, I moved on to setting a simple yet pretty table.

Flowers cut from my garden, casual placemats and purple napkins to brighten things up.

Once again I find myself hosting during the week, and with each visit I am loving this idea of “work week’ entertaining. As these last few blog posts have proven, I’ve been ‘week day entertaining’ of late. My schedule affords me the luxury of being flexible and available, so these moments aren’t stressful at all. On the contrary, they are a joy to break up the work week. (Which is an ironic and funny statement since the majority of work week is cooking. What I mean is that the break comes in the form of being social. And THAT is a great thing.) I do understand that even with the work from home scenario your schedule might not allow for this much flexibility. But if it does, here is a menu that might suit your needs. And if not, then serve it as a weekend lunch option, or a light dinner. Also, this meal doesn’t need to be summer only, which is why I don’t feel so badly posting it so late.

Here’s how it went down. Even for a simple lunch, it’s always nice to have a starter to offer when your guest(s) arrive.

Appetizer - The Ubiquitous Cheese/Charcuterie Platter
(There is a reason this platter is so popular. It just works. You don’t have to go crazy with a huge platter. A few nibbles is all that is needed to whet the appetite. I put out a few things that I had on hand: Mortadella, Humboldt Goat Cheese, Cucumber slices, Picos (Spanish Mini Breadsticks), G. F. crackers, olives, sliced fresh apricots)

Choose a platter size that is appropriate for the amount of people. That way you can fill it to fill abundant, even if it’s a small offering.

I used both baby Arugula & baby Kale for this salad. It’s fresh and crisp and the arugula adds a peppery bite.

Oven Roasted Herb Oil Cod with garden picked grape tomatoes & green olives

  • Place the cod, grape tomatoes and green olives on a baking sheet.

  • Season with oil, salt and pepper (you can add chopped parsley & thyme)

  • Roast at 350 degrees for 10-12 minutes depending on the thickness of the cod.

This is easy to prep prior, covered and placed in fridge until ready to roast.

Plate it up and pour all those delicious juices over top.

Basmati Rice with Sautéed Red Onion

  • Bring 1 cup of rice to 1.5 c water to a boil.

  • Lower to simmer, cover and let cook for 13 minutes. Remove from heat and let steam with cover on for another 5-10 minutes.

  • Meanwhile, in a cast iron pan sauté diced onions in olive oil, salt, pepper until caramelized. Then add the rice to onions and ‘fry’ it up.

This is such a simple way to enhance rice that makes it more than just a carb side dish.

As far as prep, I could have done all this the morning of but I had an early morning meeting away from my home. So, I prepped the Yellow Squash dish the day before. Partly because this was a brand new creation which required a think through process along with time to set up for proper photos. The added benefit was that it proved to me that this new recipe could be made ahead of time and then finished before serving. Another disclosure; I already had the homemade Caesar dressing from a couple of days before from our dinner. But if you don’t have time to make fresh, then find the best, most natural dressing you can. I make most everything from scratch, especially dressings, but that doesn’t mean you have to. If this is an area where you can relieve the workload, then do so. However, if you have the time, there is nothing like fresh, homemade.

We finished by sitting outside enjoying homemade ice cream sandwiches. Dianne and I had the most lovely visit. Juancarlos was able to join us for lunch which was nice. We certainly missed, Lenny, Dianne’s husband, and hoping we can lure him for next time. I feel so grateful to have friends, and ones that have lasted decades. Spending time with people you care about enriches the soul. I believe we all are quite aware of just how true that is after spending almost 3 years in isolation.

If you can’t chisel out a weekday calendar slice, then do try to carve out a weekend moment to share it with old, and new friends alike.

Here we are.

Dianne, always so thoughtful and gracious brought me a hostess gift that was right up my alley. A lovely candle and napkins with beautiful friendship sayings. Besides her presence, these were the most perfect gifts.


Monday Lunch with the Cousins

So much has changed since the lock down days of the pandemic. Plenty not so good, but one decent aspect that has seemed to emerged from that dark time is that people’s schedules are a bit more fluid. Work from home or hybrid schedules allow for some unusual flexibility. And so it was that enabled us to host our cousins for lunch on a Monday. Yup, right at the start of a work week. If anything is going to shake the Monday blues out of you, hosting loved ones is a sure fire way. The main reason for their dropping by was to visit my parents. Yes, this on the heels of my cousins, Therese and Tom, visiting them the Friday before (as noted in my last post). Back to back visits for my parents meant the same for us.

Just a little side note. My dad vowed he would never move to Westchester due to narrow roads, cold weather and missing Long Island and all their neighbors. This idea always struck me as funny, as if the traffic on the LIE is so much more desirable than narrow roads. Or the weather is that much colder than Long Island’s wet winds coming off the water. Sure we are a tad bit north but not the North Pole! And missing people? HA, they have had more visitors in 6 months than they had in years.

Anyway, much like with my other cousins, we thought it would be nice if after their visit they could bring my parents over to our house for an outdoor lunch. As luck would have it, my imagined al fresco moment was dampened by rain. That said, I must admit that the indoor dining switch-aroo wound up being a better scenario for the group. We ate the appetizers and the meal all at the same table which was easier that shifting all over the place.

The beauty of back to back entertaining is that I was able to repurpose part of the table from our Friday Night Dinner, with some minor tweaks to make it casual lunch style. I also had some food surplus, so a few items reappeared from Friday night’s event.

Kept the table setting simple by using big cotton napkins as placemats.

For the table, I simply removed one runner and flipped the other lengthwise down the table. The flowers were still holding on, so they made a repeat performance. Instead of regular placemats, I used cotton napkins and folded the top and bottom edges in to create an elongated shape. As you can see, I didn’t have time to iron. It kinda pisses me off looking at this photo and noticing the creasing but I’m getting over it. Our guests were appreciative of the effort, so I guess I can let the wrinkles go. We are so fortunate to have such a wonderful family. Both sides, all sides, from every angle are full of loving, and thoughtful people. So spending the day together is not just a treat, it’s a blessing. And when you love people, you try to make food that reflects the same. As I said, I tried to repurpose as much as possible. That goes for the menu to. Here’s what I served:

Appetizers

  • Marinated Artichoke Hearts (store bought but with homemade herb/garlic oil)

  • Fennel with Extra Virgin Olive Oil & Course Salt/Pepper

  • Smoked Salmon/Cream Cheese Rolls on Cucumber Rounds

  • White Bean Dip with crudité (same as for the Friday night dinner)

  • Marinated Wild Mushrooms (store bought from Italian Specialty shop)

Main Meal

  • Oven Roasted Vegetables (Eggplant, Zucchini, Peppers, Onions, Tomatoes)

    • Cut vegetables into thick slices, season with salt/pepper and slight drizzle of olive oil (do not over oil them or they will be soggy instead of roasted.) Roast at 400 degrees flipping once.until browned.

  • Marinated Feta

  • Homemade Focaccia

    • I just started making my own. There are the two recipes I follow on Instagram. One is for overnight proving. The other is for same day, which is the one I used. Please be aware that the chef in the below link curses a lot, and I mean alot.

    • Tastelessbaker : same day foccaccia

  • Summer Pasta Salad

    • Like me, these are pasta people. But it was summer so a salad versus a hot dish was called for. I just threw together what I had in the house and made an herb/garlic oil dressing. I used pasta shells, cucumber, chick peas, grape tomatoes, red onion and tossed it all together. Important part is to cut the vegetables to bite size pieces.

  • Pork Belly Roast: This one is all Juancarlos. I will try to explain what he did best I can.

    • Skin side up score the skin through the fat but not into the meat. Flip it over to meat side to fill.

    • Create a filling of chopped herbs, garlic, oil and spread it onto the meat side.

    • Roll it up and tie with cooking string, and rub with oil, salt and pepper.

    • In a roasting pan, place onion halves and whole carrots for pork to sit on.

    • Roast at 425 degrees for 1/2 hour then turn oven down to 350 for another 2 hours, depending on the size of pork. Roughly, 20-25 minutes per pound.

      Here is another way of cooking Pork Belly that isn’t rolled.

Dessert

  • Cream Puffs (exquisitely made by my cousin, Gina)

  • Homemade Ice Cream Sandwiches

If you have ever had Monday-itis, and aren’t quite ready to start the work week, might I suggest that
you block off time on your google work calendar, rearrange your schedule and book in a lunch with family or friends that you love. I highly recommend it.

A Monday completely stirred with LOVE.


Halibut en Papillote - A Make Ahead Meal

Halibut en Papillote

My cousin, Therese, loves to eat healthy, as do I. So whenever she visits the menu is focused on fish, vegetables, and no carbs. Just recently, she and her husband, Tom, took a drive from NJ to Westchester to visit to my parents in their new home in Westchester. This past January we moved them from Long Island to be closer to us, and fortunately our family and their friends have been willing and gracious to make the trip to visit them. We hadn’t seen Therese and Tom since before the pandemic so it made perfect sense to feed two birds with one crumb. They started out early in order to extend their stay to include dinner at our house. Lucky us.

Keeping it light yet ensuring it would be filling was my main goal. So, we started off with mezze-style appetizers that would do just that.

All make ahead appetizers. Just plate before guests arrive.

Also, top of mind was trying to make as much ahead of time as possible. This was a Friday night dinner and I was going to be busy most of that day. Whenever you can give yourself a running advantage to ease your work load on the dinner day, the better. Here’s what I prepped the day before.

  • Cut the crudite and kept in glass jar with wet paper towels. Carrots are kept in a covered jar of cold water.

  • Made White Bean dip

  • Grilled Eggplant

  • Roasted Tomatoes

  • Made Marinated Feta

  • Store bought olives (Offering store bought items also helps ease the work load.)

Made ahead on the day of:

  • Roasted Spiced Carrots

    • Cut carrots lengthwise. Season with cumin, cinnamon, turmeric, salt, pepper, oil. Roast at 425 degrees until tender and browned. I made this in the afternoon, then warmed it up at the same time the Halibut baked

  • Roasted Onions

    • Cut in thick slices or in wedges. Season with Magic 3 (oil, salt, pepper). Roast at 425 degrees until caramelized. I made this at the same time as the carrots, then warmed it up at the same time the Halibut baked.

  • Halibut en Papillote

    • While the onions and carrots were roasting I prepped each packet and refrigerated them. Then baked it while we enjoyed the appetizers. You can prep this up to 4 hours ahead of time.

The night before while the tomatoes were roasting I set a simple but fun table. I wanted to give a nod to dinner. So I pulled out two matching runners that featured a sea creature and laid them across the short end of the table. This create a bridge from one side to the other. I picked up these runners at IKEA years ago, and have used them in so many ways. I love the bold, graphic contrast to the neutral tone. An inexpensive purchase that has paid off. I then chose complimentary napkins, swaddled the silverware in the center, then secured it with a napkin ring. The flared top of napkin gave the illusion of a fishtail. Another nod to dinner. The flowers were trimmed and rearranged from the ones my niece, Gianna, brought over for dinner earlier in the week. Glasses and some candles to make it moody, and we can call the table done.

This meal was a strike right down the alley for Therese’s palate. But not to worry, everyone else enjoyed it, too.

Making fish en papillote is not only a fun way to serve the main course but can be prepped ahead of time, placed in the fridge and baked right before serving. Oh, and wait, there is more; you don’t need exact amounts, or exact ingredients. Something near and dear to my heart. Use the type of fish and vegetable in the amounts that work for you and your guests. And if that wasn’t enough, it’s protein and veg all in one neat packet so you don’t need a side dish of vegetables. (I made more veggies because Therese loves, loves, loves vegetables.)

Ingredients

Halibut 6-7 oz/person ( you can use cod, snapper, flounder, salmon)
Onion, rounds
Scallion, long strips
Carrots, strands
Zucchini, rounds
fresh thyme
Lemon slices
Olive oil, salt, pepper
White wine

Instructions

  1. Slice the vegetables accordingly. This is an important step since everything will be baking together at the same time. It is essential that the ones that need more cook time be cut more finely than those that don’t. I used a vegetable peeler for the carrots, while the onions and zucchini I cut in thicker rounds. The scallions I cut in long strips.

  2. Place the parchment paper on a baking sheet. Start placing the lemon slices, onions, zucchini on top of each other at the center of the parchment. This way when you fold over you will have enough paper to fold and tuck.

  3. Then place the fish, carrots, thyme and season with salt, pepper a drizzle of oil and splash of white wine.

  4. Fold the parchment paper over the fish/veg pile then starting at one corner fold the paper all the way around creating a seal. You can either bake right away or if you are making ahead, place the entire baking sheet in the fridge until you are ready to bake.

  5. Bake at 400 degrees for 12-15 minutes depending on the thickness of the fish.

As I mentioned, I was short on time. Therefore, I didn’t have time to photograph the en papillote part. However, I did have images from the time I made it with red snapper. Which is actually an excellent example to demonstrate the many variations of this technique. In the pictured below, I used Red Snapper, Spinach, Zucchini Strips, Scallions.

With the many variations that can be made the list seems endless. But let me give you a few ideas. Other vegetables that work well: Asparagus, Spinach, Kale, Yellow Squash, Cherry Tomatoes, Olives, Capers, Basil, Sun-dried tomatoes, Broccolini.

You can even use potatoes if you slice them thin.

As you can see, this method affords a huge range of flexibility and versatility depending on your guests tastes. That is also another huge benefit. Since they are made in individual pouches, you can customized them for each guest. This might seem like asking for trouble having to make different combos for each guest. But it does allow you to accommodate guests who have allergies or food sensitivities. Or just the pesky ones who don’t like certain veggies!)

All in all, it was a fun evening of healthy eating and a great time catching up with family we love.