"Tradition! Tradition! " As Zero Mostel so famously belted out in Fiddler on the Roof, it is what grounds us to our own history. I love family traditions. They fill me with memories and smiles, good times and laughter of being together as a family. And for me, a big part of that was being in the kitchen with any one of the 3 incredible women who inspired my love of cooking and baking. My Italian grandmothers and mother: Powerhouses in the Kitchen. As a little girl I would watch them and help whenever and wherever I could. I studied, learned and committed most of what they did to memory. Thankfully, some recipes, like this one, Pizza Rustica were written down, so I can keep the tradition going. Today's recipe is brought to you by these two amazing woman, my grandmothers.

Trofimena Carmela Annunziata
aka - Mildred Majewski, mom's mom
Photo Credit: Paul Majewski

Carmela Marie Giovanna
aka - Mildred Perri, dad's mom

The 3 Powerhouses of the Kitchen - Literally making Pizza Rustica. That's my gorgeous Mom. I can't believe I found this photo!!! A treasure.
For the past few years, I have been making Pizza Rustica for Easter. What is that, you ask? Well, pizza, in Italian, simply means pie. Rustica means rustic. Duh! So this is a rustic pie packed with cheeses and meats served typically at Easter to break Lent. For those who might not know, Lent is that period of time prior to Easter when Catholics are supposed to abstain from eating meat (which I do daily anyway, so no sacrifice for me, hehe). Thus, this 'more torte than' pie celebrates the return to eating meat. It was a definite tradition in our home growing up and one I'm trying to keep afloat.
It is rich. It is dense. It is a delicious and decadent pie. One that my parents, in particular my dad, absolutely love. Nothing brings me more joy than making traditional recipes for them and seeing their happiness. I relive the moments of my childhood. This recipe is not difficult to make, just a little time consuming. You may see versions where the filling combines all the ingredients together. That is the easy way out. But my grandmas patiently and lovingly created layers. So that’s what I do. Plus, I think it looks beautiful that way. (Funny thing is my mom and I were in heated debate about this methodology. She swears her mom used the layering method, of which I have no doubt. But claims my dad's mom mixed it all together. I remember them both layering it, so that's that. Take the time to layer it and do it the pretty way.)
I like to think of this as a three part recipe. 1- Make the dough. 2- Make the filling. 3- Then layer the meats and cheeses. Here we go.

Ingredients
Dough
2 lb. Flour (approx. 6 cups)
2 tsp. Baking powder
1 c. milk
1 c. oil
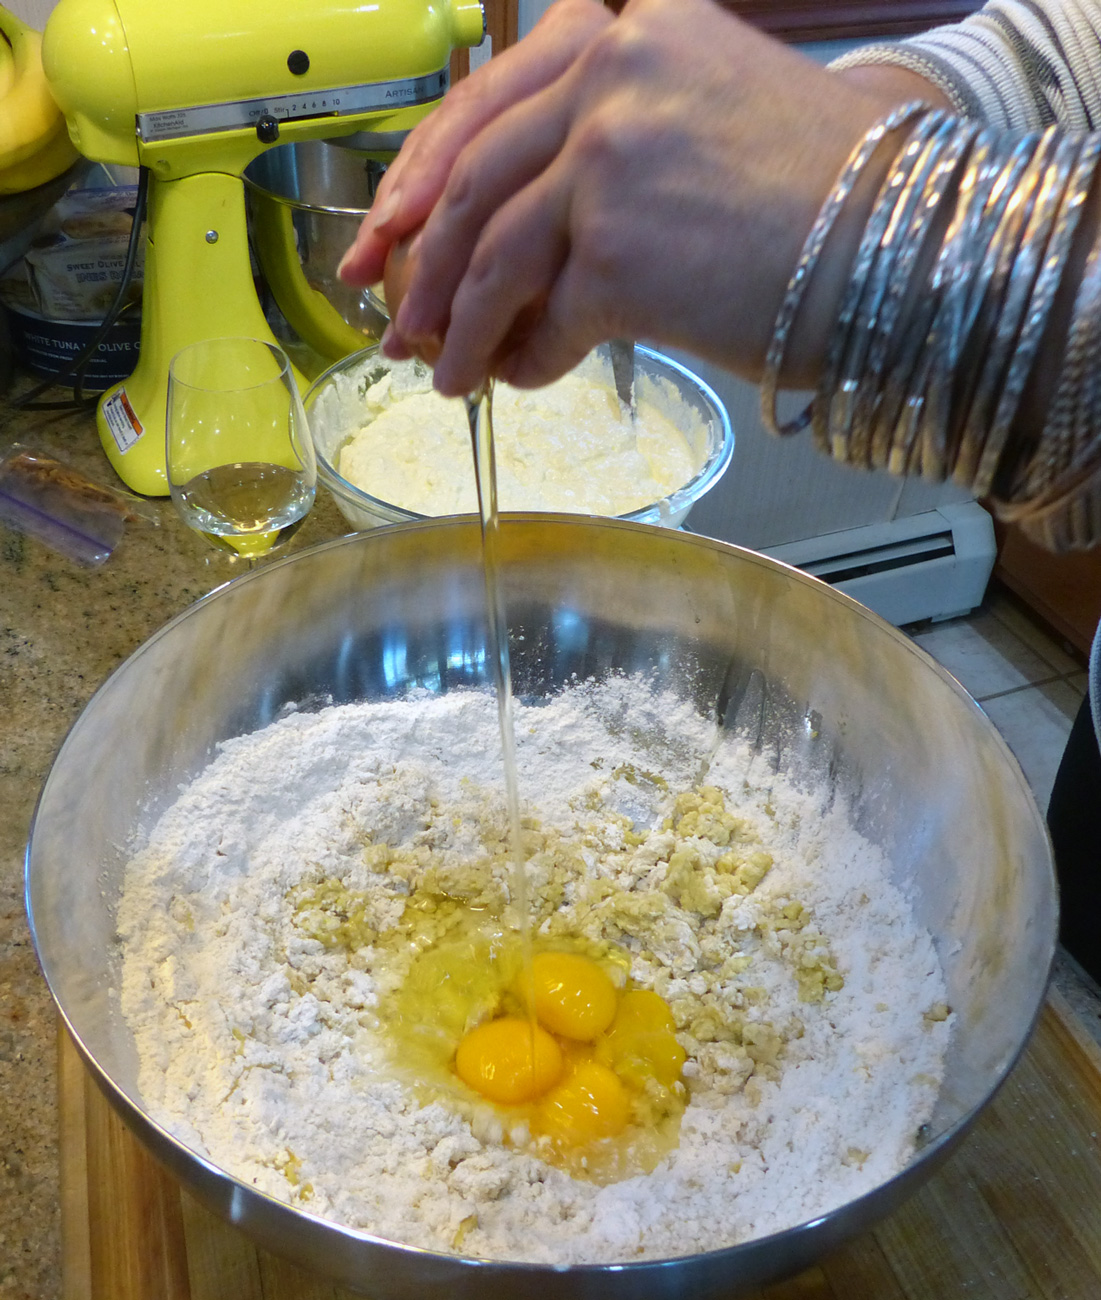
5 eggs
dash of salt & pepper
Combine all the above ingredients in a big bowl. I add the eggs last. Once all the dough comes together, knead on a board until dough is smooth. Divide dough into two sections (2/3 and 1/3). Roll out the 2/3 portion and place the dough into a 9" x 3.25" liter spring pan. (Because the pie is so dense and heavy, I suggest using a spring pan so you can remove it. If you don't have one or don't mind serving it from the baking pan, then just us the largest pan you have. My grandmothers like making this in a deep pan, but you can make it in a long rectangle. You will just have less layers.)

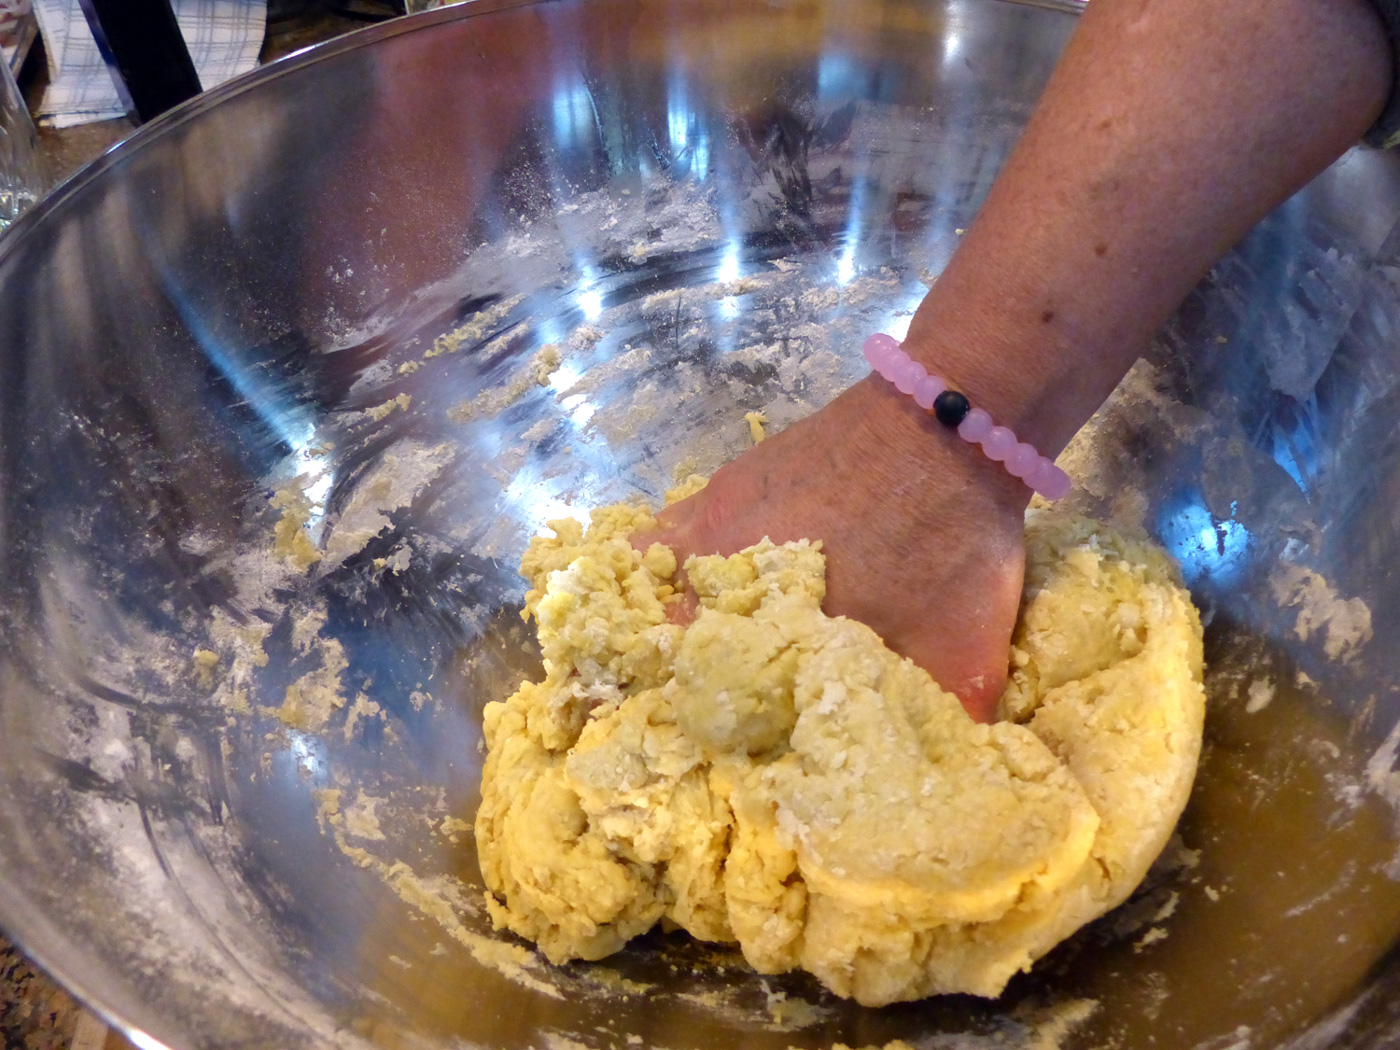
Combining into a ball.
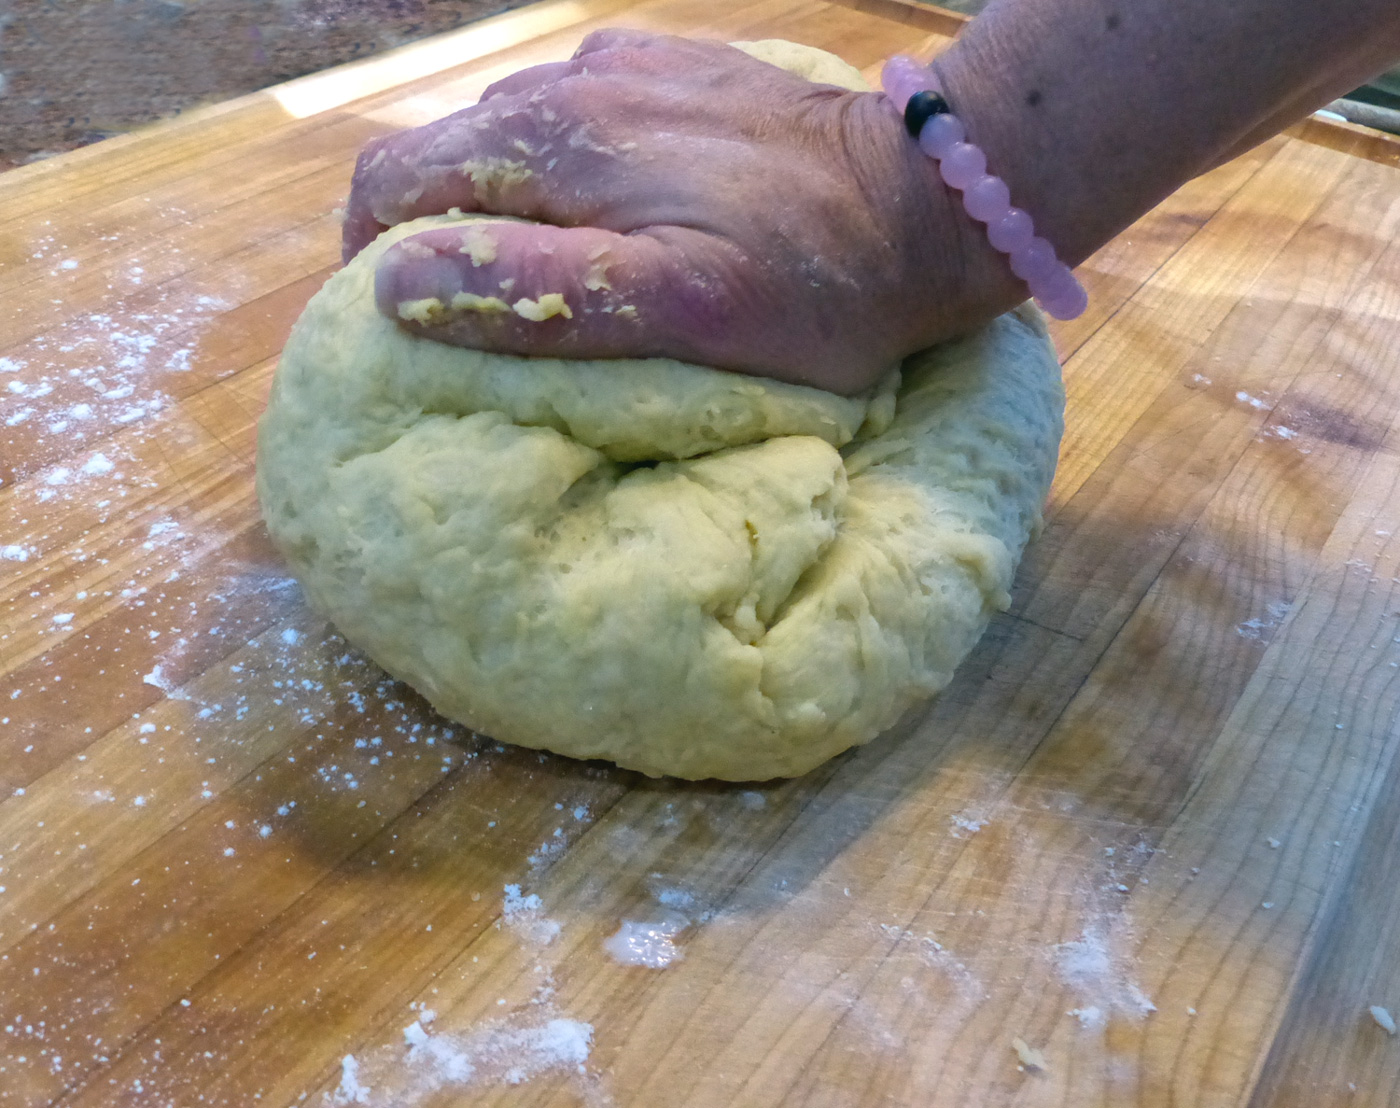
Kneading until smooth
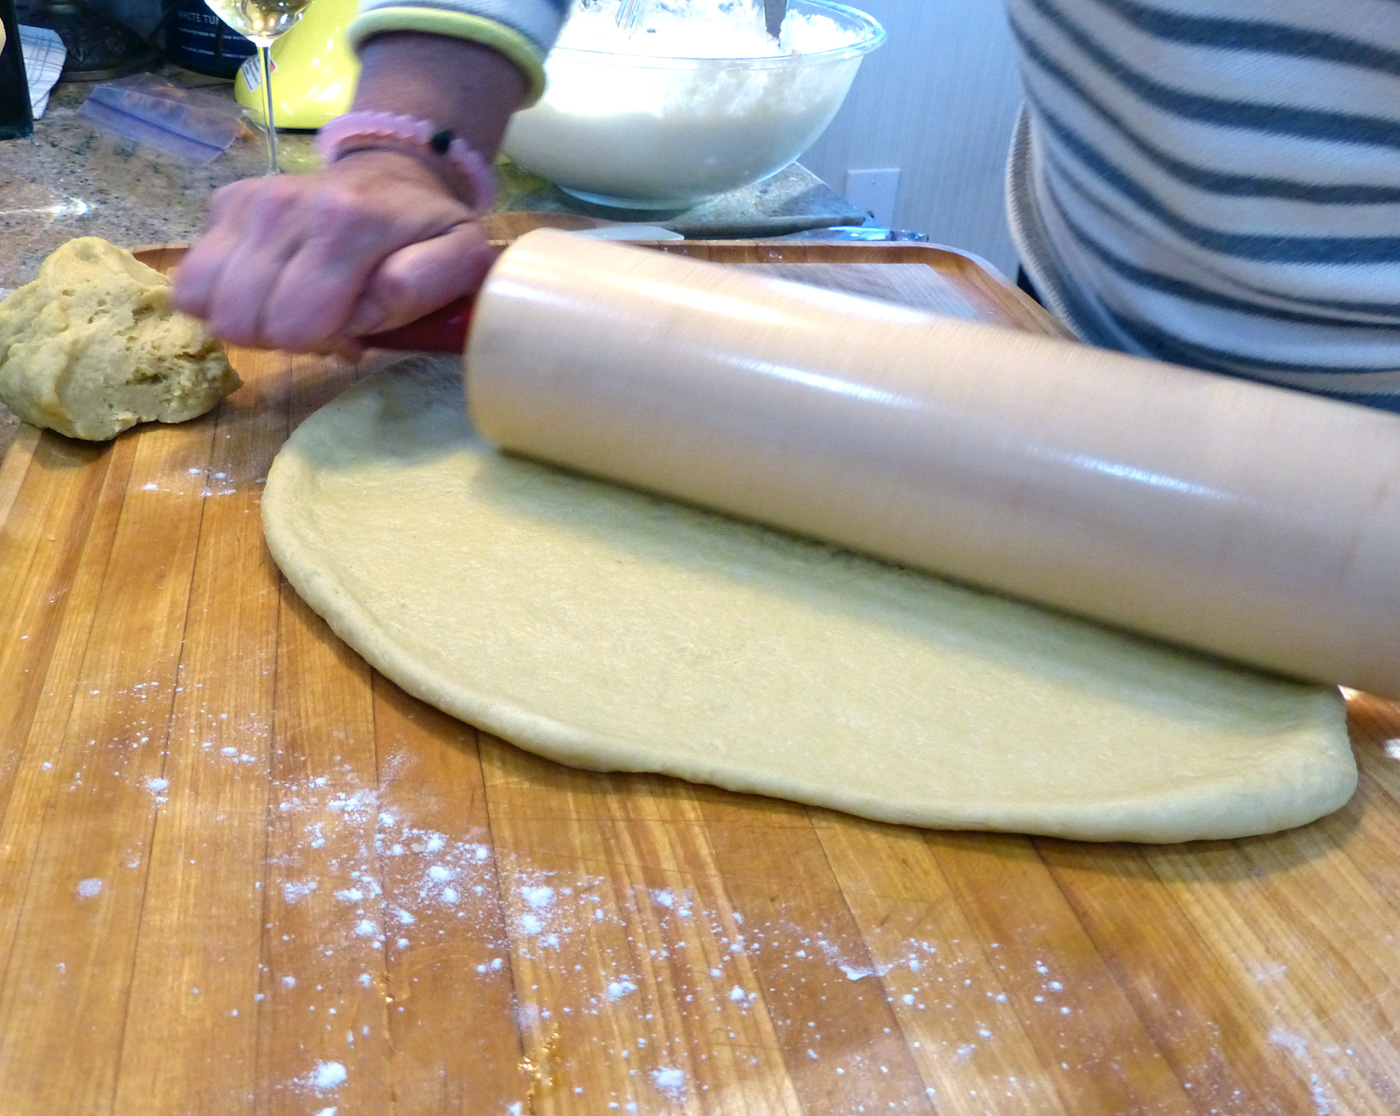
Roll it out to size. If the dough breaks, just patch it.
Now onto the filling.
Filling
½ - ¾ lb. Prosciutto, sliced thin
½ lb. Genoa salami (sliced thin)
½ lb. Soppressata (sliced thin)
1 whole Basket cheese (farm fresh cow's milk cheese made & left in the basket)
3 lbs. Ricotta cheese (whole milk)
6 eggs
fresh parsley, chopped (optional, another debate. sometimes it was added, sometimes not)
Salt

Cheesy deliciousness
In a separate bowl, combine the ricotta cheese, basket cheese and parsley with the eggs and season with salt.

You have to crack some eggs in this recipe
Get all the meats items ready for assembly. Begin the layering by first adding a layer of the cheese mixture, spreading evenly to cover the bottom. You want about 1/2" of the cheese mixture. Then add a layer of the prosciutto, followed by another layer of the cheese mixture. Next layer the salami, repeat the cheese layer. Then a layer of soppressata, and repeat the process until you fill up the pan.

First layer of goodness going down.
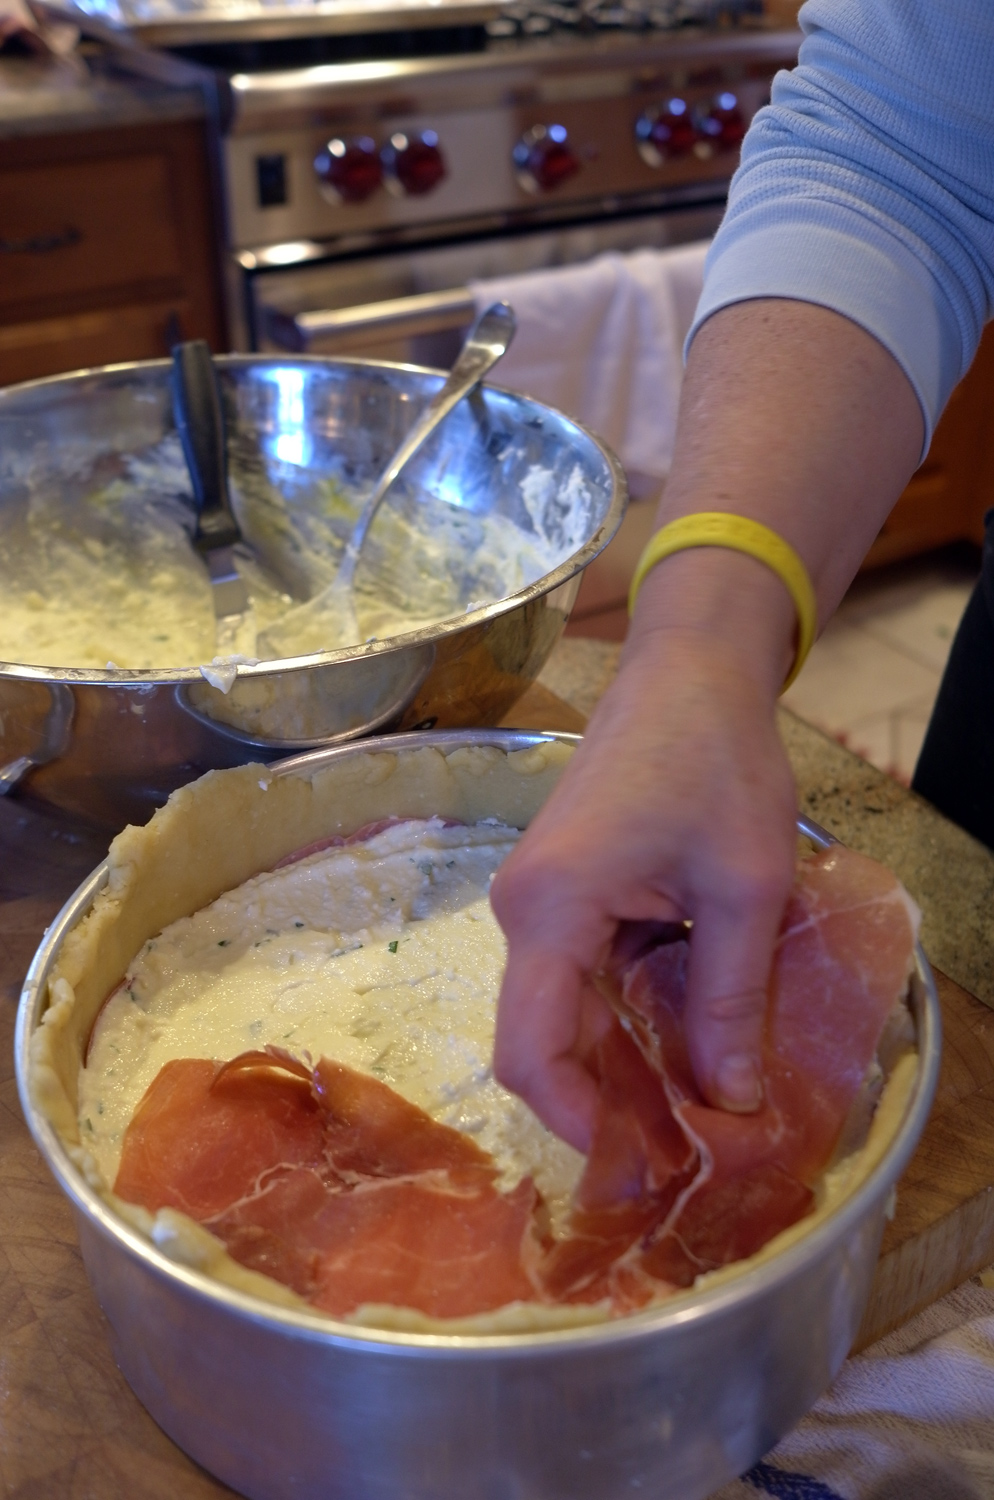
Layering up and up, overlap the meat so there is a good amount.

I use an offset spatula to spread the mixture around. It makes it a lot easier.
Roll out the remainder of the dough a little larger than the top of the pan. Place over the top of the pan. Trim the excess but leave enough to seal. Then using two fingers, pinch to crimp and seal the top.

Since the dough is quite pliable, it's much easier if you roll it onto the rolling pin and they roll it onto the top.

Trim the excess
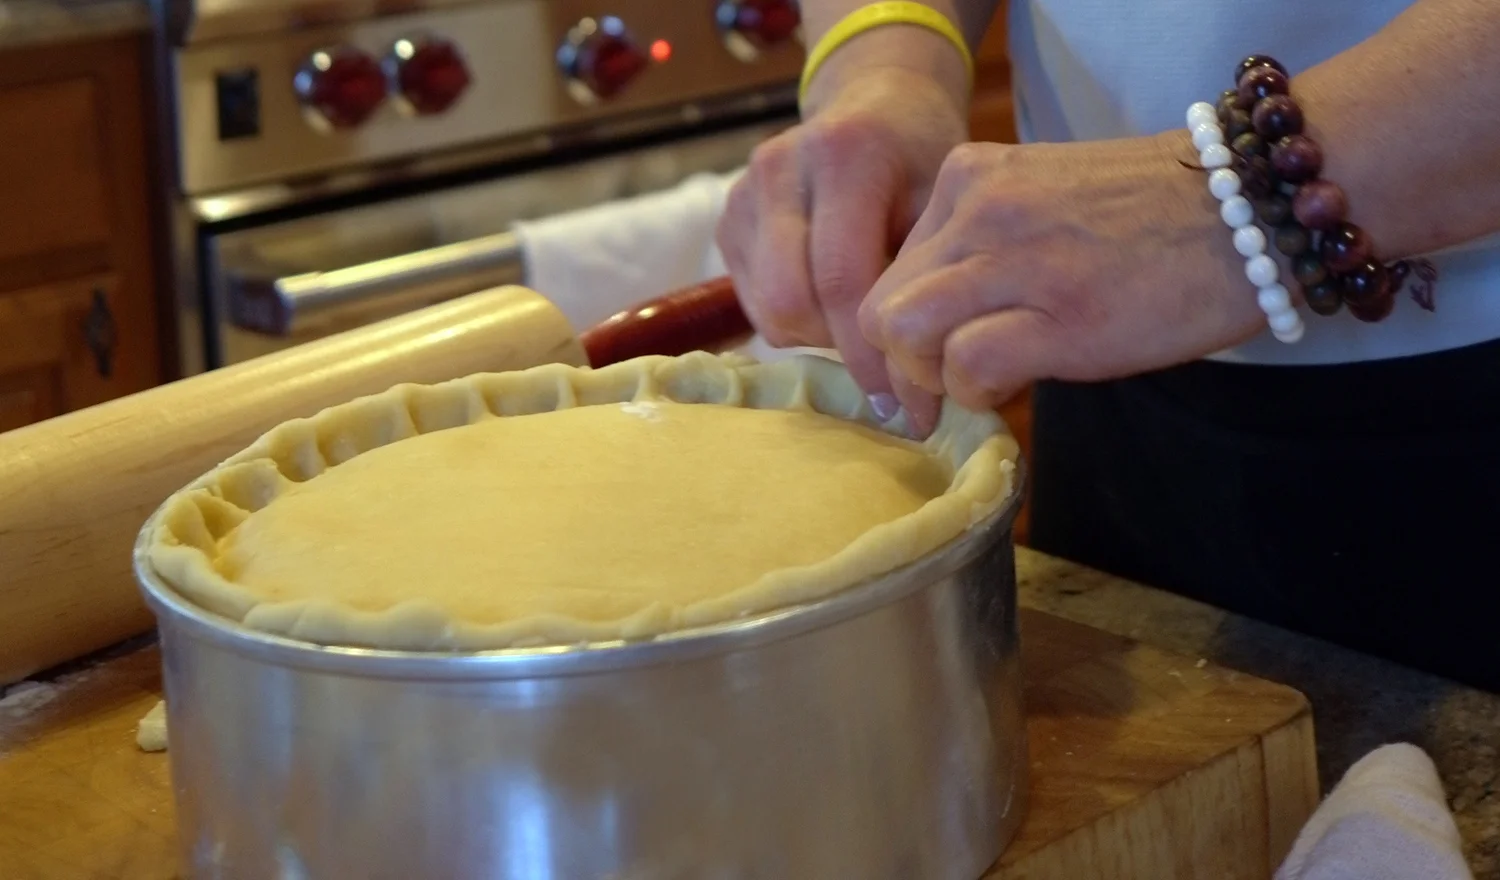
Using two index fingers, pinch the dough together to create a seal AND a pretty border.
Bake at 350 degrees for 1 hour or until golden brown. Let rest and cool before lifting it up through the springform pan.

This monster of a "pie" feeds an army, so we usually serve it as an appetizer with very few, or light apps to accompany it. Like olives, or fennel with olive oil and course salt.

Our line up of apps one year. Roasted red peppers, burrata with fresh tomatoes/basil, fennel with coarse salt/pepper/oil and the of course, the towering Pizza Rustica.

Layers of rich deliciousness.
Serve up a slice. Yes, an Italian Easter Family Tradition... but delicious anytime.
Food photos in this post credited to: www.asithappens.me