Floral Spring Table Setting

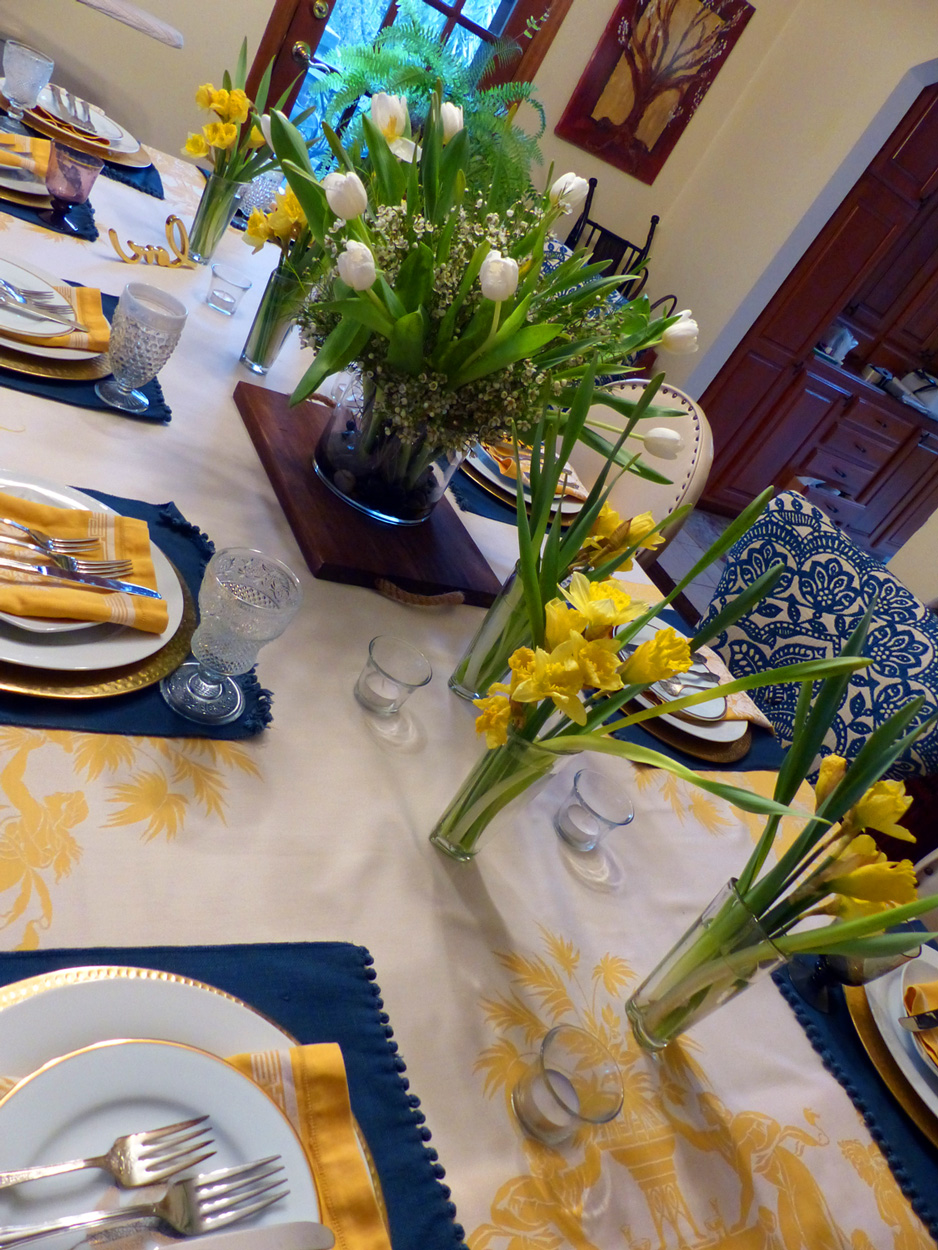
A burst of floral joy spread out on a table.

I’ve noticed that every Easter I feel compelled to create a table setting to share with you. I’m not sure why I’m more motivated to bring you another Springtime way to dress a table versus another recipe for Easter. Maybe I feel you all have traditions and a menu you follow and don’t need another recipe. Or maybe the weather made me do it. I think I get so excited at the thought of longer days and warmer temps. It evokes images of flowers, sun and a bright cheery feeling that I want to spread out onto the table.

Colors are incredibly powerful. So much so that advertisers spend a pretty penny researching their affect on consumers. I love how a color can completely change your mood. When I look at the array on this table scape it’s no wonder it brings such joy. Here’s why.

  • Green makes you feel optimistic and refreshed. It also relaxes you partly due its connection with nature and ease on the eyes.

  • Pink is soft and evokes a sense of romance and sweetness.

  • Magenta is bold and energizing.

  • Yellow, of course, is reminiscent of sunshine, smiley faces and the start of a new day, which makes you feel positive, happy and raring to go.

With all those good vibes it’s clear why I love creating Springtime tables.

You know from previous posts that I have a ton of tablecloths and fabrics, but that doesn’t stop me from getting more. Lately, I have been thrifting at a local church and grabbing some fun and inexpensive finds. If you go back to my last post, Rose-colored Salad, the table had a remnant cloth that I recently bought for $2. I loved it because it was a color combo that I definitely didn’t have in my stash. I know, hard to believe there was a color gap in my linens closet, HA.

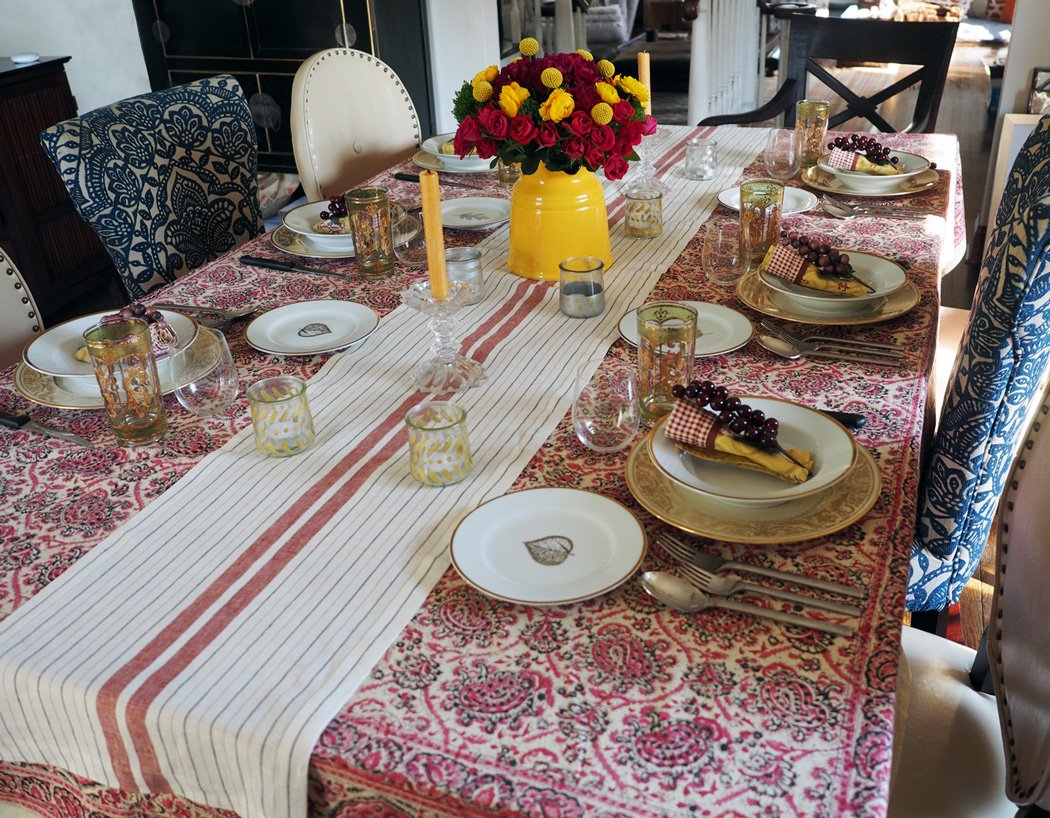
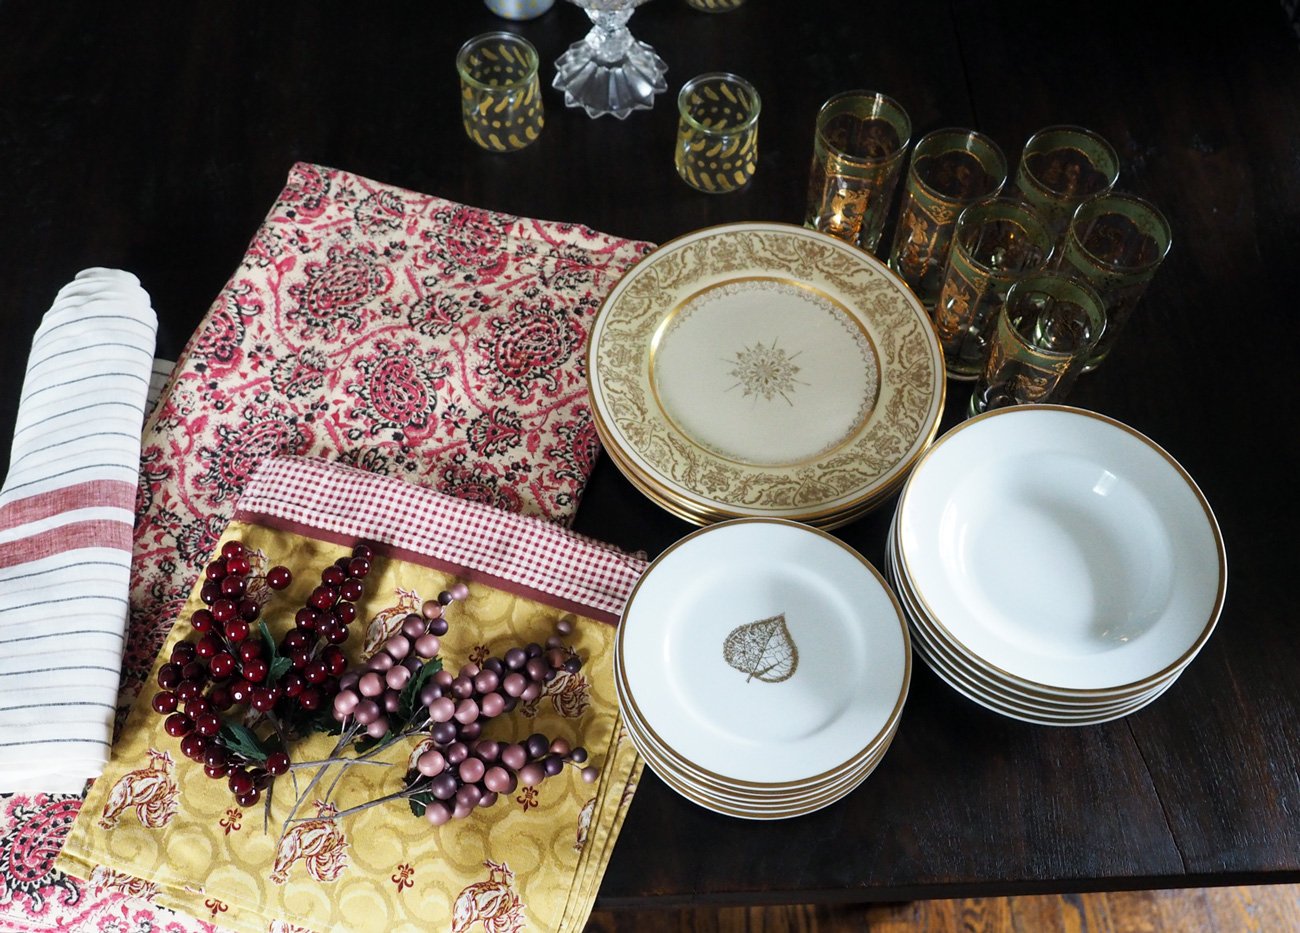
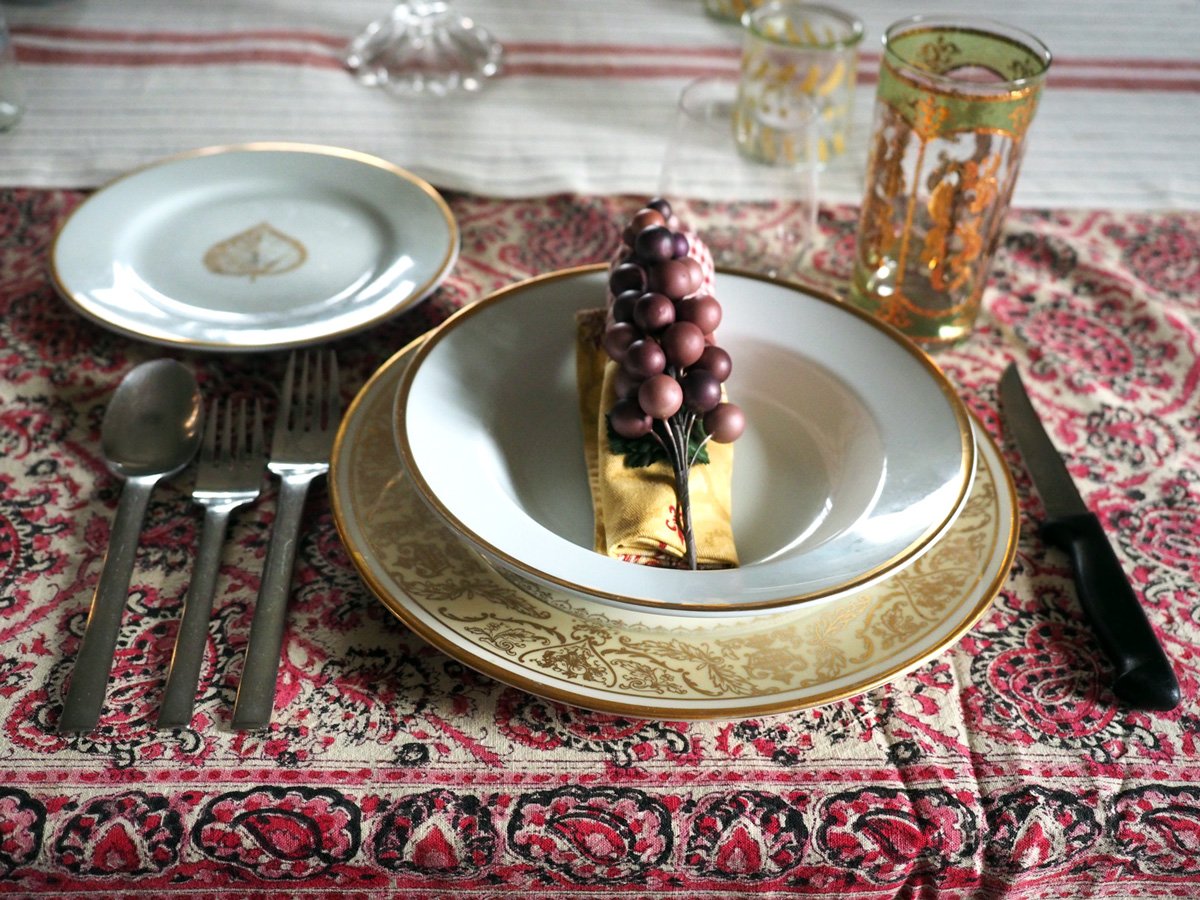
I have been wanting to use the ‘floral on top of floral’ theme for a while but could never quite achieve exactly what I was envisioning. So, when I saw the stark white cloth with bursts of Springtime flowers I immediately grabbed it. In my utter excitement, I never fully inspected it; just brought it to the register and paid. Once I got it home and opened it up to wash, I realized it was a sheet. You think that bothered me? Not in the least. Once washed, fabric is fabric, and everything has multiple uses. I also picked up the rose & gold rimmed plates and bowls to add to the floral theme. I got 12 of each for $15 (for those, like me, who use their fingers to count, that’s 62¢ a dish!) A fruitful shop of flora, for sure.

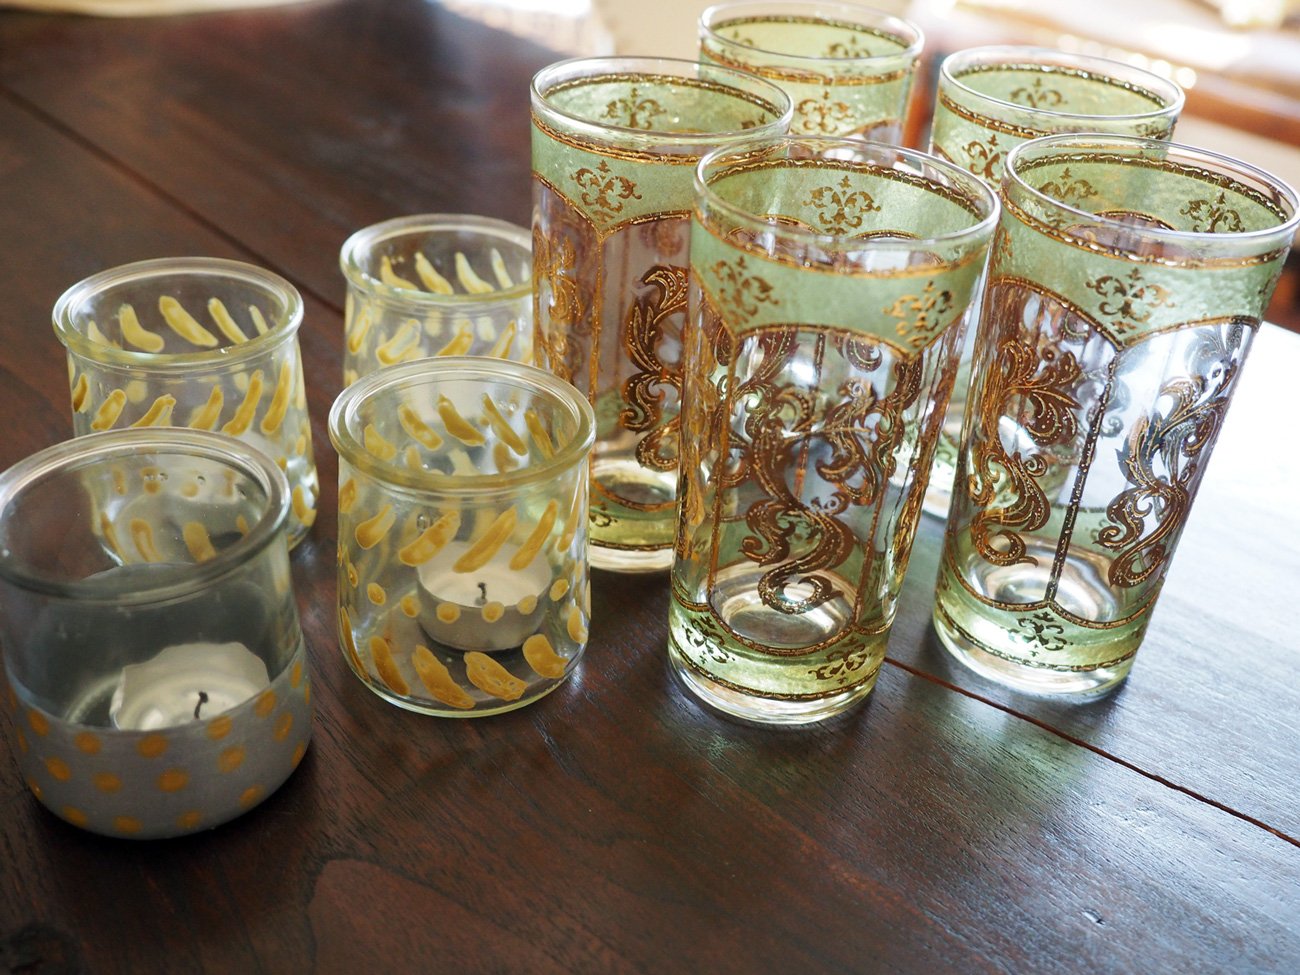
The line up: White Sheer for the base, Floral sheet for the runner, yellow/white napkins, Dinner plate with gold leaf pattern, Rose/gold/floral soup & salad plates, Peach candle sticks, Tiffany wine glasses, vintage green/gold water glasses.

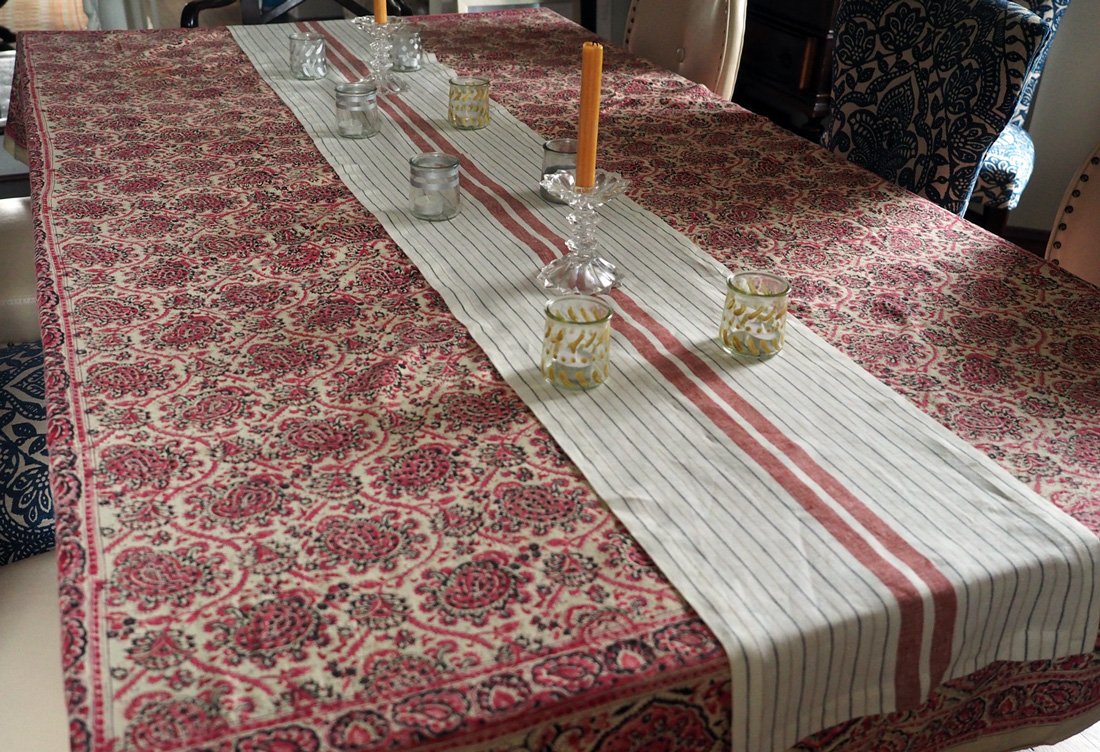
In the past, you have seen me lay the more detailed cloth as the main base and then use a sheer or mono-colored fabric for the center runner. This go around I wanted the placemats and dishes to pop so they could take star billing. To do that I switched it up by placing a white sheer as the base. Then I twisted the floral “sheet'“ and threw it down the center of the table.

Using the white sheer material creates a clean base for the plates to shine.

Then I began to build the floral layers, first by using large leaf mats Instead of the usual placemats, Then the dishes with gold leaf pattern topped with my new rose/gold/floral plate & bowl. The floral motif is fairly evident.

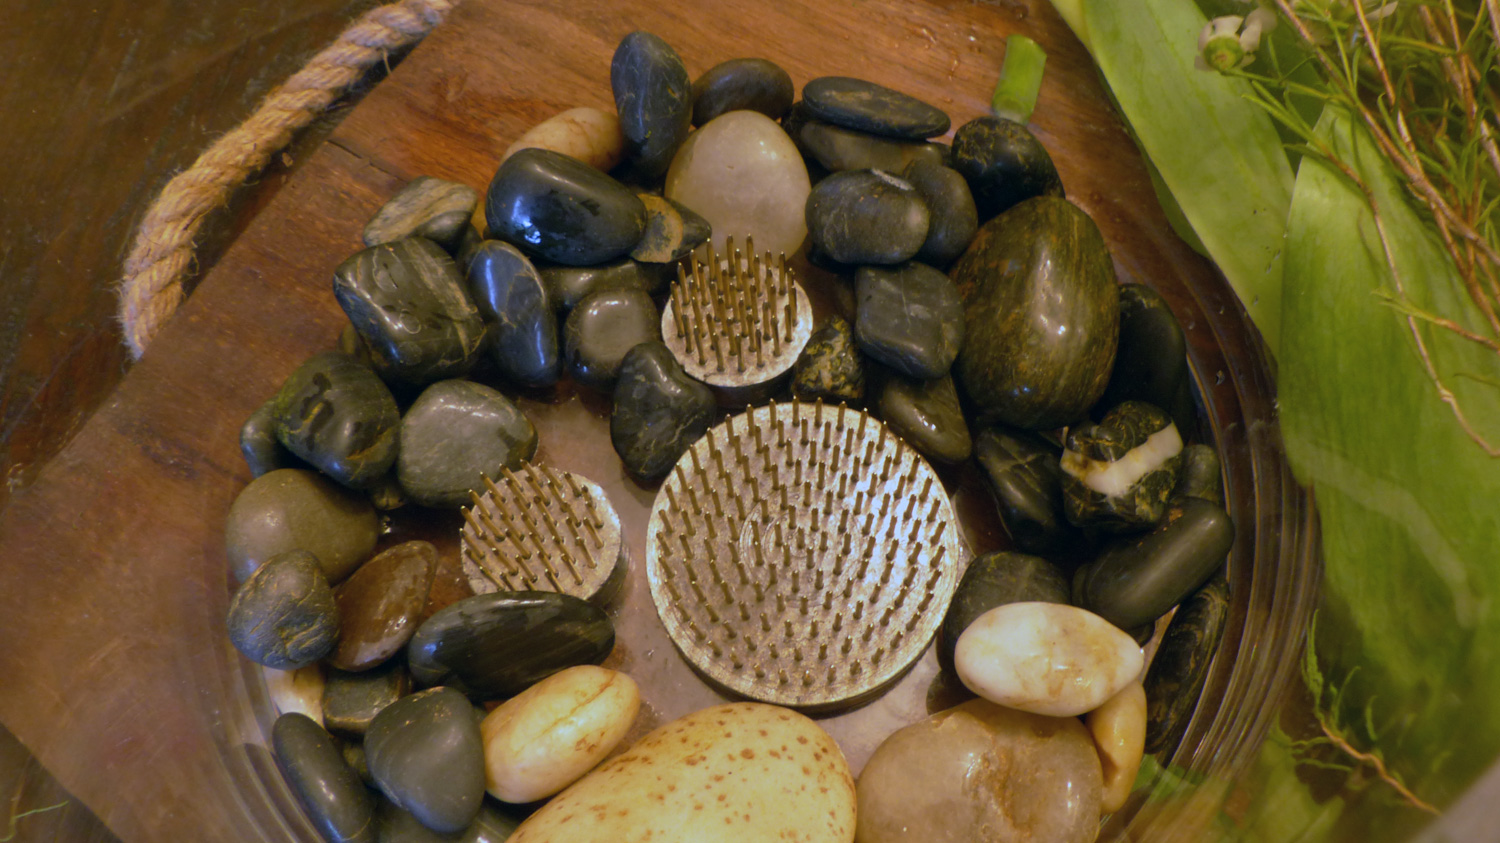
In a previous post where I used the large leaf mats I provided this link in case you wanted to purchase something similar.

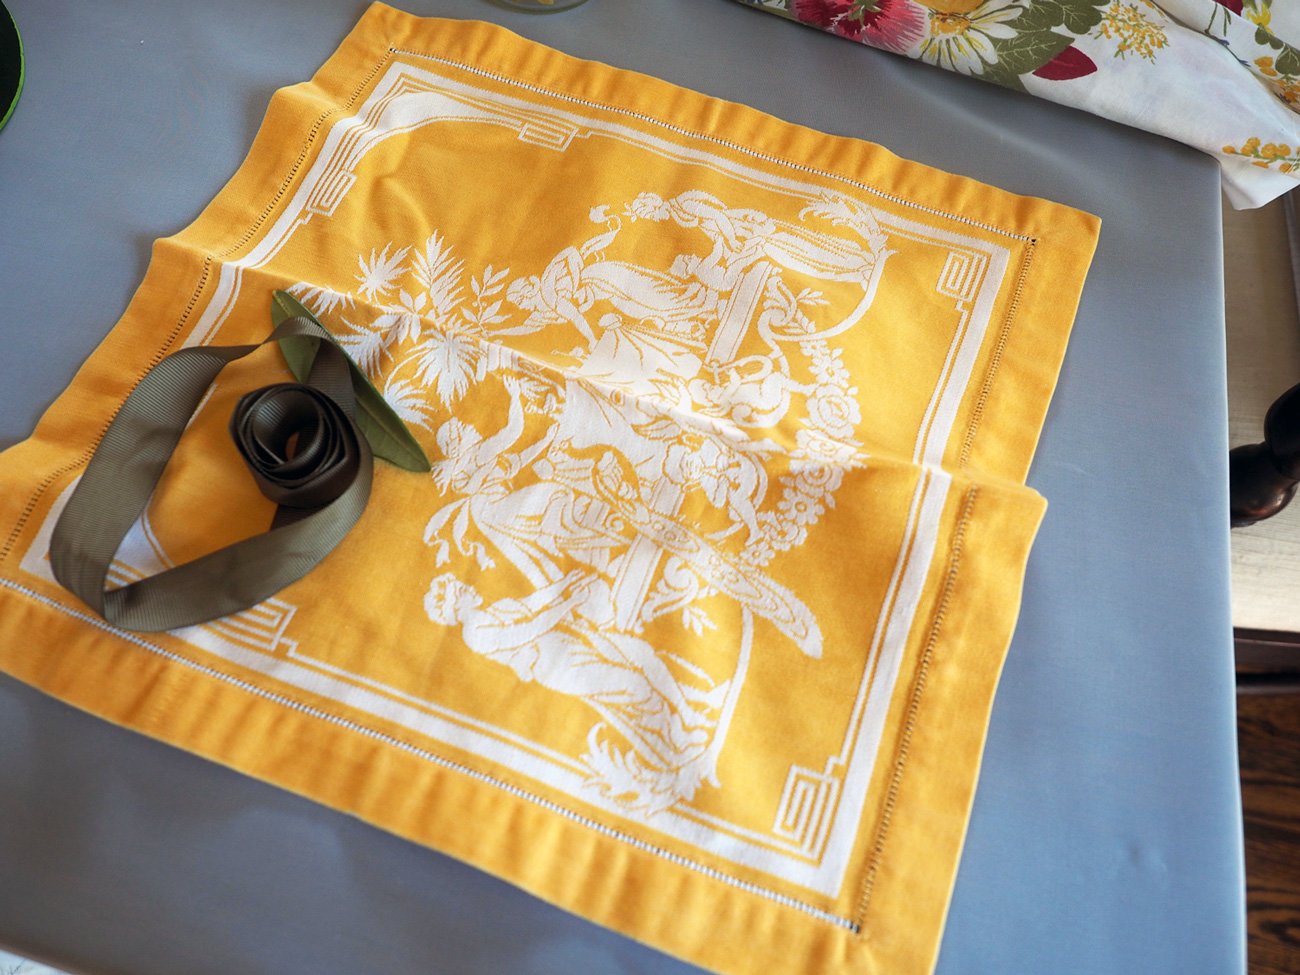
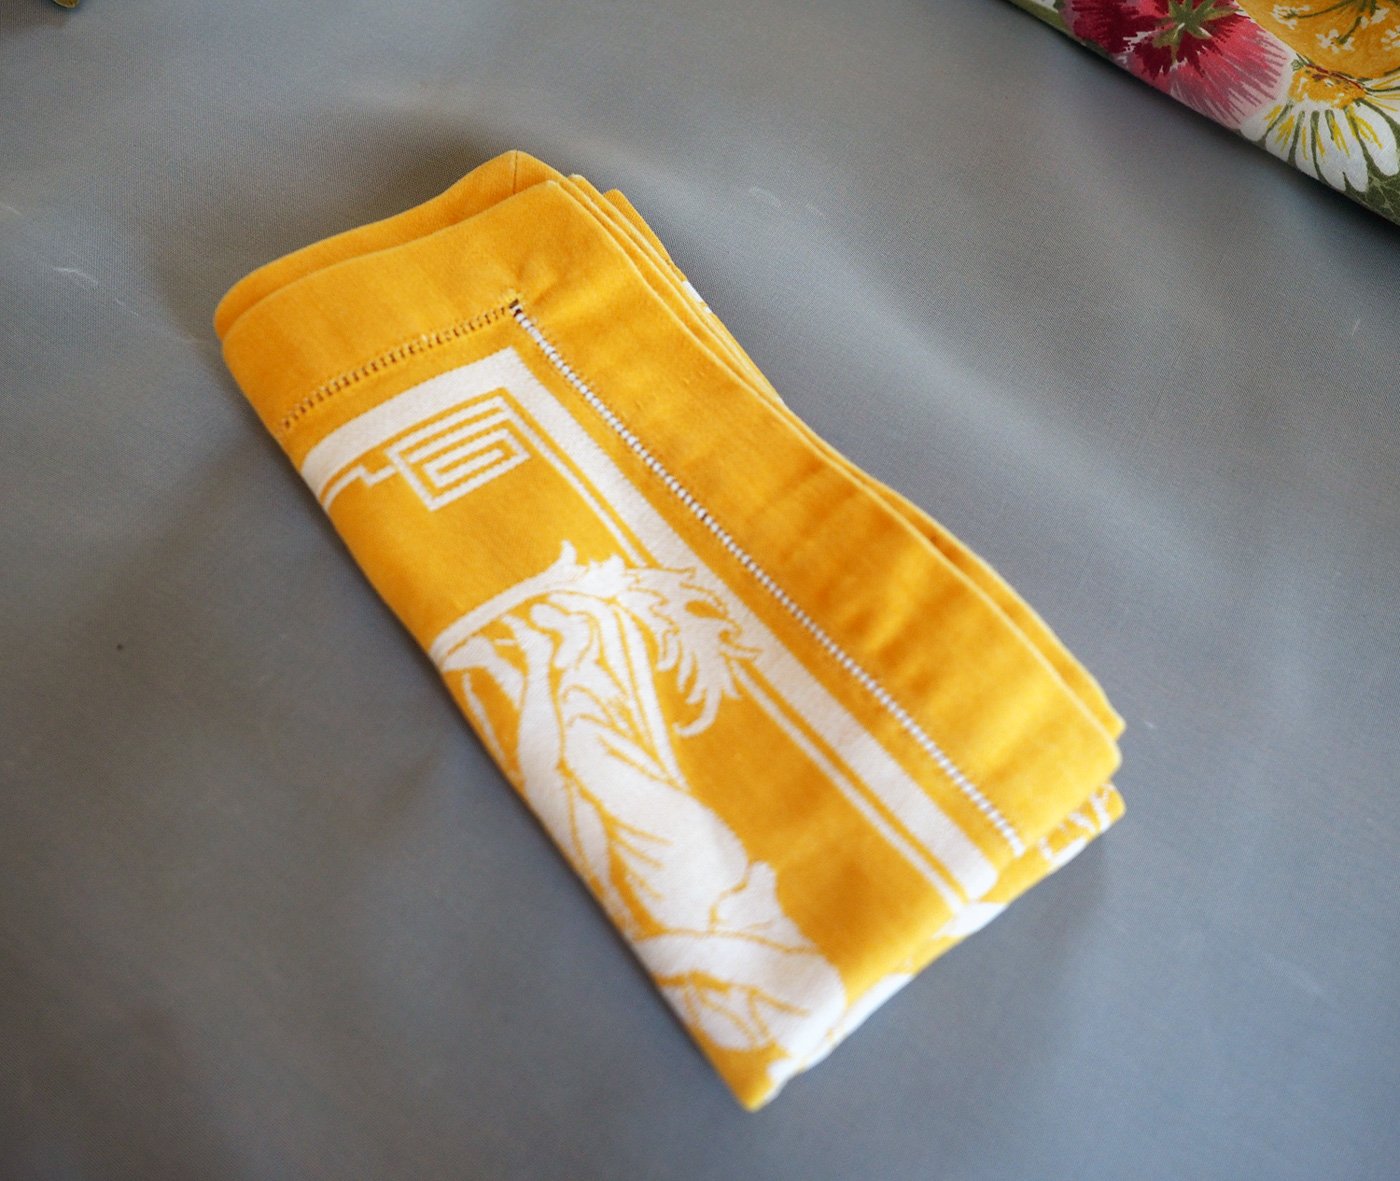
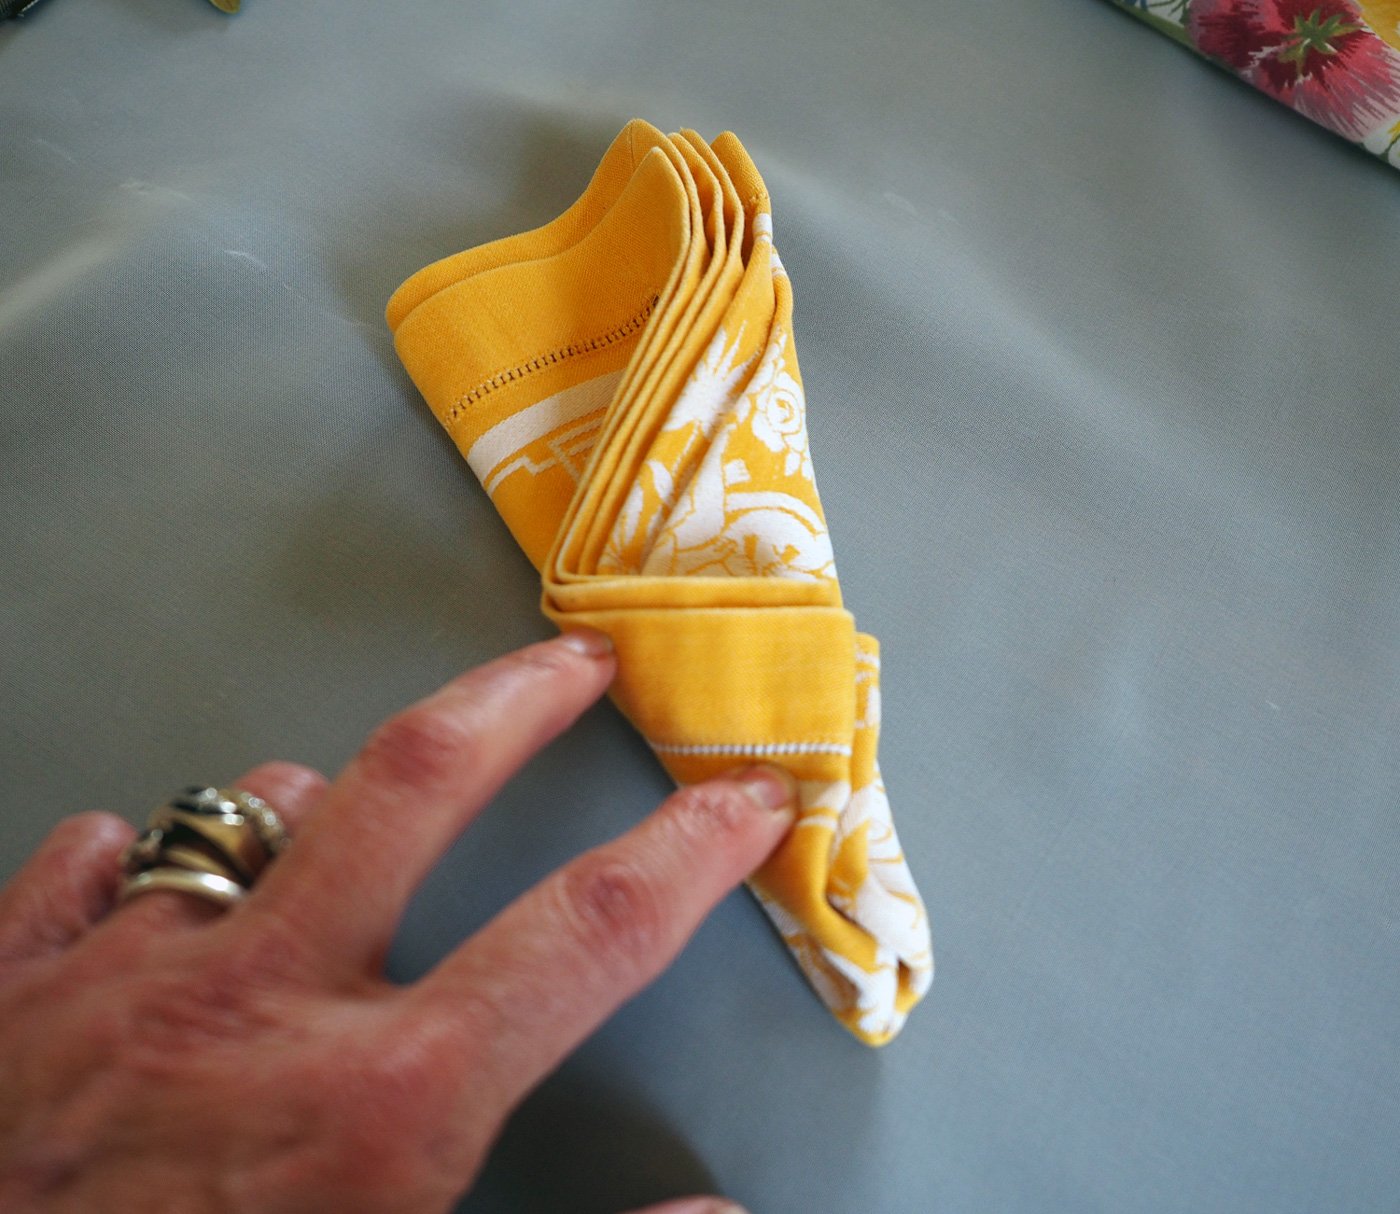
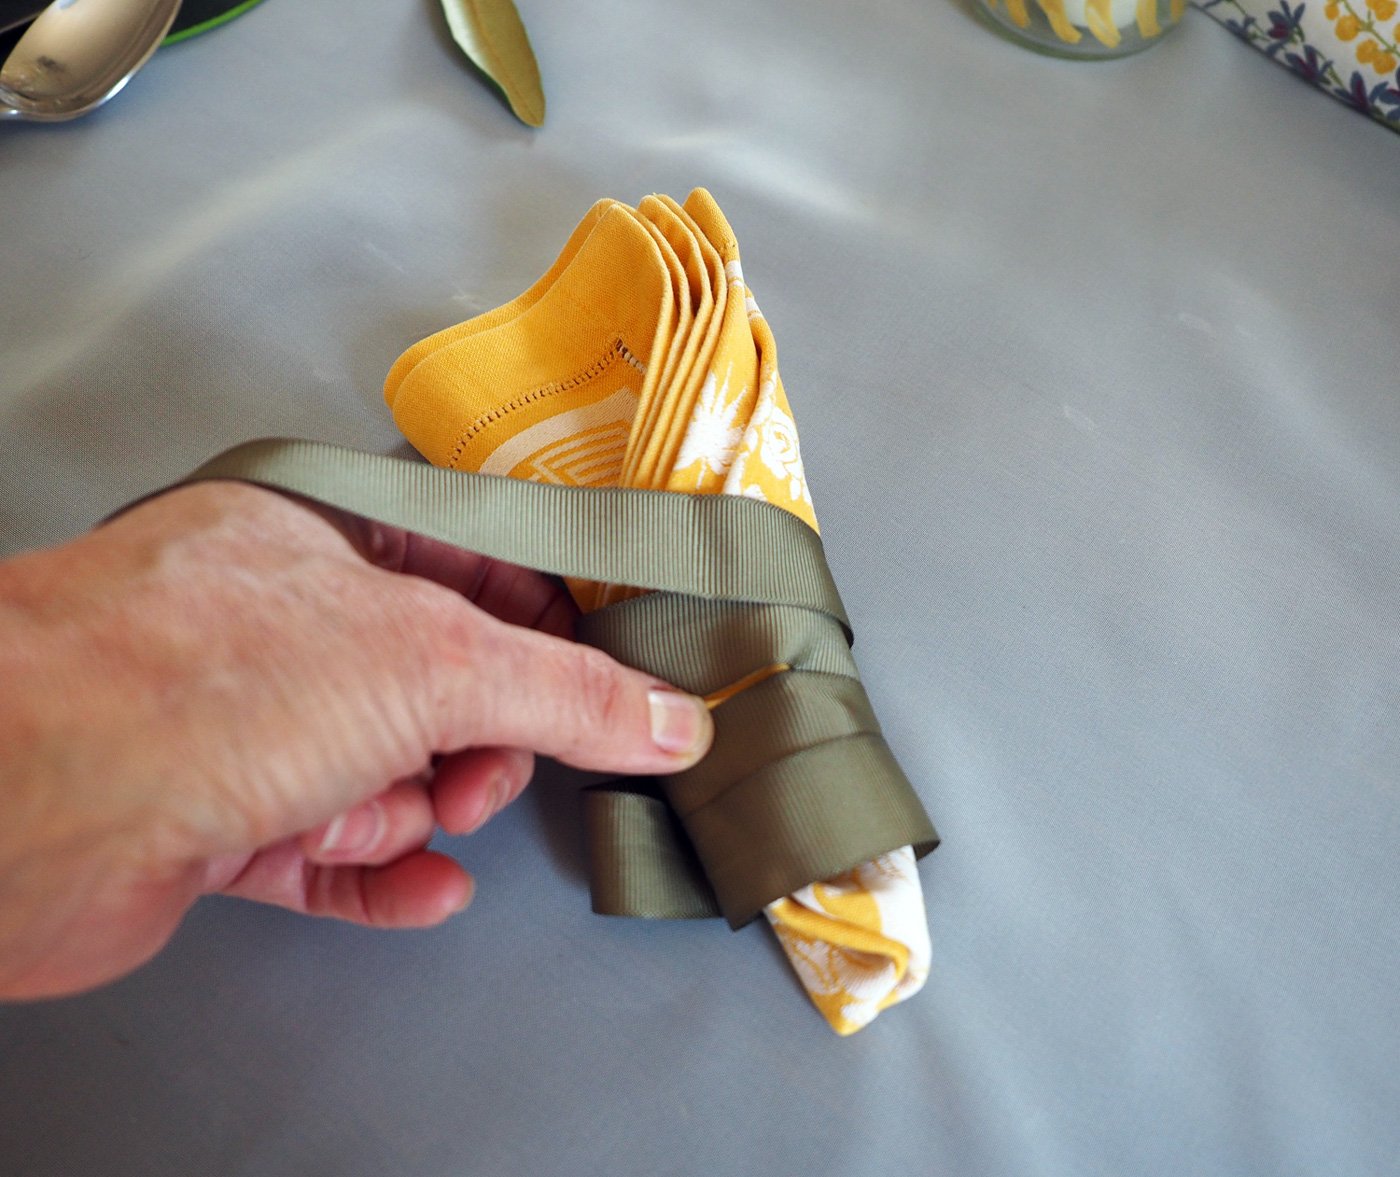
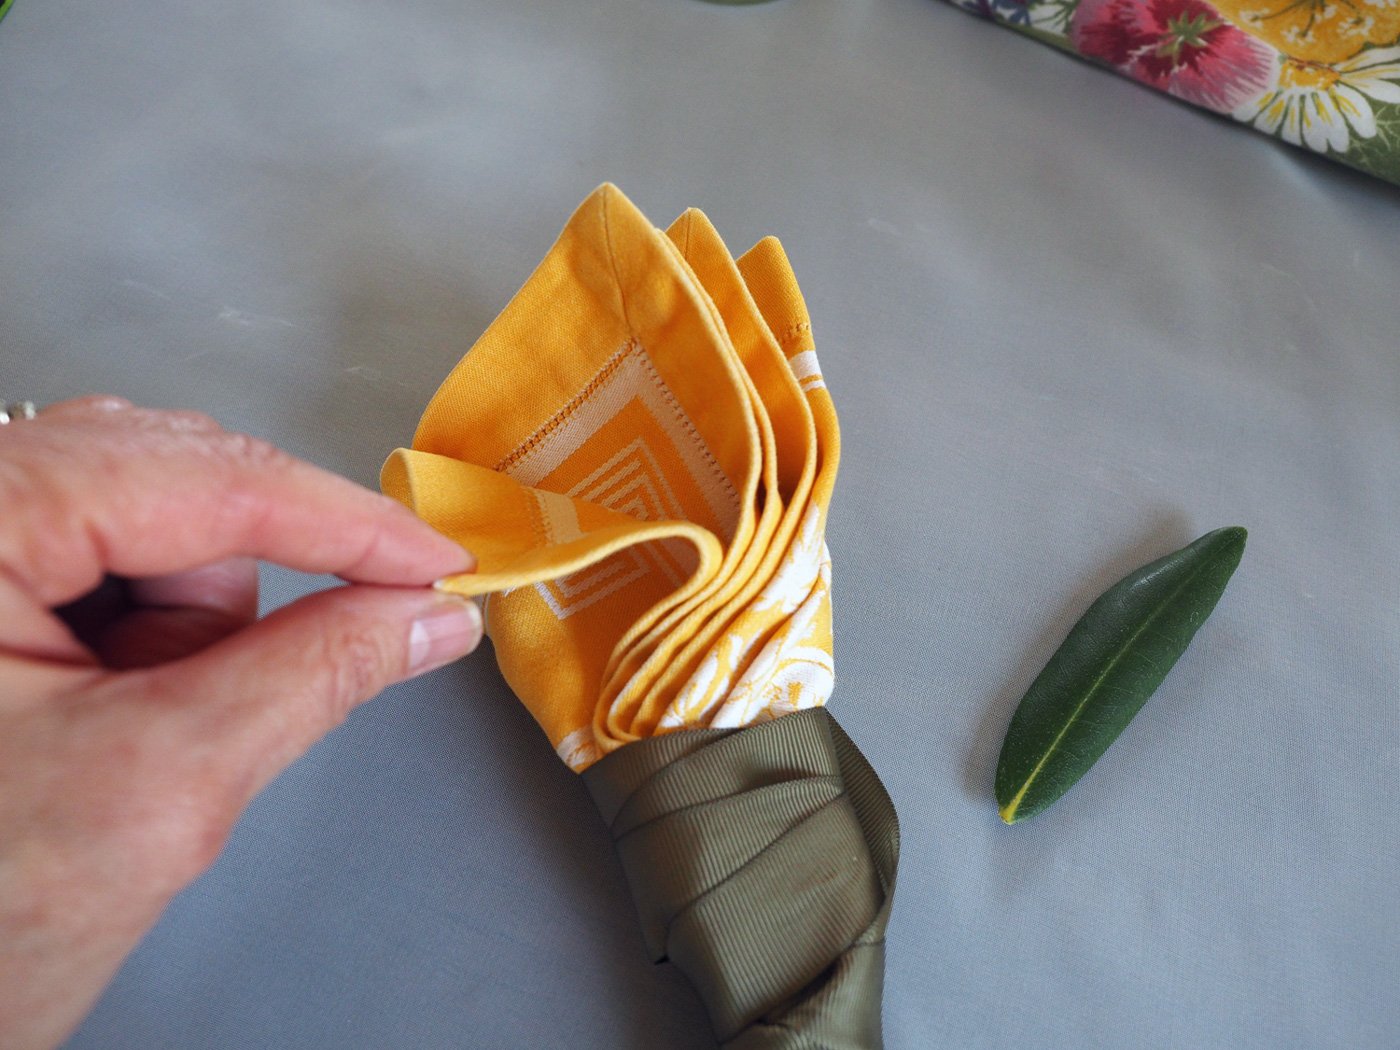
Next, I folded the napkins in a way reminiscent of a tulip and used green grosgrain ribbon to emulate a stem. I cut a few small leaves from our rhododendron tree and added them in for more floral flair. I then placed the ‘tulip’ napkins in the cut glass wine goblets which brightened the entire table up another notch.

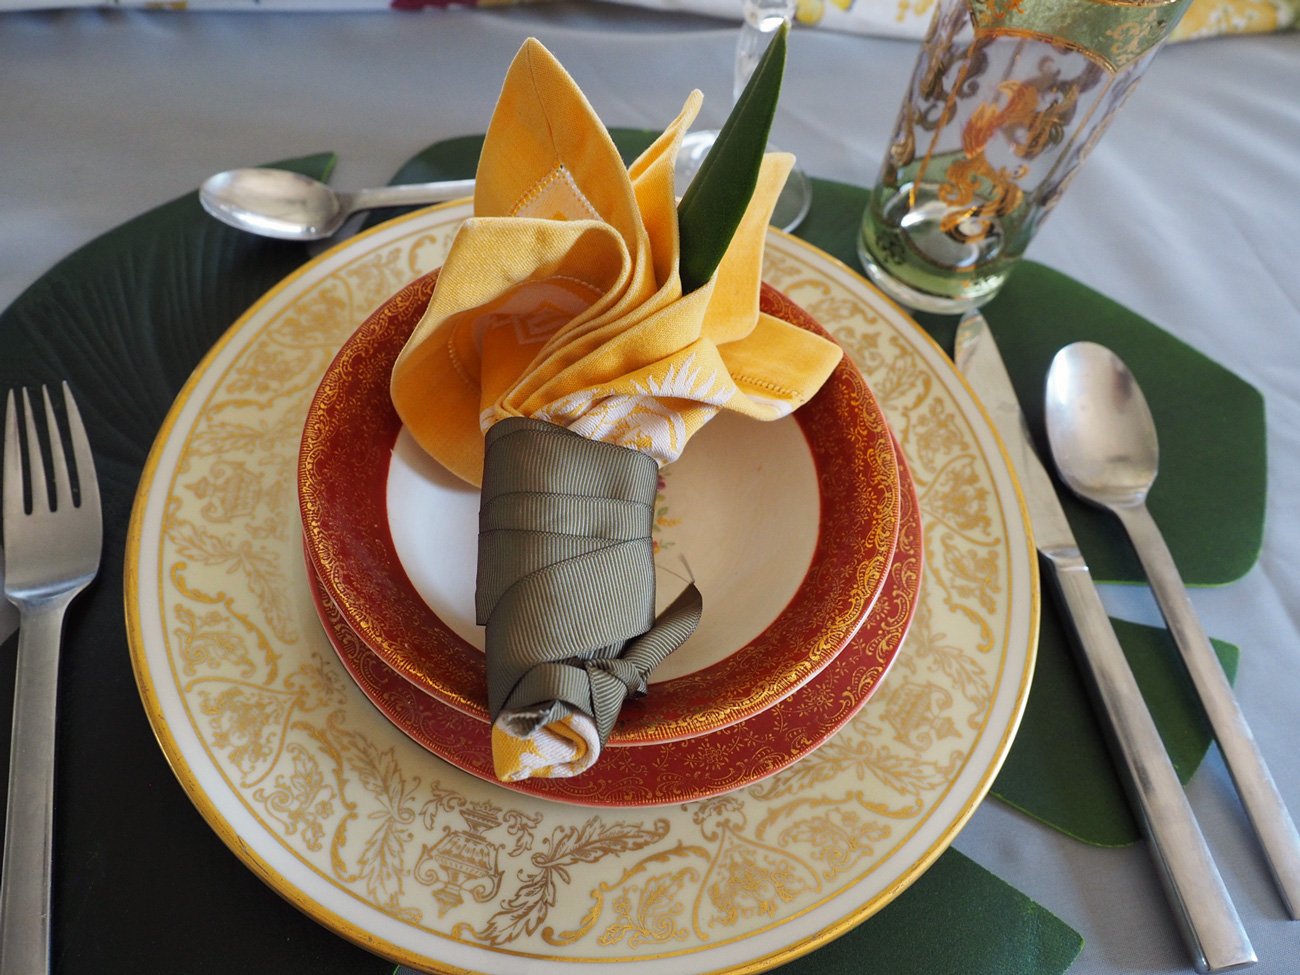
Then it was time to place the silver and glassware, and candles around the table. To continue tying in the leaf and color scheme, I used my favorite vintage green and gold glasses. If you remember, those were another great find at the Lincoln Road Mall Street Fair in Miami. I am so glad I wrapped those up, stuffed in my suitcase and brought back to NY.

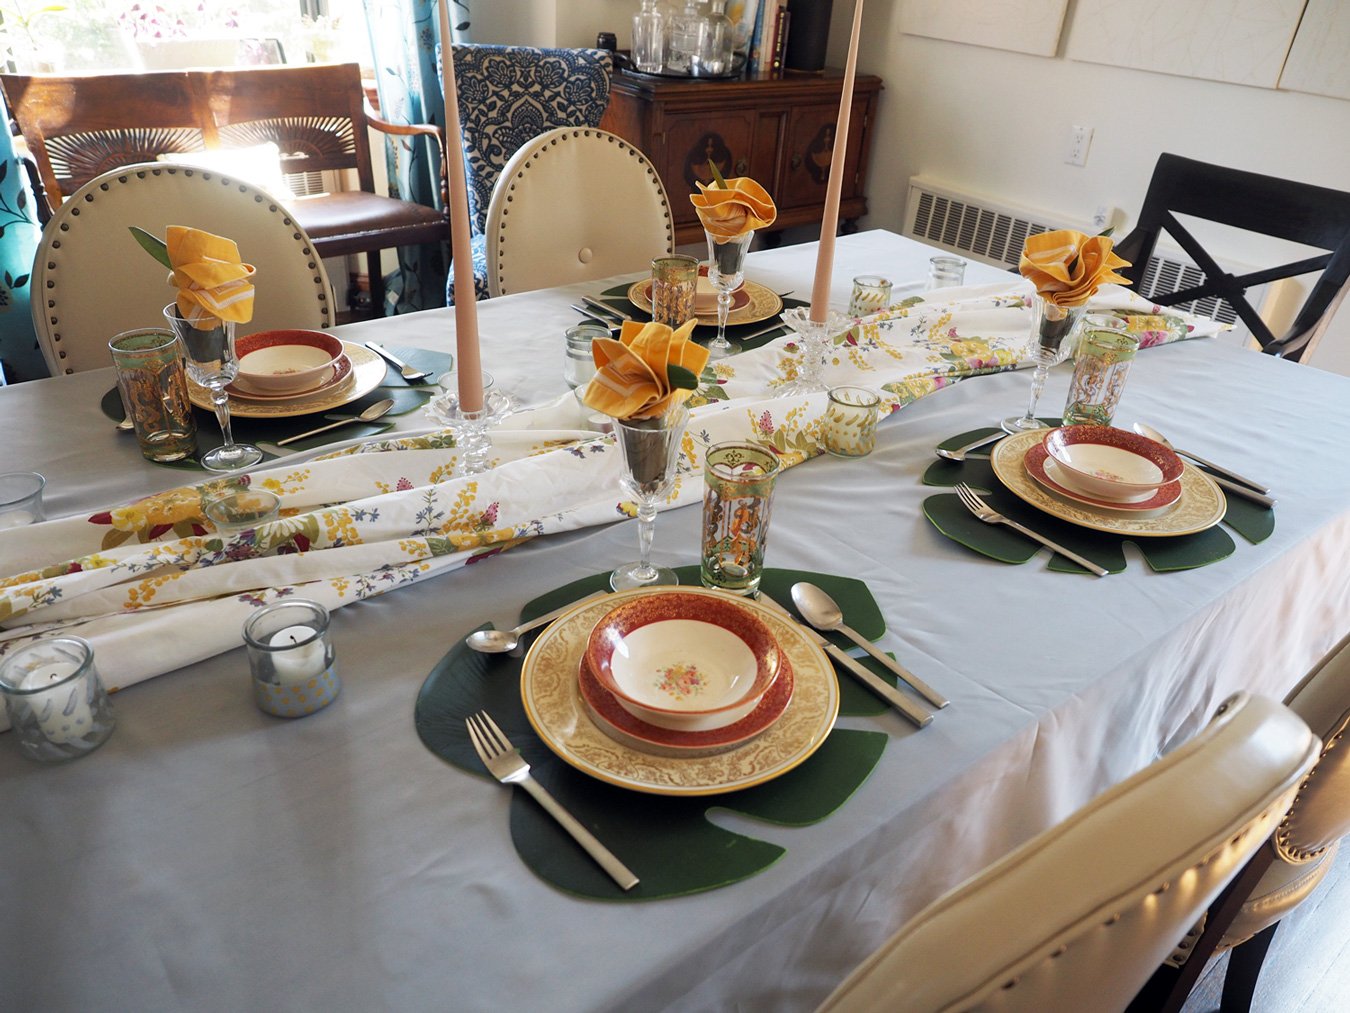
All the colors are working together, and the place settings are the star, popping off the simple white sheer base.

The gold and yellow play nicely together. All the designs of leaves and florals swirl around creating whimsy.

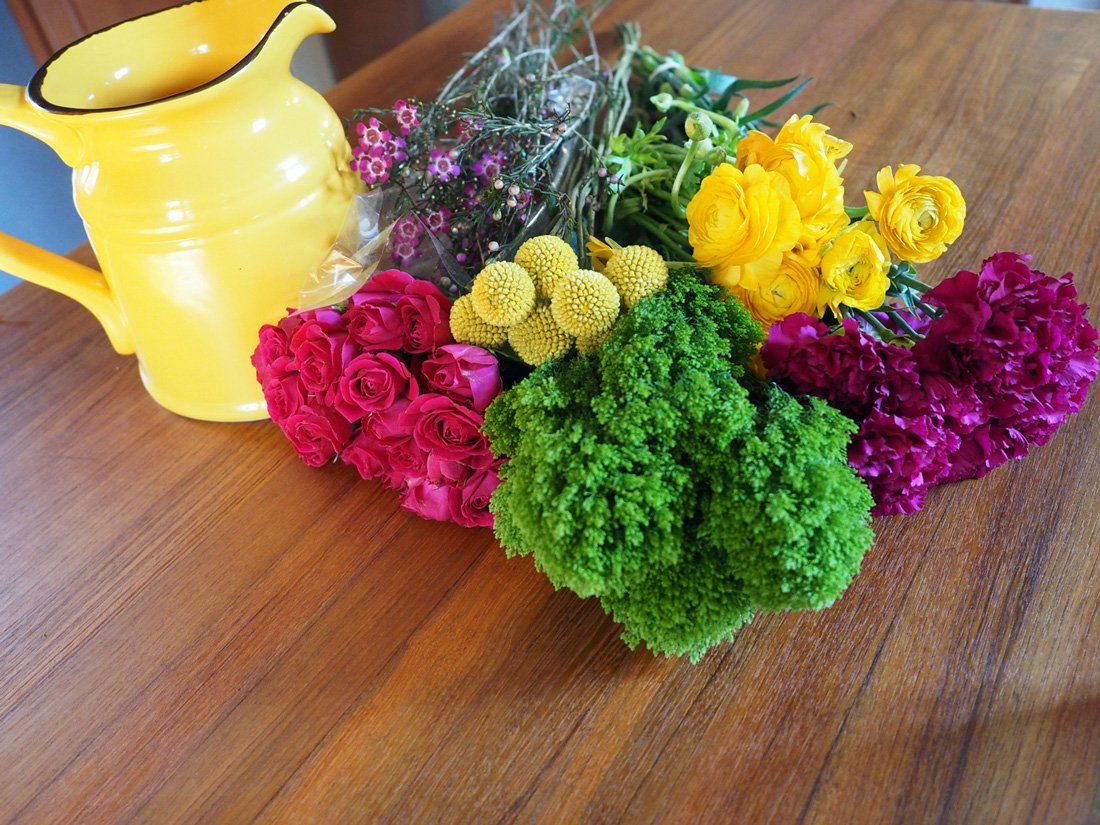
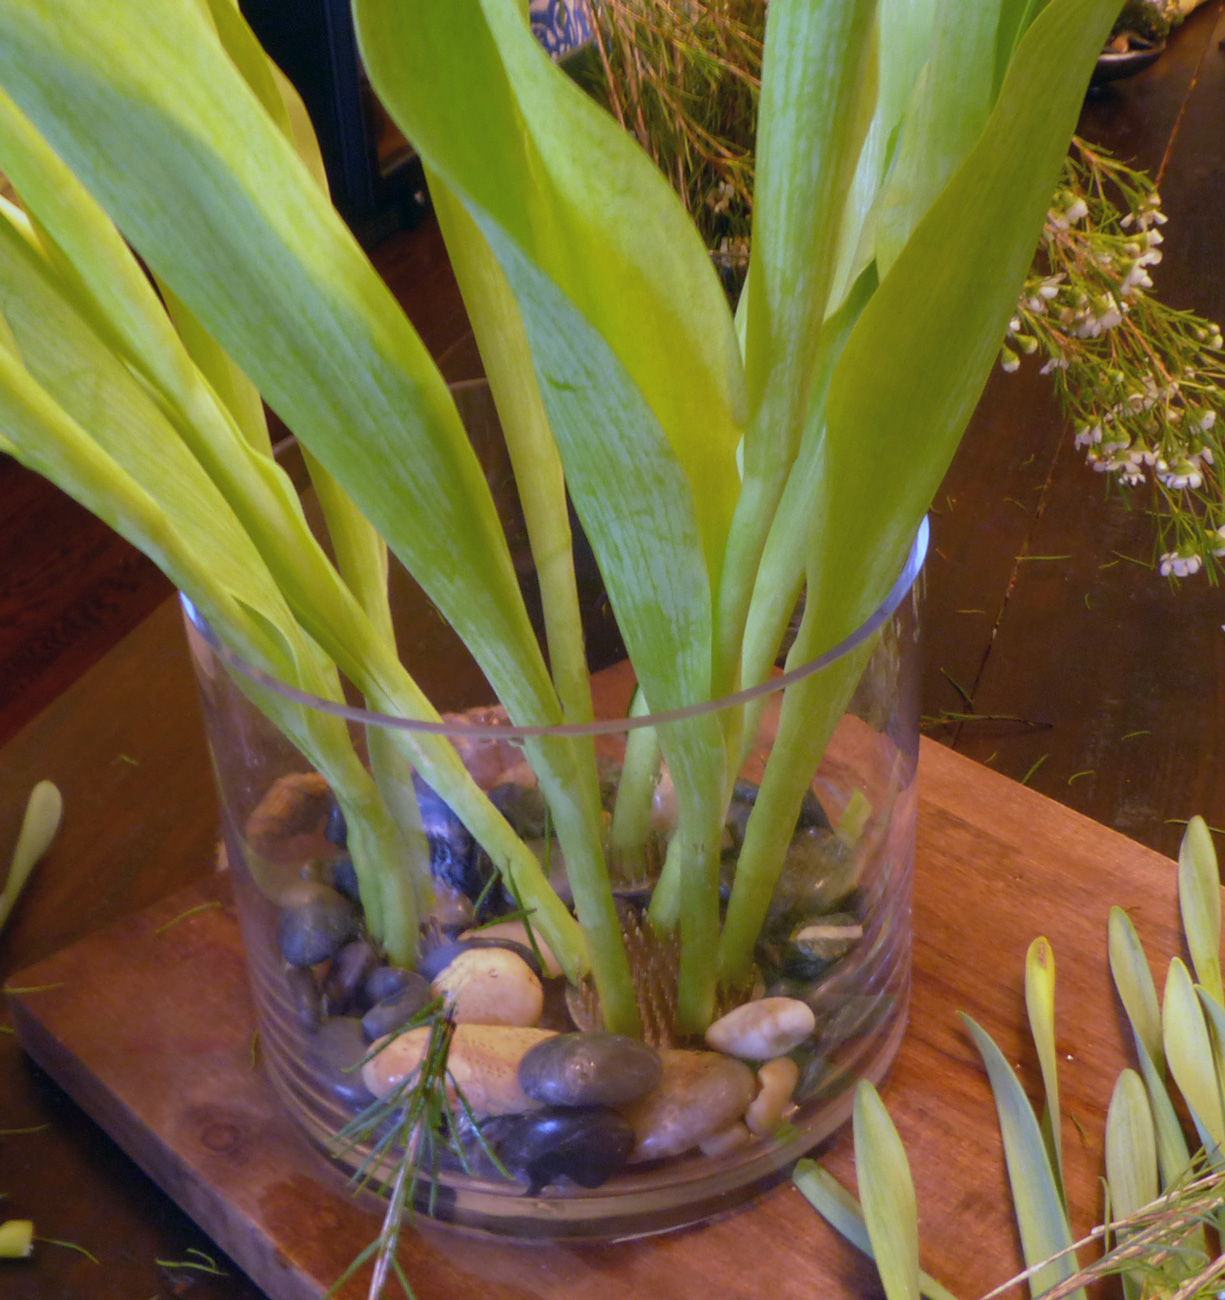
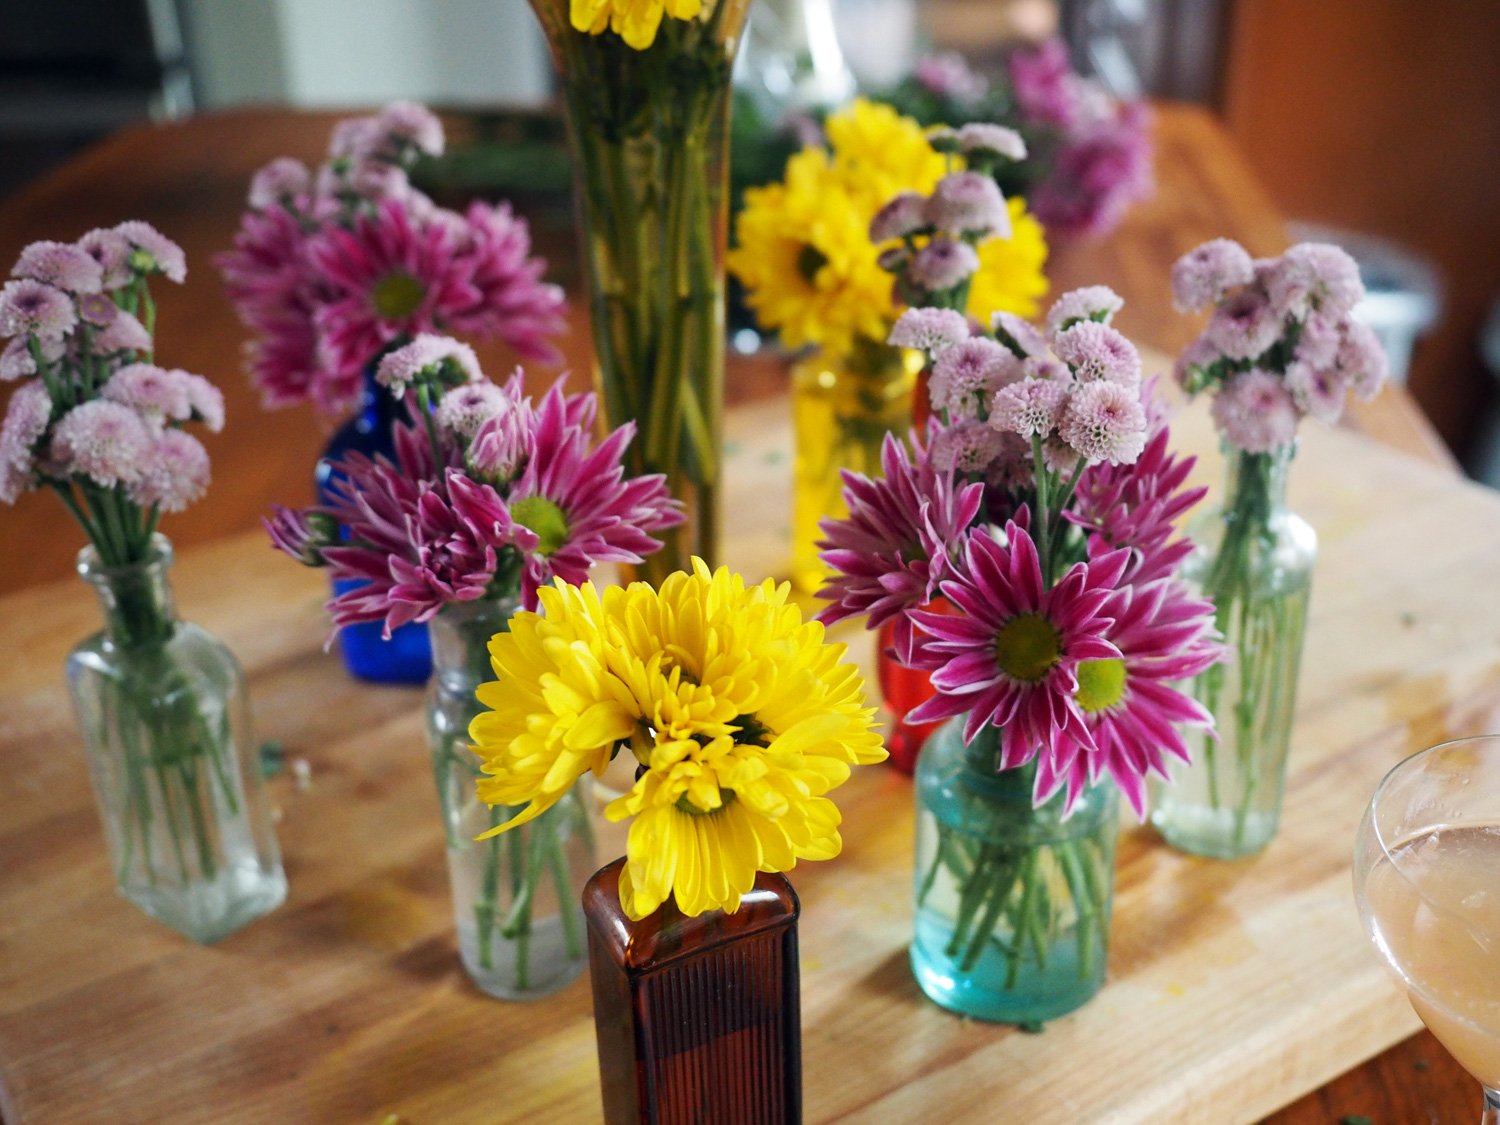
And how can we have a Springtime table without actual florals? I wanted to keep the flowers as close to the colors in the table runner. At Trader Joe’s, I found three that answered the call. All mums, in 3 varieties and colors: Yellow Sundance Chrysanthemum, Magenta Mums & Lilac Mini Poms. My vision was to make the florals feel like wildflowers spread out along the table. To achieve that I used all my mini vintage vases. Arranging and choosing which vase with which flower is a fell thing. Go with your gut and what visually looks appealing to you. Typically, I like monochromatic floral design. In keeping with that the yellow mums needed to stand on their own and be in vases that enhanced their vibrance. The magenta and lilac flowers worked beautifully together.


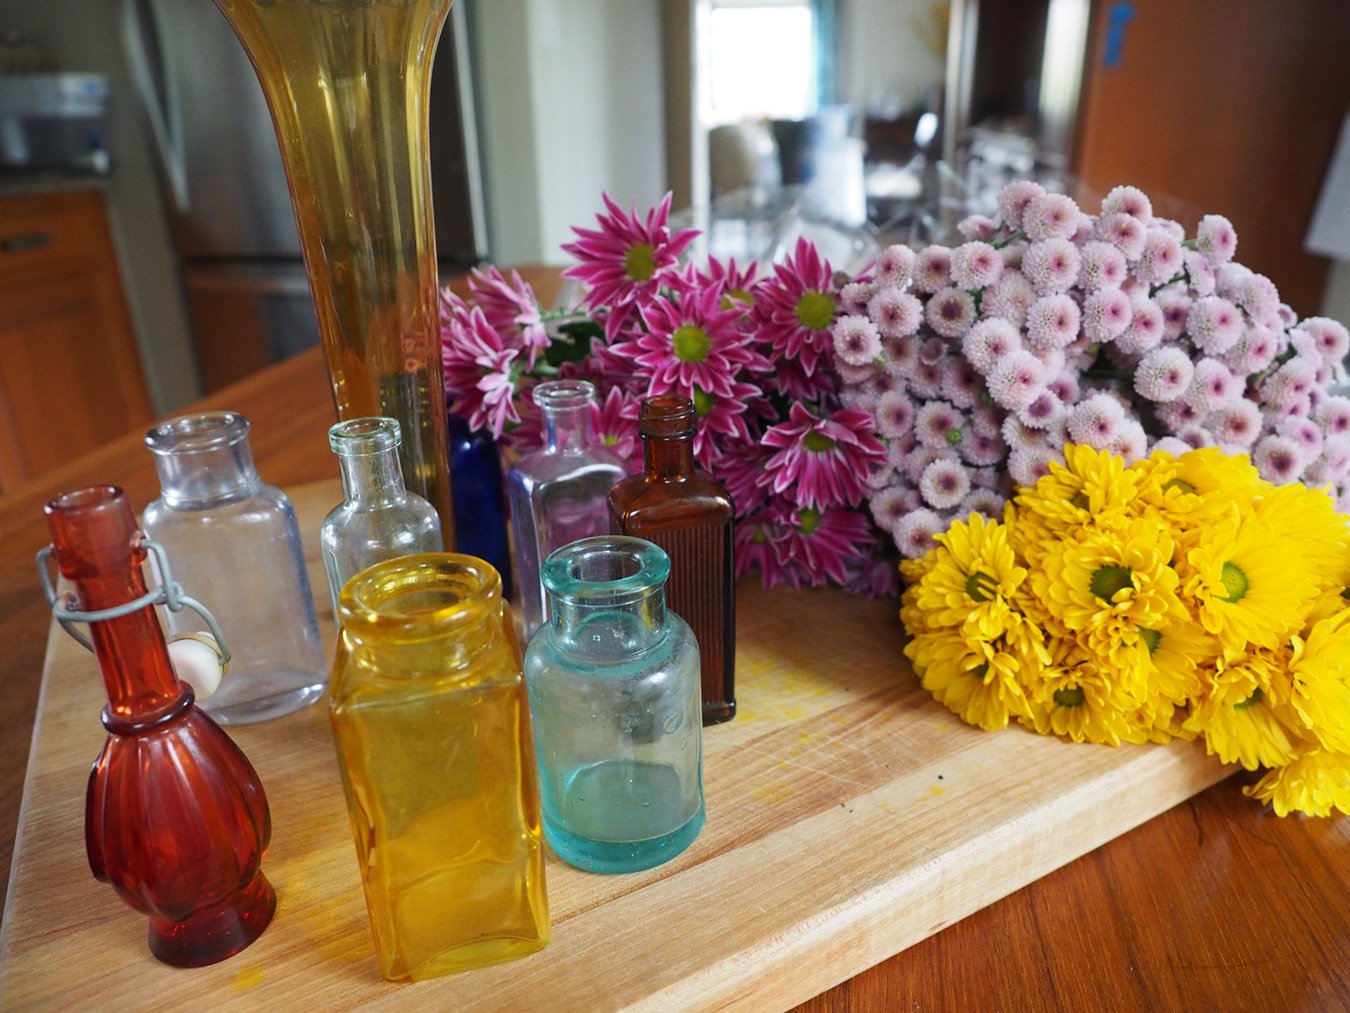
Side note: If you don’t have mini vases, you can achieve the same effect with small juice glasses, or those glass yogurt cups. Look around your own stash to see what works. The goal is to use what you have. Everything has more than one purpose.

Honestly, I am in love with this table. I finally achieved the floral on top of floral design I have been dreaming. It feels so fresh and light and cheerful. And frankly, cheerful is what I know I can use right now. Maybe you can, too.

Happy Springtime. Happy Easter. Happy Passover.

A floral explosion

I think the flowers in the vases mimic the flowers in the cloth.

Happiness running through the length of this table and in my mind.


Color your life with brightness & cheer!

Spring & Easter Table Setting

I have long pined over creating a table setting that featured multiple layers of floral patterns on top of each other; from tablecloth to napkins to dishes. However, as I embarked on making my mental vision a reality, I encountered a major issue. My dream was way more fantasy. Believe it or not, after rummaging through my vast linen collection I realized that I didn’t quite have the variety of floral patterns I had envisioned in my noggin. And because I’m the type of person who just can’t give up on an idea, I did the next best thing. I found other patterns with the intended color scheme and worked from there.

This is just the napkin selection and a few tablecloths.

With the floral theme still running through my brain, I selected the closest linen I had to Spring florals. A pinkish toned tablecloth with leaf-like swirls resembling flowers. I remember when I purchased it from an upstate vintage shop and thought it was unlike anything I had. You may think I’m tripping on some hallucinogenic imagining that these swirls look like flowers, but I was desperate.

As I continued my search for napkins among my collection I was dumbfounded not to find a single one with any real floral print or even pink tones. But then again, would I really have bought such a thing? It was at that point when I realized that the table setting would be something different from my original vision.

An intense pattern of swirls that could be flowers, no?

I pulled out a napkin set that had similar but not exact colors. Roosters and checkerboards were as close as I could find.

I used a simple fold and roll method

Given the intense pattern of the tablecloth I felt it might be overwhelming on its own. A table runner would help provide some visual relief. Yet another pattern, not floral, but tones that would complement.

A striped table runner is another pattern. It’s simplicity allows for visual interest without taking away from the tablecloth.

The search for florals continued to be a bust. No floral plates like my little head hoped for. So, instead I pulled out a more ornate plate with gold adornments, followed by soup and salad plates with gold trim.

Dishes with gold accents.

At this point, my only option was to keep building on the new theme, and upped the ante with green and gold trimmed glassware and votives. Now I at least had a pattern on pattern theme working. Florals became swirls. The key to layering different patterns is to find a common thread of complementary colors.

Fancy glasses and votives with some gold trim help to elevate the table.

With my choices laid out it was time to set the table.

All the table setting pieces ready to be placed.

The runner definitely breaks up all that pattern and the stripes down the center act as a landing strip for the candles.

Fold, roll and wrap the napkins with a ‘floral’ themed enhancement.

Typically, I stack all the dishes, but opted to keep the salad plate on the side to hint at the original floral theme allowing the leaf design to be seen. Plus I knew I would be individually plating the salad to ensure my guests ate that course. Having the plate out makes it easy to grab and pile on the salad.

Finished place setting with utensils for each course.

Pre-plating the salad makes serving a breeze. Dressing is served in bowl for guests to add to their liking.

A pretty inviting way to welcome your guests to the table.

Side note; I find that if you plate it and serve it separately before the main meal, everyone eats it. If you place a large bowl of salad with all the rest of the meal, people often times say, “I’ll serve myself later.” And later becomes, “I’m too full.” So get your greens in early.

Ok, with the table set, it was time to move onto the actual florals. Since this was a last minute table setting, and I don’t travel to the city like I used to with my usual floral stop at Dahlia - Grand Central, Trader Joe’s would have to do. They typically have a decent selection at reasonable prices. I have to admit that I got excited about the colors I saw in the store but once I got home I realized I completely missed the mark on the pink tones. However, the purchase was made and I had to push on. I’m starting to feel like the theme went from layered florals to “ just make it happen and make it pretty.” I honestly thought the colors were more fuchsia than red hued but oh well. Pops of yellow and green made it all feel fresh and Spring like. The large yellow jug added more seasonal brightness and helped to tie it back to the napkins.

Definitely a burst of floral color

The key to a well composed arrangement is color blocking and keeping to just a few colors that complement one another.

The colors were a bit off but it still adds a happy feel.

In the end the reds and yellows echo the colors in the napkins.

Happy colors.

As for the meal, this was a Palm Sunday lunch. I told my sister, Alyssa, that it would be simple since all this was a last minute idea. But alas, I made much more than a simple meal for just six of us. It ended up being quite filling, and delicious. So, if you want something a tad different for Easter, this menu could work for an simpler meal than the usual extravagant lamb dinner. Here goes:

Appetizer

  • Roasted Grape Tomatoes in Garlic Oil

  • Whipped Feta
    This is an easy way to elevate a humble chunk of feta. Simply place the desired amount in a mini food processor and buzz it until smooth. One important note: rinse the feta block with cold water first to remove some of the saltiness. For some reason, once blended it brings out even more of the salt flavor.

  • Garlic Bread

Oven roasted grape tomatoes, whipped feta, garlic bread

First Course

  • Cauliflower Soup

  • Mixed Greens with Apple/Orange/Cucumber & Date Dressing: I used my Bibb, Arugula Butternut Squash Salad recipe swapping out the lettuces with mixed greens and the butternut squash with apple, orange and cucumber. All the rest of the ingredients and dressing remained the same.

Individually plated salad of Mixed greens with apple slices, orange segments, sliced cucumber, peptias and dried cranberries.

Main Course

  • Pork Loin basted in Rosemary Garlic Butter
    Sear the pork loin (seasoned with salt & pepper) in a cast iron skillet on both sides. Remove from the pan and add butter, sprigs of rosemary and several whole garlic cloves slightly smashed. Once butter is melted, return the pork to the pan and spoon the butter over the pork to finish cooking and flavor the meat.

Rosemary Garlic Butter basted Pork Loin.

  • Seared Shrimp with garlic & parsley
    Marinate the shrimp with crushed garlic, parsley, salt, pepper, crushed red pepper flakes. Sear in a cast iron grill pan. Remove shrimp and add white wine to deglaze the pan and pour over shrimp.

  • Basmati Rice with herb garlic oil
    Make a “chimichurri” sauce of finely chopped parsley, cilantro, scallions, crushed garlic, lemon zest and squeeze of lemon juice, salt, pepper, and olive oil.
    Cook Basmati rice 1 : 1.5 ratio to water. Bring water and rice to a boil, lower heat, cover and cook for 13 minutes. Keep the lid on, remove from heat and let steam for another 5-8 minutes
    Add as much of the herb garlic oil as desired. You can make the rice and oil ahead. Then right before serving warm the rice and add the sauce. I used a cast iron wok to ‘fry up’ the rice and then added the sauce to finish.

Sautéd shrimp and Herb Oil Basmati Rice

  • Oven Roasted Red Onions
    Onions are an overlooked vegetable. When oven roasted they become caramelized, sweet and delicious. Cut them in half, trimming the stem end but still leaving enough of the core to hold the onion pieces together when you cut them into quarters. Place on sheet pan, drizzle with olive oil, salt and pepper. Roast at 400 degrees until browned and caramelized.

  • Broccoli Rabe
    Wash, trim and boil the broccoli rabe until tender. Sauté in oil, garlic slices and season with salt & pepper.

Oven roasted red onions, the humble vegetable turned the star. Broccoli Rabe with garlic oil.

Dessert was a large platter of fruit and a few Saint Joseph Italian pastries. Apologies there are no photos of that course. Even though everyone said they were stuffed, they grabbed the fruit and pastries before I could get a picture. Just image a colorful array of seasonal fruit, along with luscious filled pastry.

I hope this inspires you to pile pattern on top of pattern and let your imagination work with whatever you have on hand. I started with an idea, veered off the flower garden and landed on an array of swirls, roosters, stripes and sparkle that still made me smile. A lesson in forging forward in whatever direction the universe provides and making the best of what life has to offer.

Whole Roasted Snapper - A Whole Meal

Please, I beg you, do not get squeamish on me for this one. Oven roasting it whole is a great way to get a moist, flavorful fish. Some people shy away from the whole thing. I get it. It’s hard to miss the eyes, the mouth and even the tail. I will admit that this freaks me out a bit, too. It used to be worse for me but now I simply keep my focus on the body and away from the facial attributes. Most importantly, I concentrate on how to honor the fish. The whole fish; because the skin and bones not only impart deep flavors but also protect the fish from drying out by providing natural oils. Another key to increasing its savor and tender texture is stuffing the body with aromatics, such as lemon, onions and herbs. These truly perfume the inner flesh and keep it supple. Additionally, you can cook it en papillote, which mean enveloped in paper. This steams the fish locking in moisture. I simply oven roasted mine this go around.

*NOTE: When buying whole fish, to ensure it is fresh, look for these keys elements.

  • The fish should be bright, with a metallic luster.

  • The eyes should be bright, vivid, clear and bulging. If they are sunken or cloudy, it is old

  • The gills should be bright, wet, pink or red.

  • The smell should be pleasant and mild.

  • If the scales are still on, they should be shiny and not detach themselves.

2 fish, not in the same position as the logo for my main company, 2fish, inc, but there they are together.

I like making this for a small dinner party. It creates a lovely presentation and produces a succulent dish. I served this with green veggies, a quinoa salad and a watercress salad. If you continue to scroll down, you will find visual instructions for those dishes. These sides were ideal; light and refreshing to accompany the red snapper. Together they make for a perfect Spring meal.

And as my mom pointed out in the comments section, this method can do used with most any whole fish.


Ingredients

Red Snapper *2-3 lbs for 4 servings
2 Lemons (1 sliced, 1 in wedges for serving)**
1 small Onion
Parsley (or fresh herb of your choice)
Magic 3 (Olive Oil, Salt, Pepper)

*When buying a whole fish figure about 12 ounces to 1 pound of whole fish per person as a main course (as the fish generally yields 50 percent, thus making a 6 to 8 ounce serving) or for 2 people as a first course.

**If you are going to make the Quinoa Salad, then zest the lemon before you slice it for stuffing. Reserve the zest to season the quinoa.

Instructions

  1. Make sure there are no scales on the outer skins of the fish.

  2. Pat dry both the outside and inside of the fish.

I know it seems counterintuitive to make sure the fish is dry when you want it to be moist, but water just water logs the fish.

3. Cut the onion and lemon in slices

4. Brush the interior with oil. Sprinkle with salt & pepper then stuff with the onion, lemon slices and parsley.

5. Place on a parchment lined baking tray and score the skin making several long slits. Brush with oil and season the outside with a good amount of pepper, and salt. You can also envelope the fish in a tin foil or parchment paper pouch for the en papillote approach.

6. Bake at 425 degrees for 18-20 minutes or until the internal temperature is 145 degrees.

You can place the whole fish on a platter lined with greens or herbs, or you can debone it.

Whole roasted Red Snapper

Deboned into filets

Serving suggestions:

Of course any sautéed green vegetable will pair nicely. I made both broccoli rabe and string beans prepared in a simple sauté of olive oil, garlic slices, salt and pepper. The other accompaniments were a side of quinoa and fresh baby watercress salad. Below are the quick visual instructions for the latter two dishes.

Quinoa with Sautéed Onions, Lemon Zest & Mint

Quinoa is a wonderful source of protein and a fairly neutral flavor that is enhanced by the addition of herbs.
Ingredients

1 c Quinoa
1/3-1/2 c chopped onion/shallot
2-3 t lemon zest
4-6 T lemon juice (depending on your taste
6-8 T mint, minced (mixed in and some for top)
Olive oil, salt and pepper

Instructions

  • Sauté onion and/or shallot, add the quinoa and water and cook according to the package. (I usually measure 1 cup of quinoa to 1.5 c water)

  • Bring to a boil, cover and lower to simmer cooking for 15-18 minutes until water is absorbed and quinoa is fluffy.

  • Then zest the lemon, squeeze some of the juice, season with salt and pepper and toss in the chopped mint and fork fluff. Save some mint for the top decoration.

Baby Watercress, Avocado & Orange Segment Salad with a Citrus Dressing

When making finger sandwiches, I prefer regular watercress as it has more of a textural bite to it as well as a sharper, peppery flavor. For salad purposes I prefer Baby Watercress. It is much more delicate. This salad is all about light and bright, and the citrus does that beautifully.

Ingredients

2 bunches baby watercress
1 avocado, cut in small chunks
1 shallot, thinly sliced
1 lemon, zest and juice
1 large orange, segmented

Instructions

  • First zest the orange and reserve for the dressing.

  • Then as you segment the orange do it over the dressing bowl to catch all the juices, and squeeze any juice from the remaining pulp.

  • Thinly slice the shallot (or red onion if that’s all you have)

  • Cube the avocado (squeezing some lemon to stop it from browning).

  • Assemble the salad in a bowl, then add orange juice, lemon juice, salt, pepper and olive oil to the orange zest and whisk until emulsified. That simple.

This is a perfect Spring or Summer evening meal. It would be a lovely Sunday lunch idea, too. The fish is delicate and moist. The sides are light yet filling. The citrus brightens the whole meal up, and if you have leftovers, all this would make a wonderful taco lunch.


Never Too Many Tulips

Nothing says spring like tulips.  A burst of bright, cheeriness is what springs forth. They come in an abundance of colors and different sizes, too. They are a welcomed arrangement in my house anytime, but even more ideal for Spring, and especially bright for an Easter table.

If you are not hosting a special dinner, then just go for a simple arrangement of all one color in a wide mouthed vase to add a burst of life to your home.  

However, if you are hosting and want to glam out your table, Go big and bountiful with your tulips and add some daffodils.  You actually don't need a ton of flowers, just several vases to help trick the eye into thinking you spent more!

Tulips, daffodils and baby's breath

Tulips, daffodils and baby's breath

For this arrangement, I knew I wanted the tulips in the main center vase with the daffodils lined up an either side. This meant I needed one wide mouthed vase and 6 small ones. I found these tall heart vases on the cheap at the Christmas Tree Shop.  You can use whatever vases you have handy, even simple glass jars will do the trick.

I first began by arranging the daffodils in the smaller vases.  Note that when you cut these down a bit you will have the outer stems left.  Keep those on the longer side and add them in to give height and another element of greenery.

Once you get all your smaller vases done, line them up to ensure that they all look the similar. The idea here is simplicity in sameness.

Then move onto the larger vase.  I started by placing frogs at the bottom of the vase, arranging rocks around.  I know I am the author of The Grumpy and Careless Frog books, but not that kind of frog. A floral frog is a pronged piece that helps to keep stems in place.  Since I own a few, this is what I use.  If you don't, you can put tape across the mouth of your vase in a checker board pattern.  This will help hold the flowers upright. This link will show you how using regular clear tape.

Floral frogs set amongst decorative stones.

Floral frogs set amongst decorative stones.

Push the stems into the frog prongs.

Push the stems into the frog prongs.

Keep the extra daffodil stems for the main arrangement as well.  Don't throw these out just because they don't have a flower attached to them.  They have their own beauty and offer a great contribution to this arrangement.

Leftover stems reserved so you place these in among the daffodils and the tulip arrangement.

Leftover stems reserved so you place these in among the daffodils and the tulip arrangement.

Once you have all the tulips in, fill in with the baby's breath to create fullness.  Try to fill all the open spaces so the entire mouth of the vase is completely filled with flowers. Use longer ones for the middle section, and cut some shorter for around the edge of the vase. This creates dimension. 


Then using the leftover green stems, strategically place them throughout the arrangement.  

The combination of these 3 elements using 2 colors keeps the arrangement simple and focused while still feeling bold, bright and abundant.  Happily place these on your prettiest table linens and watch your guests smile.